DIY Easter decor can be so fun to make and I’m sharing some quick and easy ideas as outlined below!
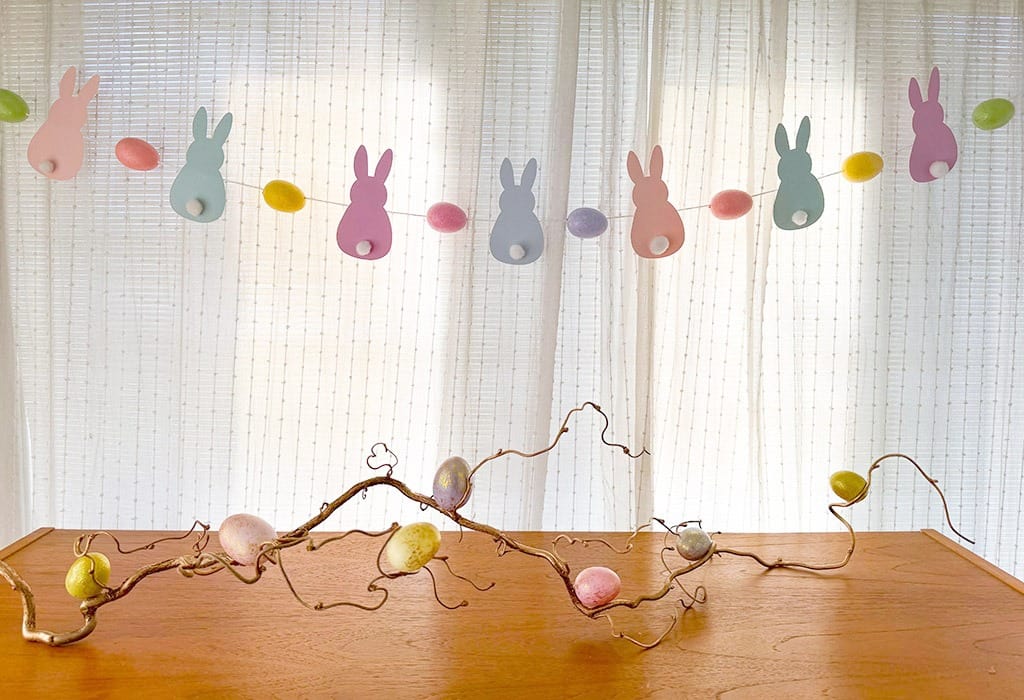
• Bunny and Easter egg banner using my Cricut Joy Xtra
• Twig and Easter egg centerpieces
• Easter basket and handmade card using my Cricut Joy Xtra
• Easter egg stickers
• Easter egg picks for plants (2 different styles)
• Our affordable outdoor Easter decor
Let’s get started with the Bunny and Easter egg banner
Supplies:
Cricut Joy Xtra
Cricut insert cards (you can also use scrapbook paper or card stock)
Light grip mat
Hot glue gun
String
Pom poms (I used white)
Faux easter eggs (I got mine on sale at Michaels, but here are other options)
Cricut Design Space (check out Cricut Access)
Large sewing needle and string
Pliers
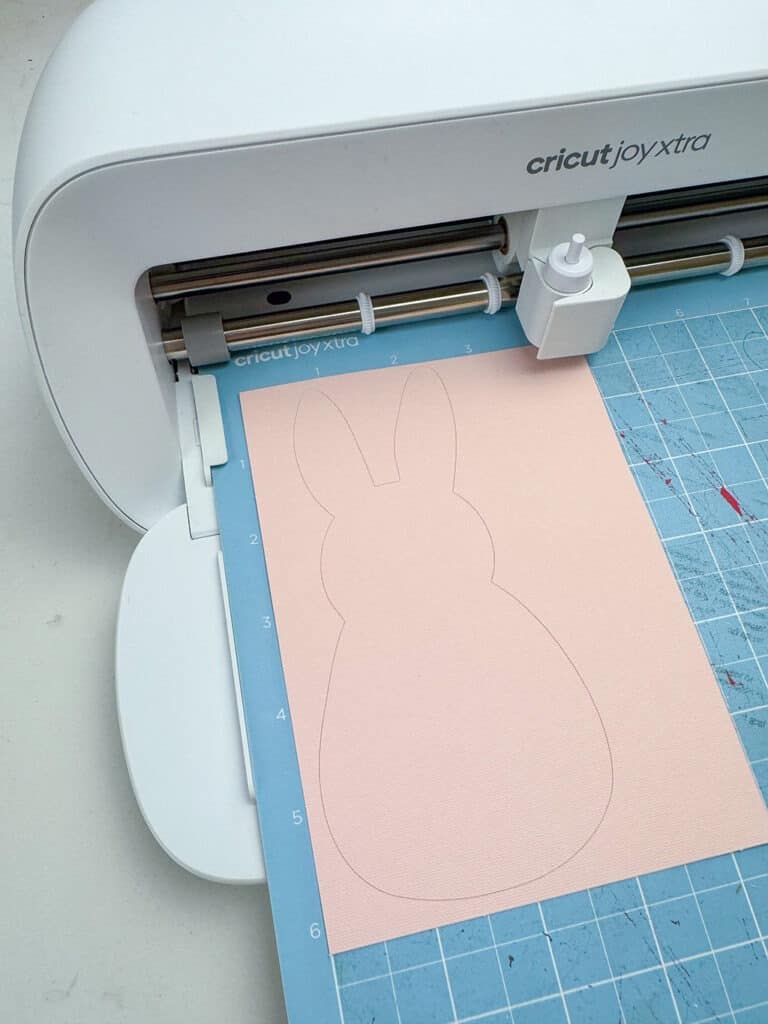
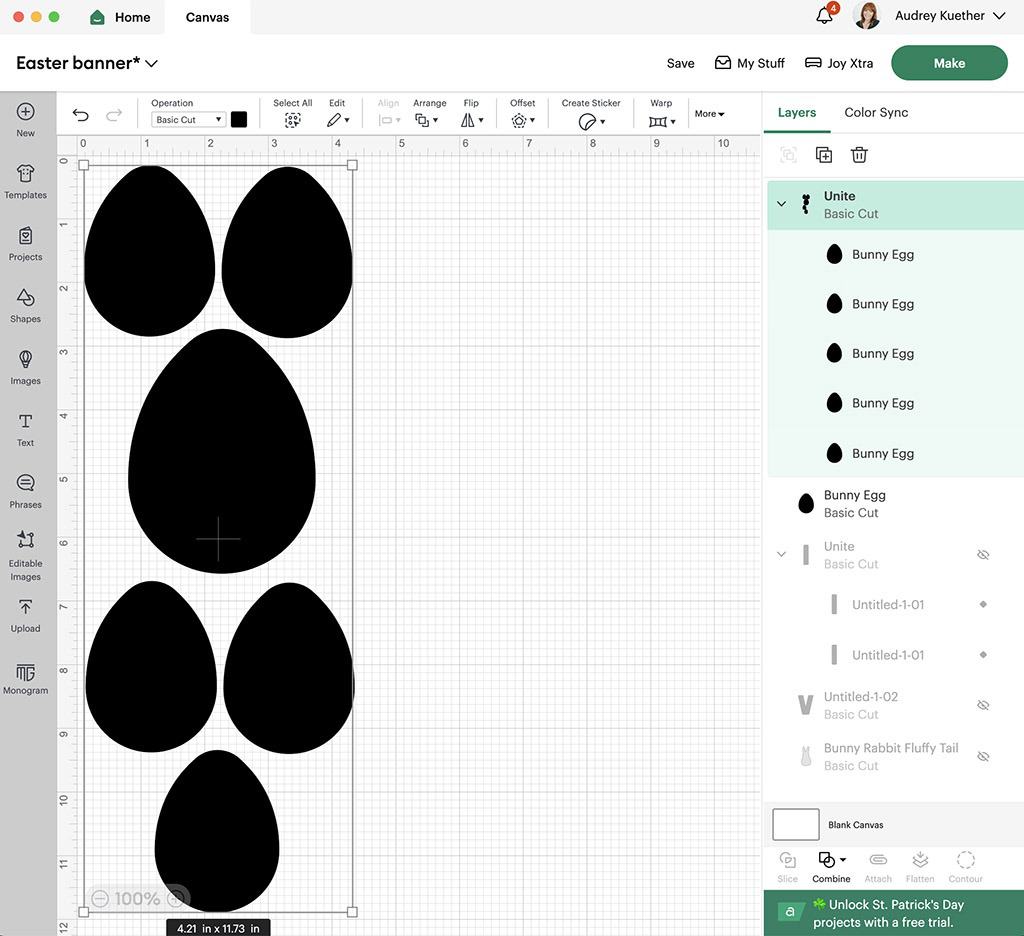
First, I went into Cricut Design Space (check out Cricut Access) to search for some Easter bunny silhouettes. There were so many options to choose from, but I settled on a basic one.
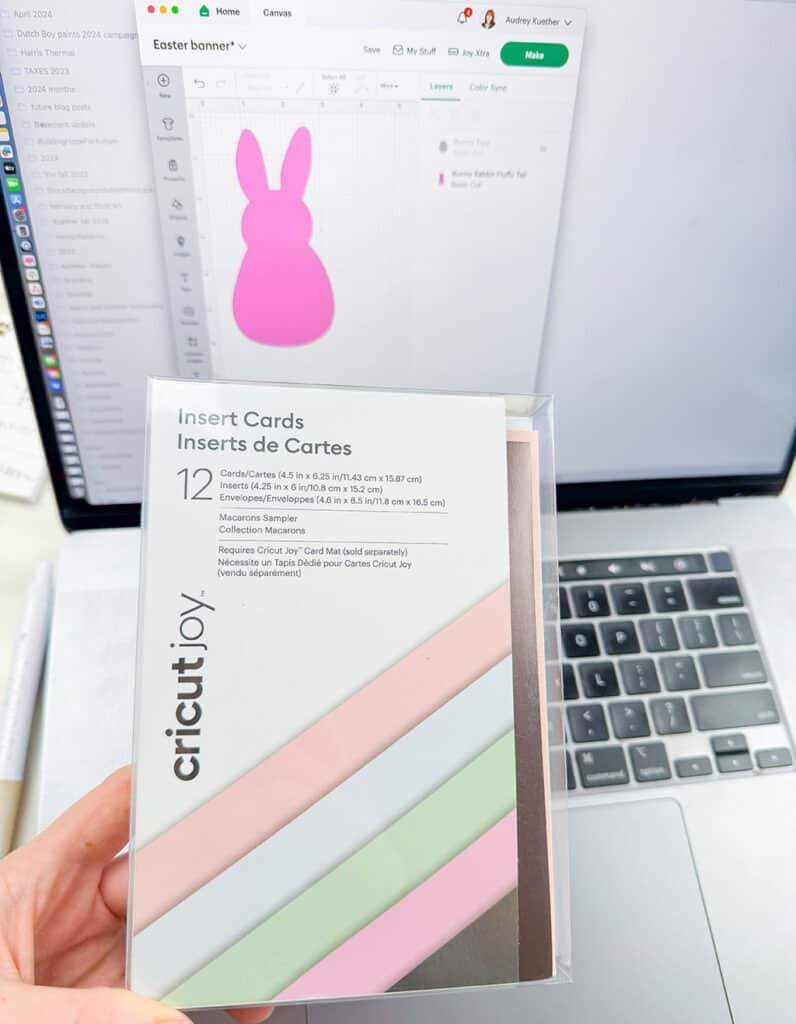
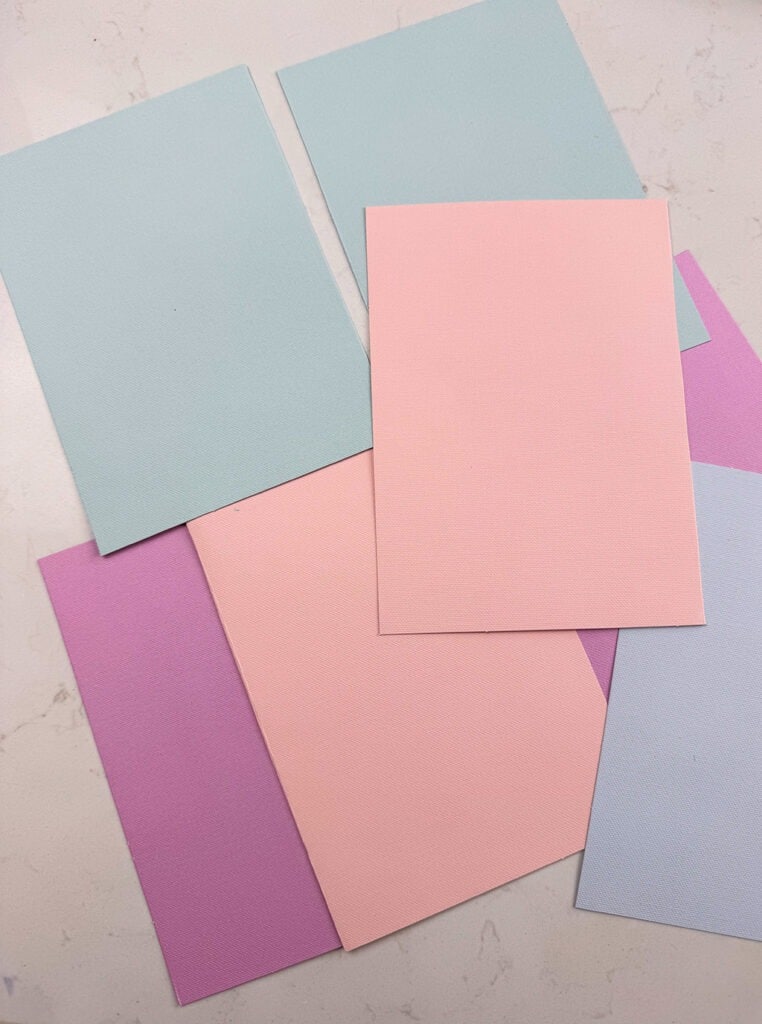
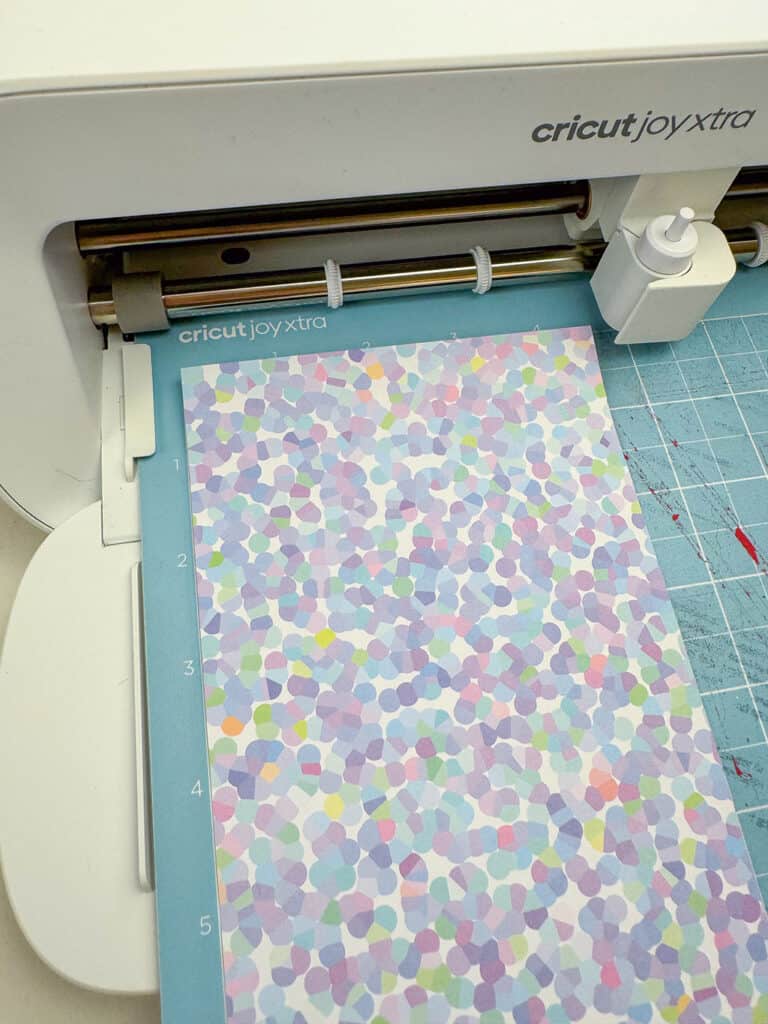
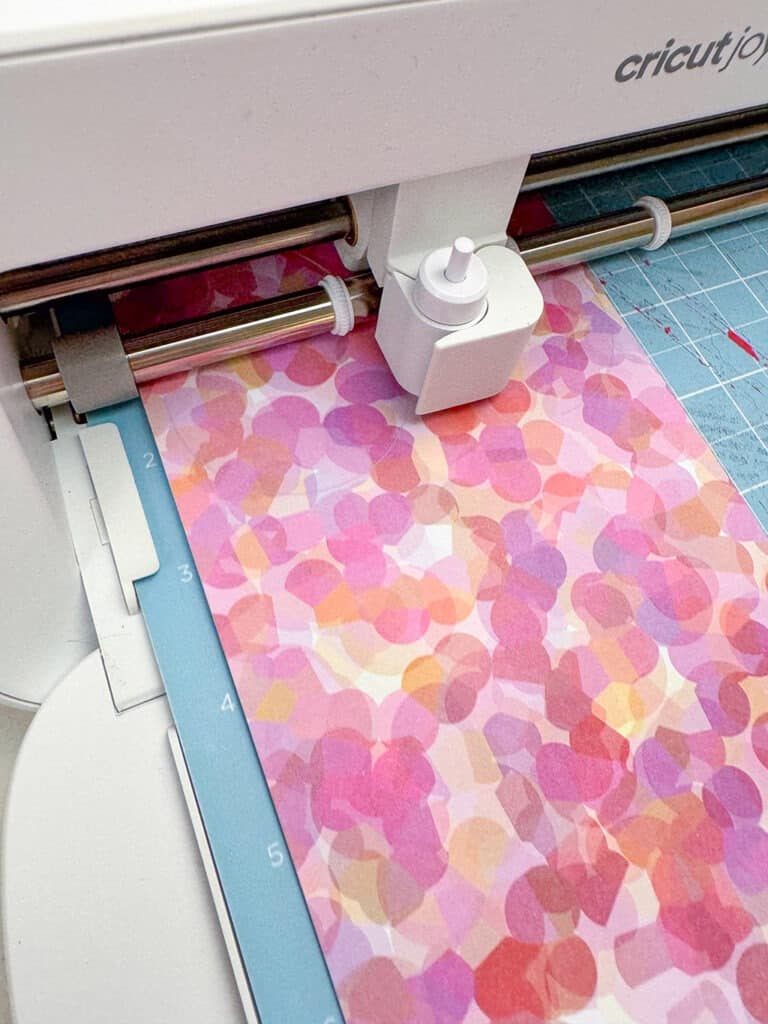
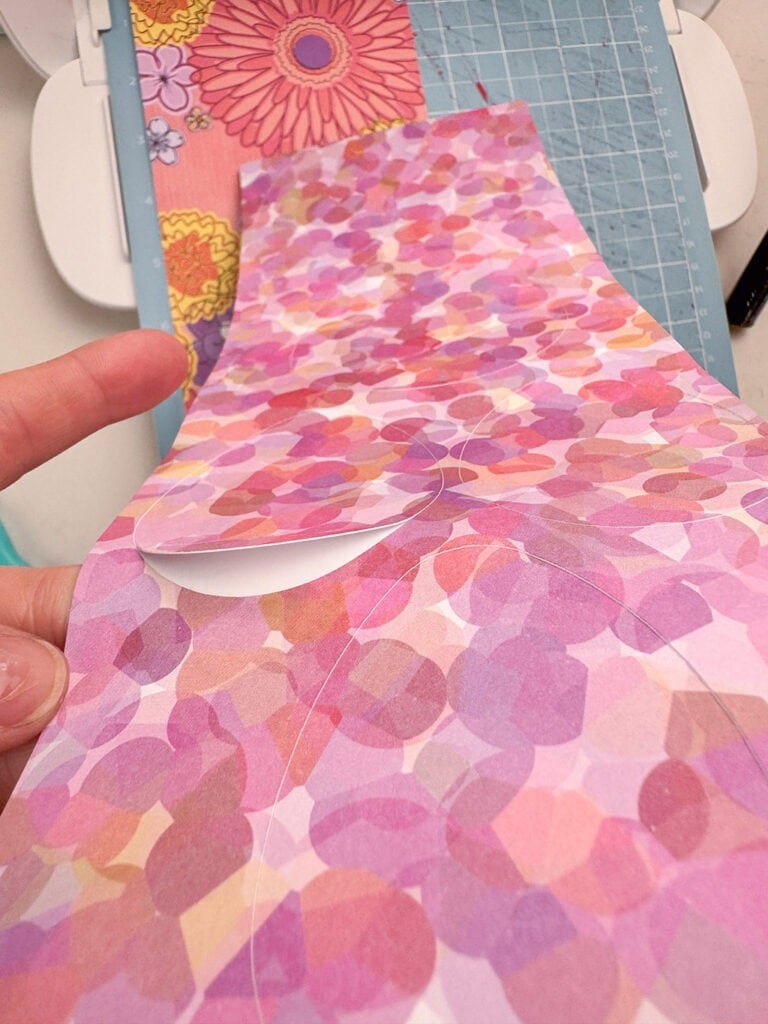
I wanted to only use items I had on hand for this project, so I dug into my Cricut materials stash and found these cute folded insert cards. I cut them in half with scissors so I could get two bunnies out of each card.
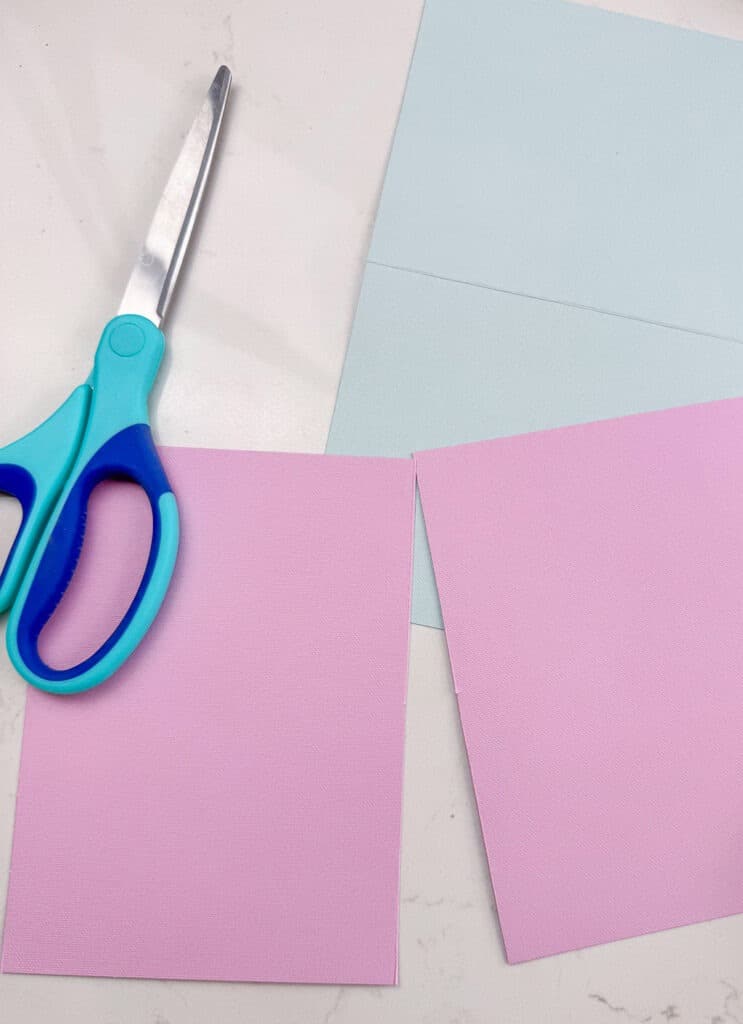
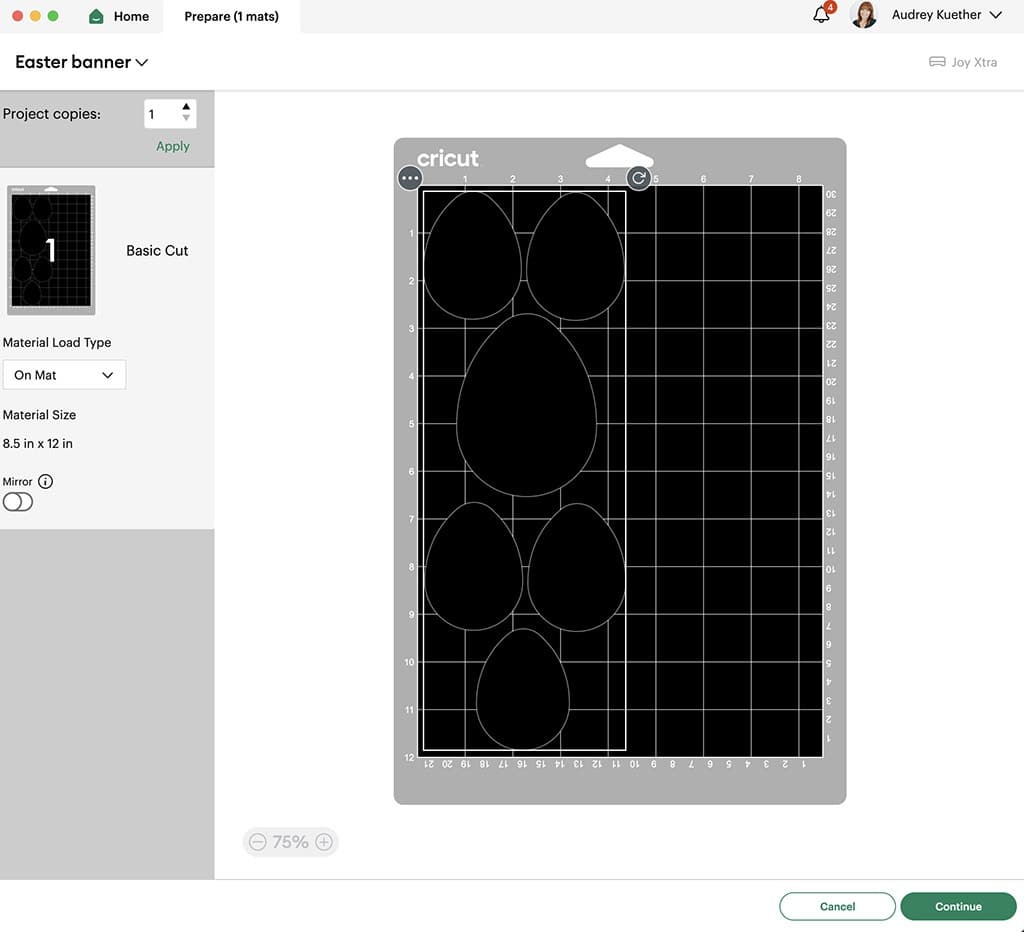
Then I cut each bunny out individually using my Cricut Joy Xtra (I chose more pressure on the cutting settings since this paper is on the thicker side).
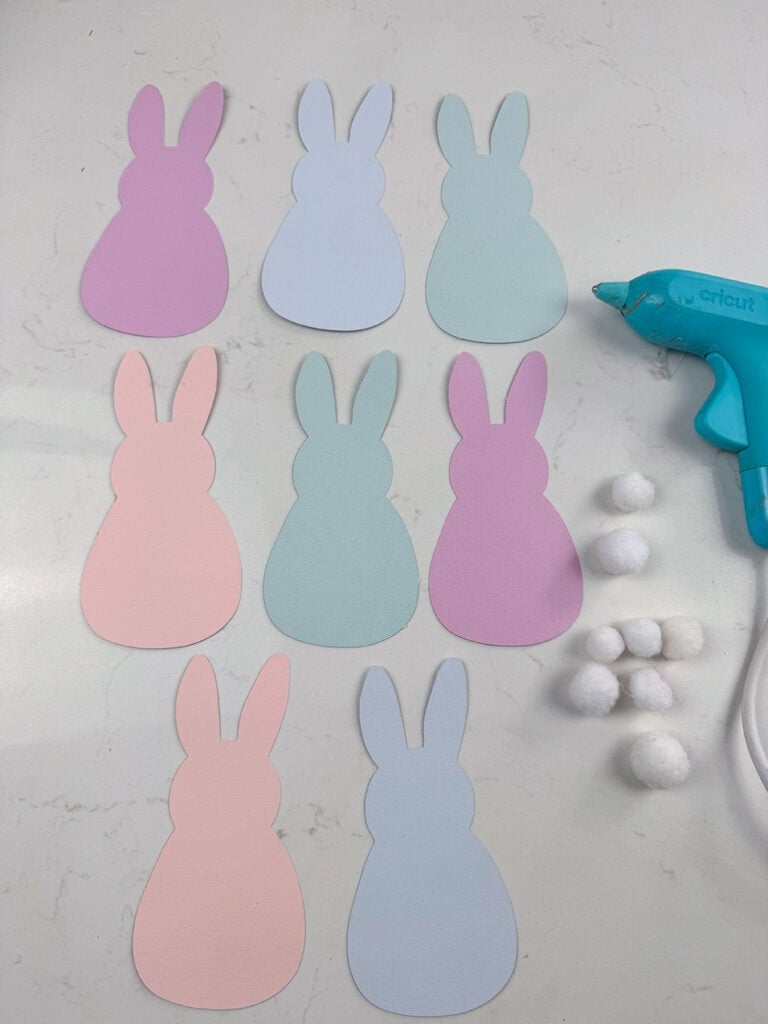
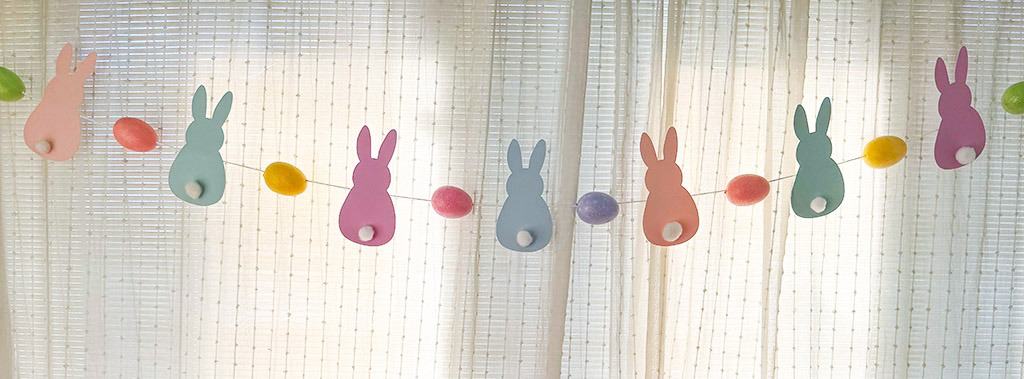
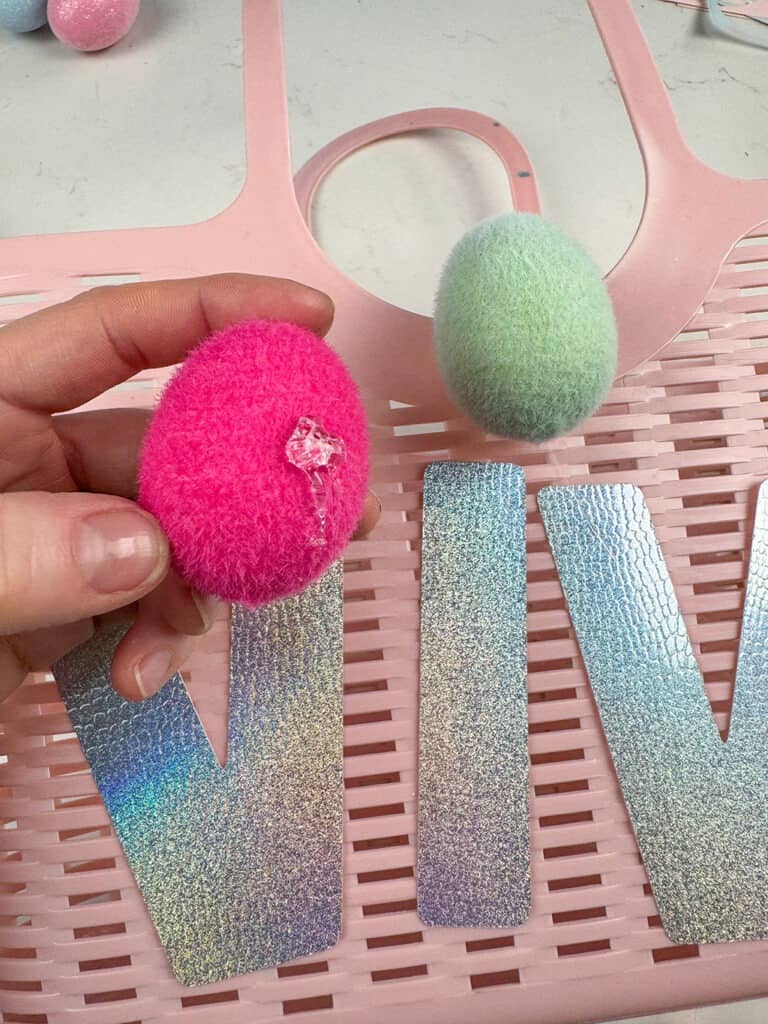
Once all bunnies were cut out I hot glued pom pom tails to all of them for an extra touch of fun.
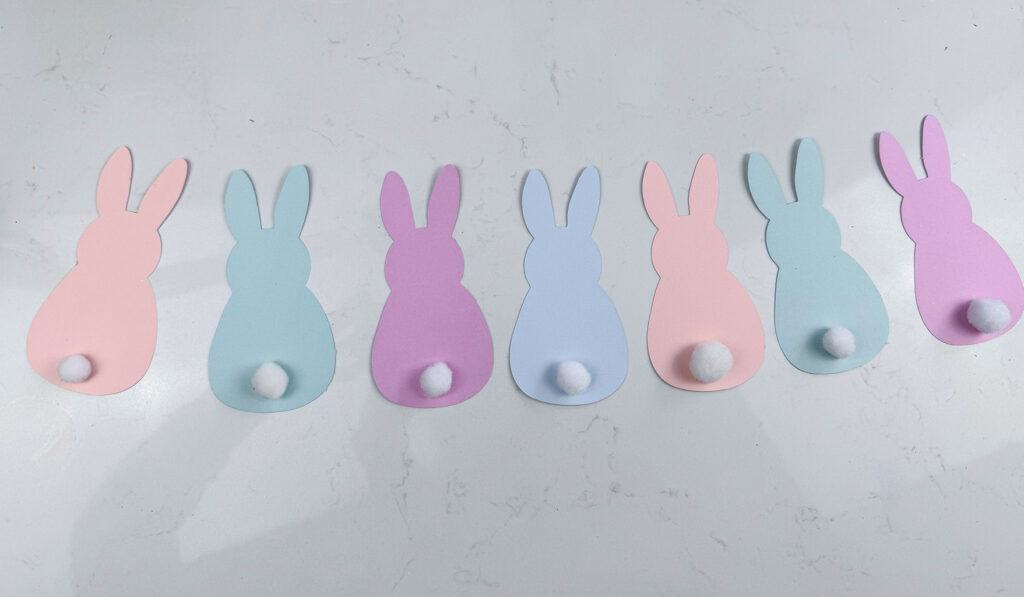
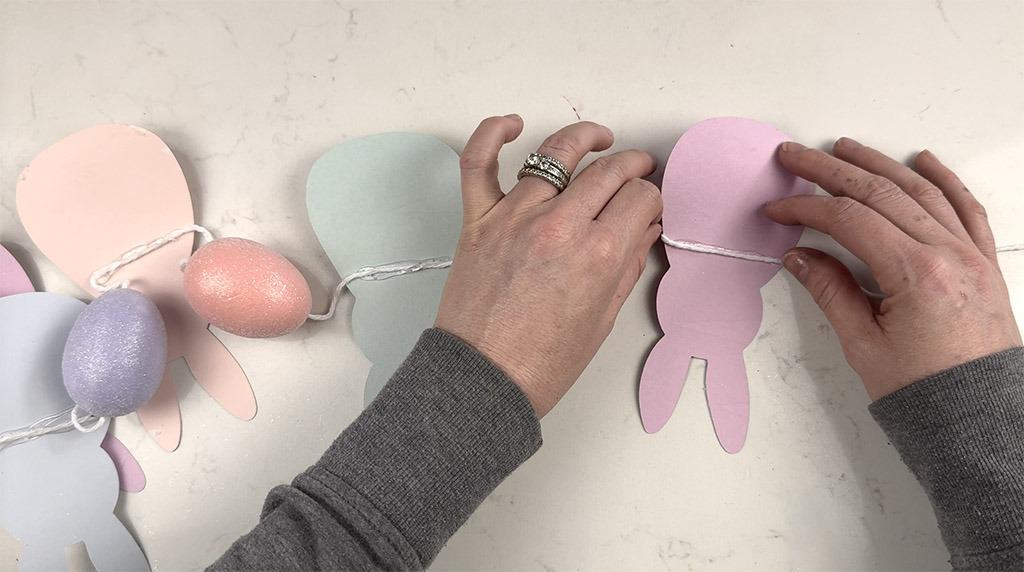
Then I lined them up or placement, and decided to add a colorful Easter egg in between each one for some extra color and detail.

Next I strung up a large sewing needle with my string, tied a knot at the end, and started stringing the eggs to the banner.
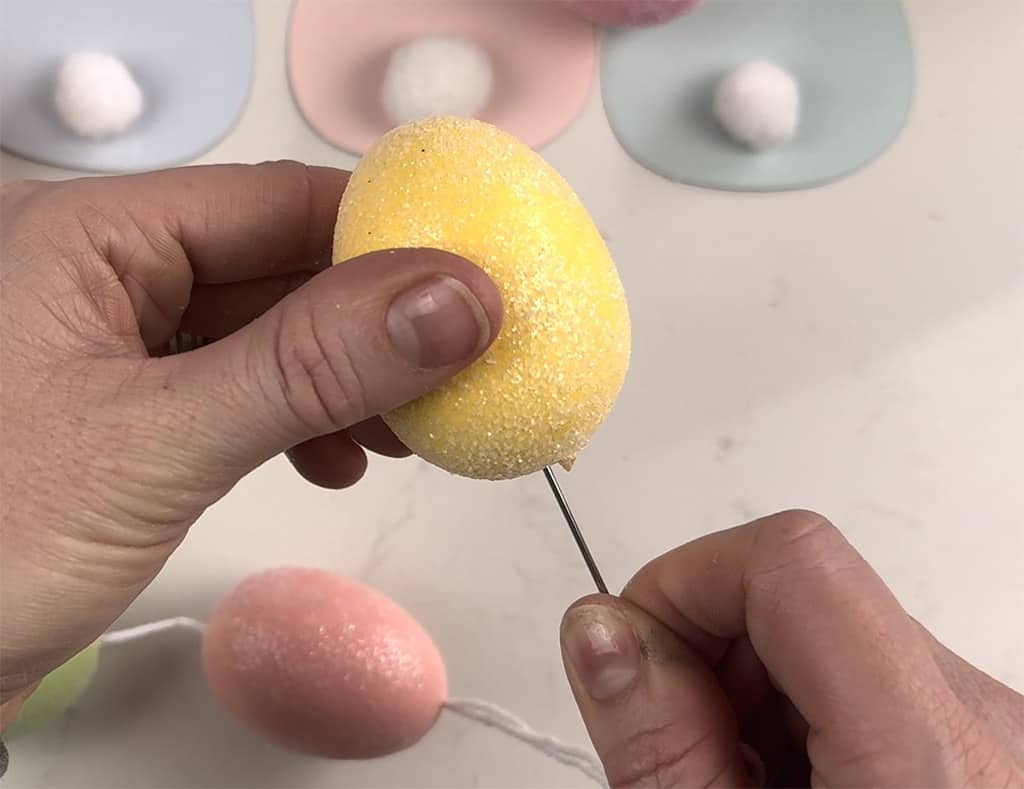
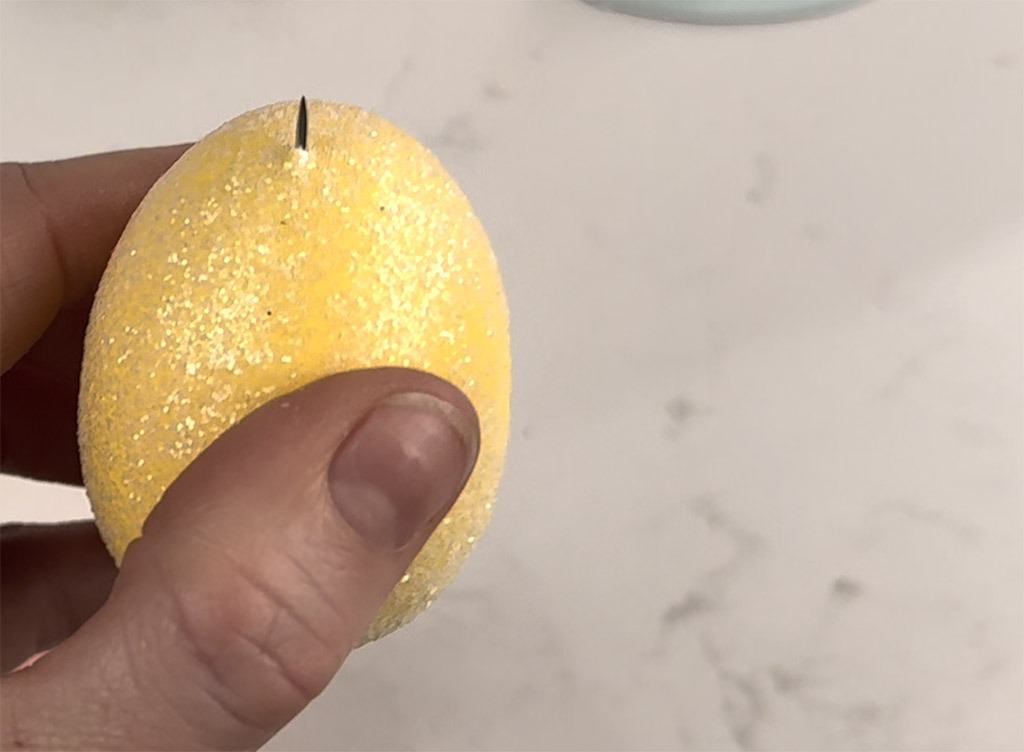
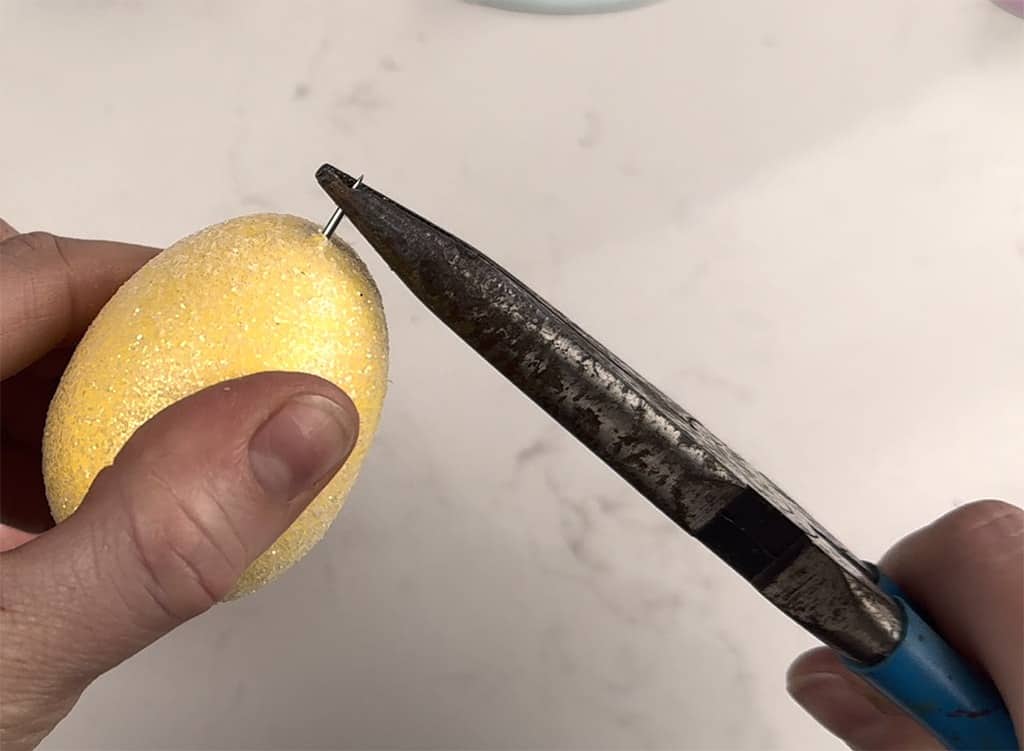
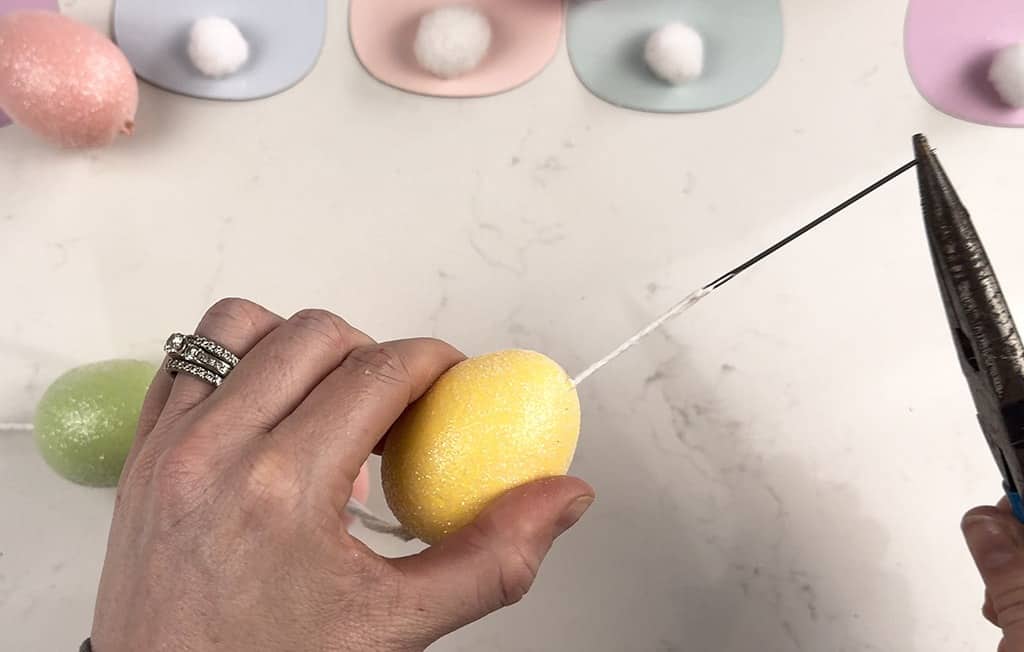
Then I repeated the same steps until all of the eggs until they were all strung on. It only took a few minutes for this step.
After I spread the eggs out, I hot glued one bunny between each egg. Knowing the pom pom tail would be a little heavy, I chose to glue around the neck area for balance.
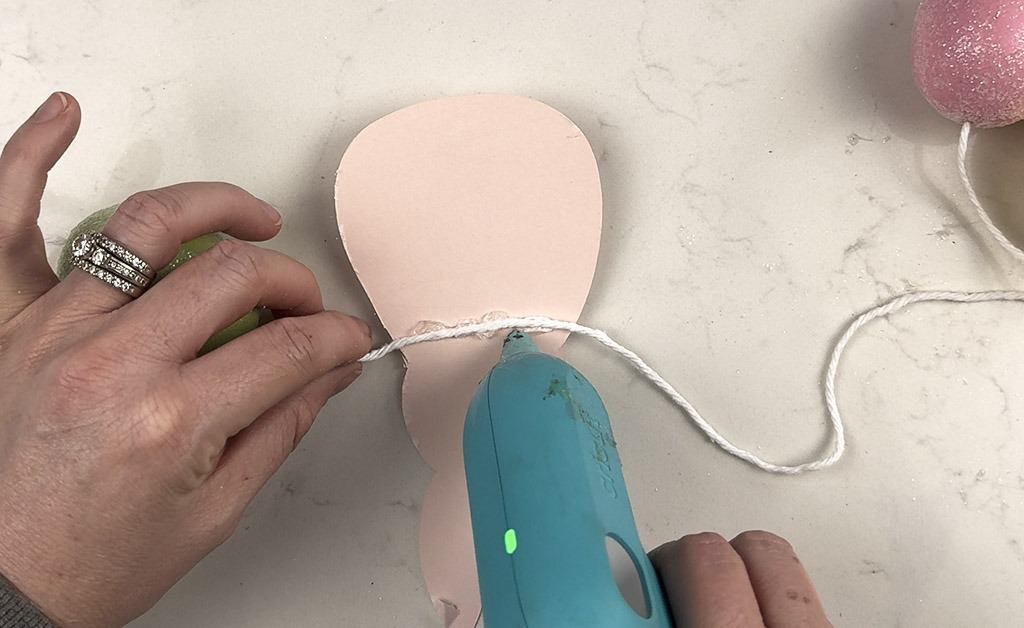
Then I repeated these steps until all bunnies were added to the string. You could also use a hole punch to make hole on each bunny to run the string through if you prefer that over hot glue.
That’s it – my first DIY Easter decor piece was complete!
Next up are my easy twig and Easter egg centerpieces
Supplies:
Twigs/sticks
Spray paint (optional)
Vase
Faux easter eggs (I got mine on sale at Michaels, but here are other options)
Hot glue gun
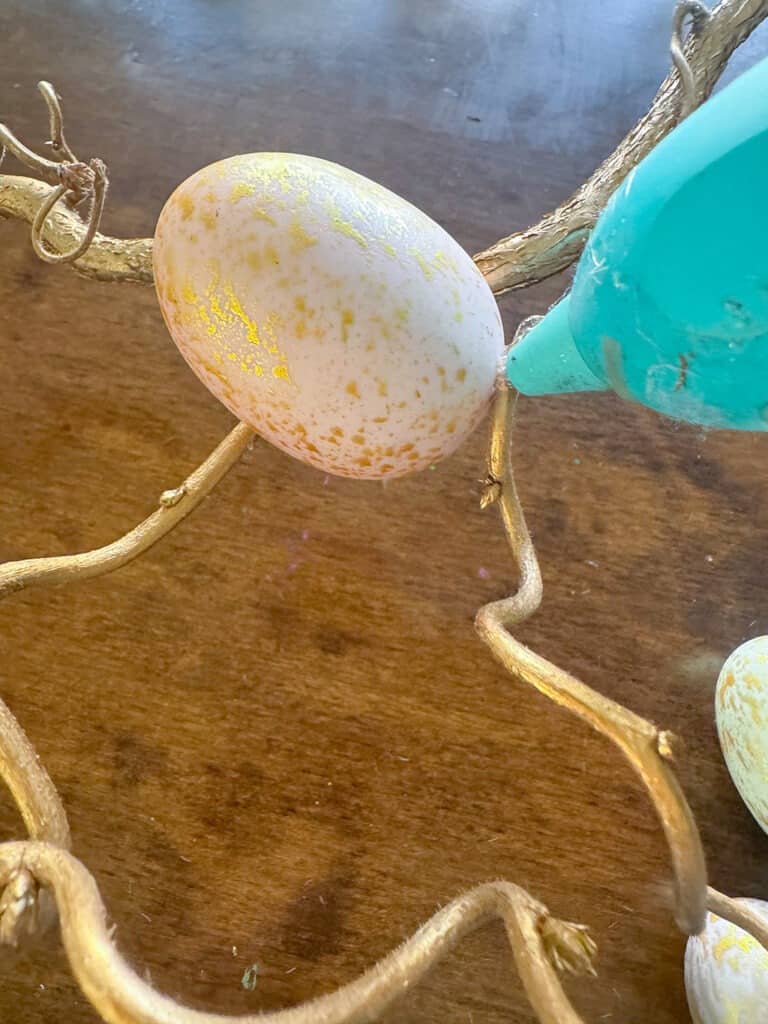
My neighbor Bryan recently gave me a pile of curly tree branches from his yard, and I just knew they’d make some fun Easter decor.
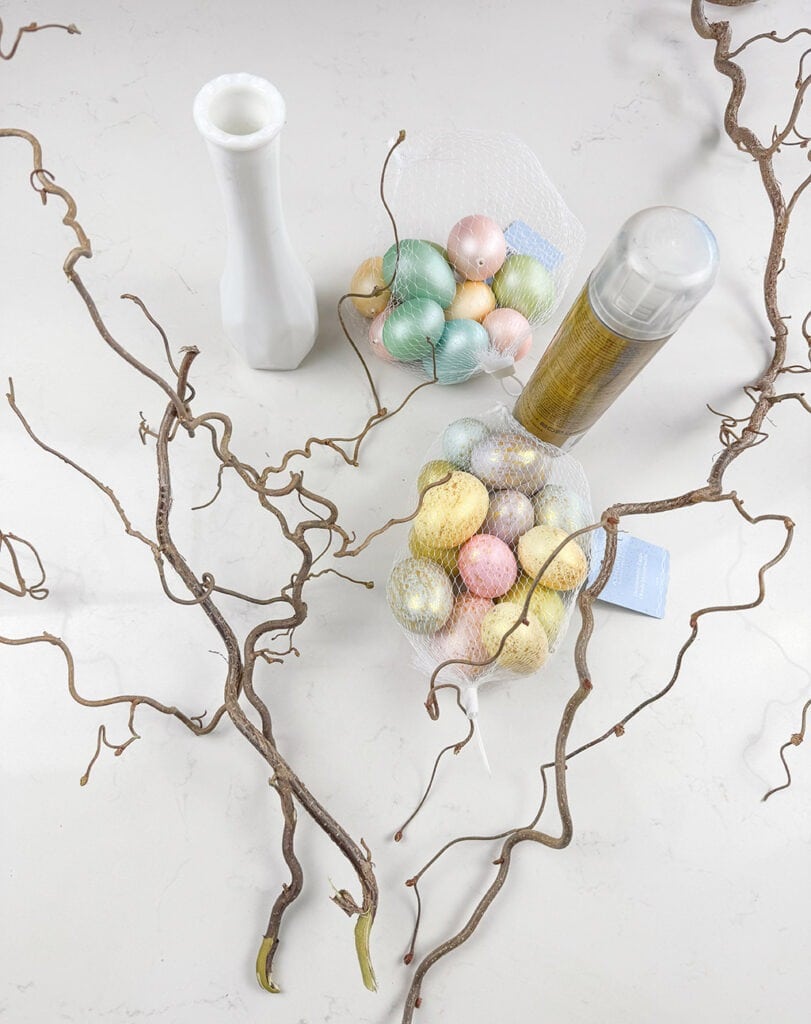
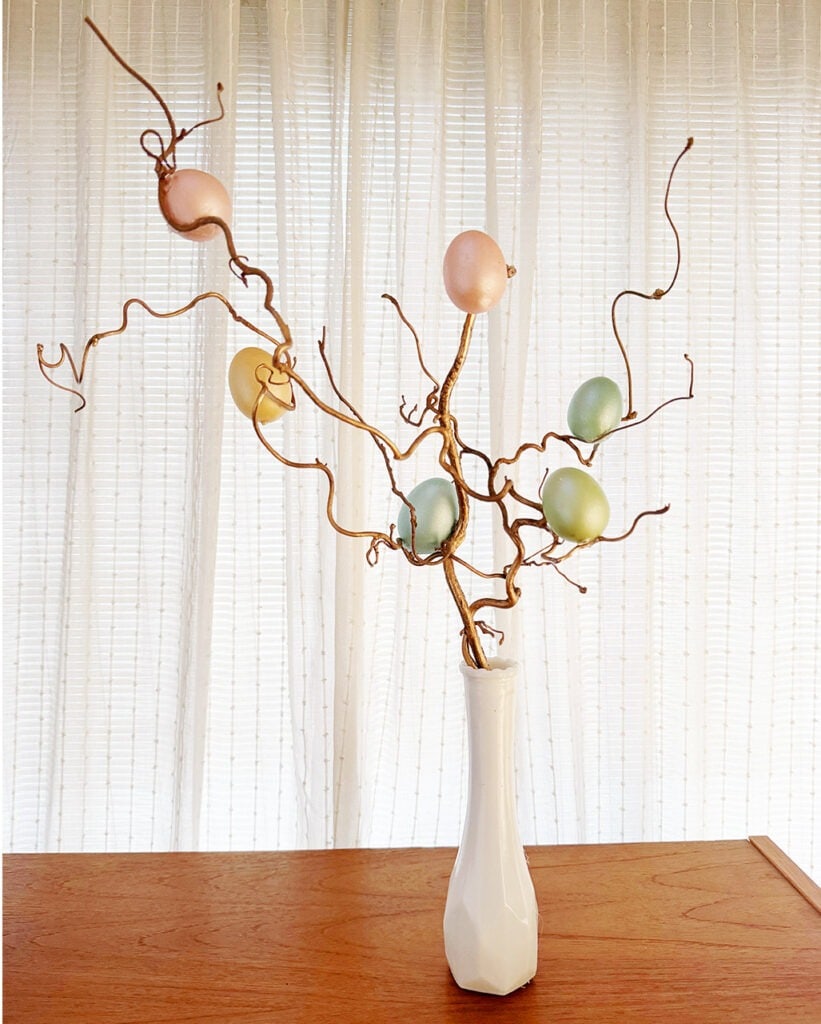
I’m a little extra, so I decided to spray paint the twigs gold, but they would look good natural too. I had enough branches for two different decor pieces, so for the first one I simply placed three twigs in a milk glass vase I had on hand.
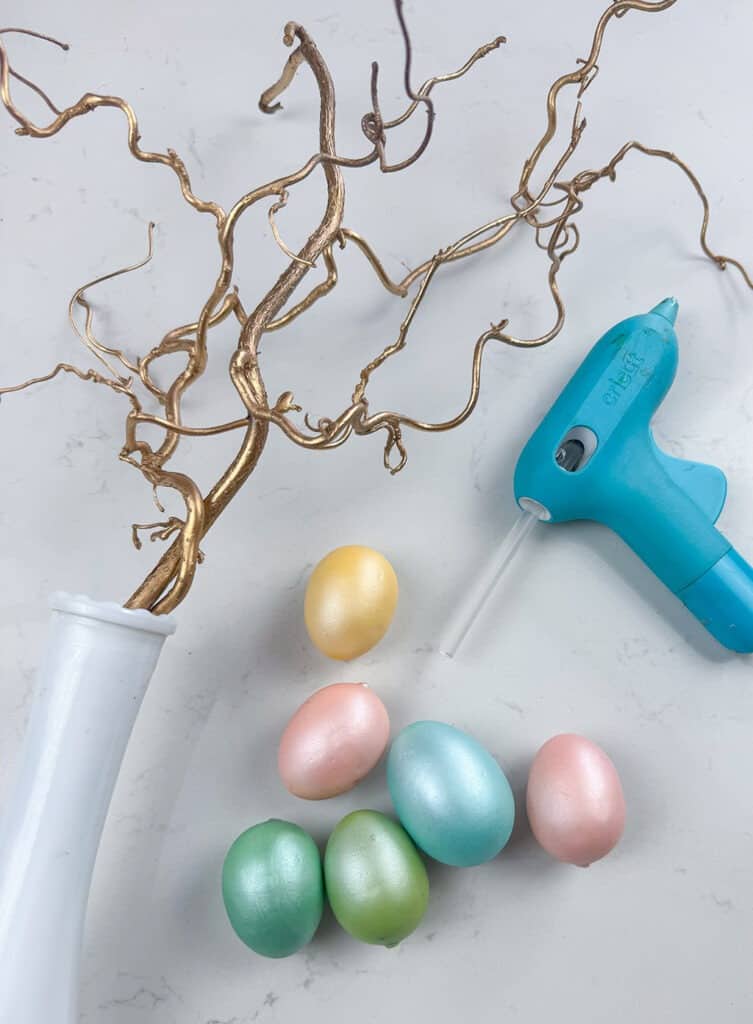
Then I simply hot glued easter eggs to the branches. It took only a couple minutes and turned out super cute!
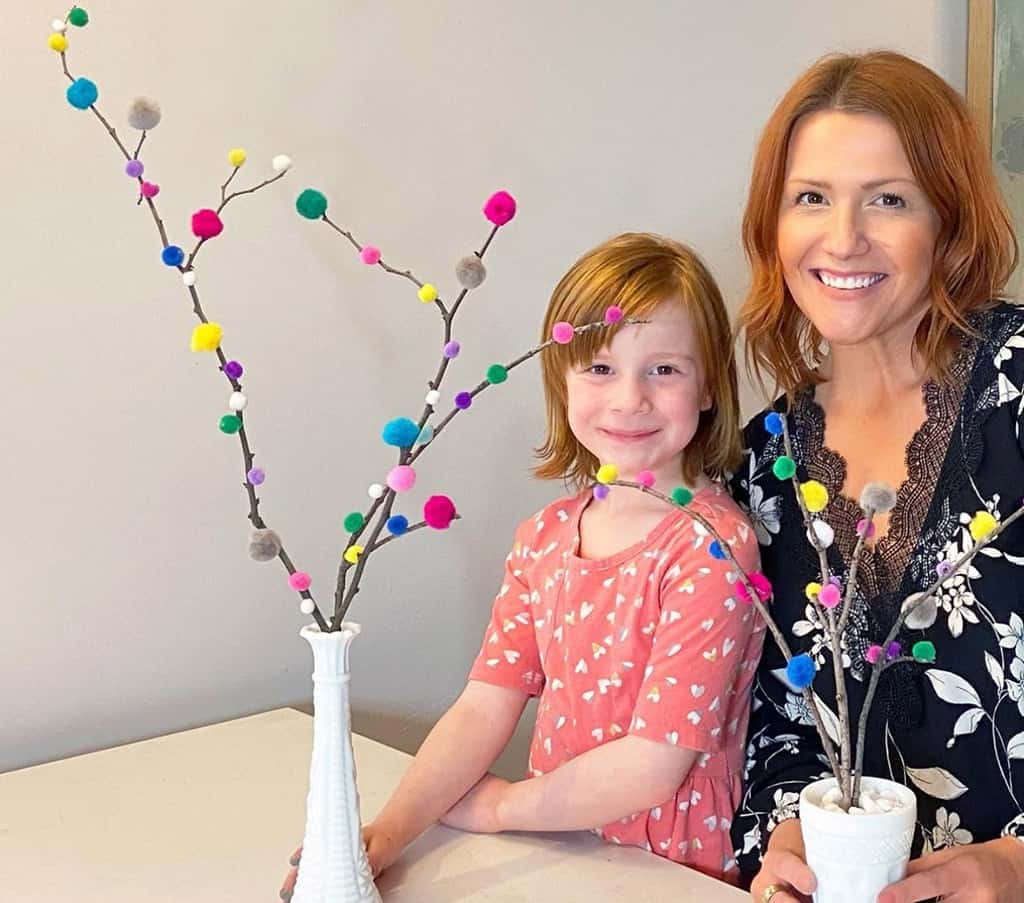
You could also skip the eggs and add colorful pom poms instead. We did that for a 2020 TV segment, and it turned out cute as well.
Next I took my long curly branch and hot glued some different Easter eggs to it.

This one would look great as an Easter table centerpiece and cost me next to nothing to make!
DIY Easter basket personalization
Supplies:
• Cricut Joy Xtra
• Cricut insert cards (you can also use scrapbook paper or card stock)
• Light grip mat
• Hot glue gun
• Faux easter eggs (I got mine on sale at Michaels, but here are other options)
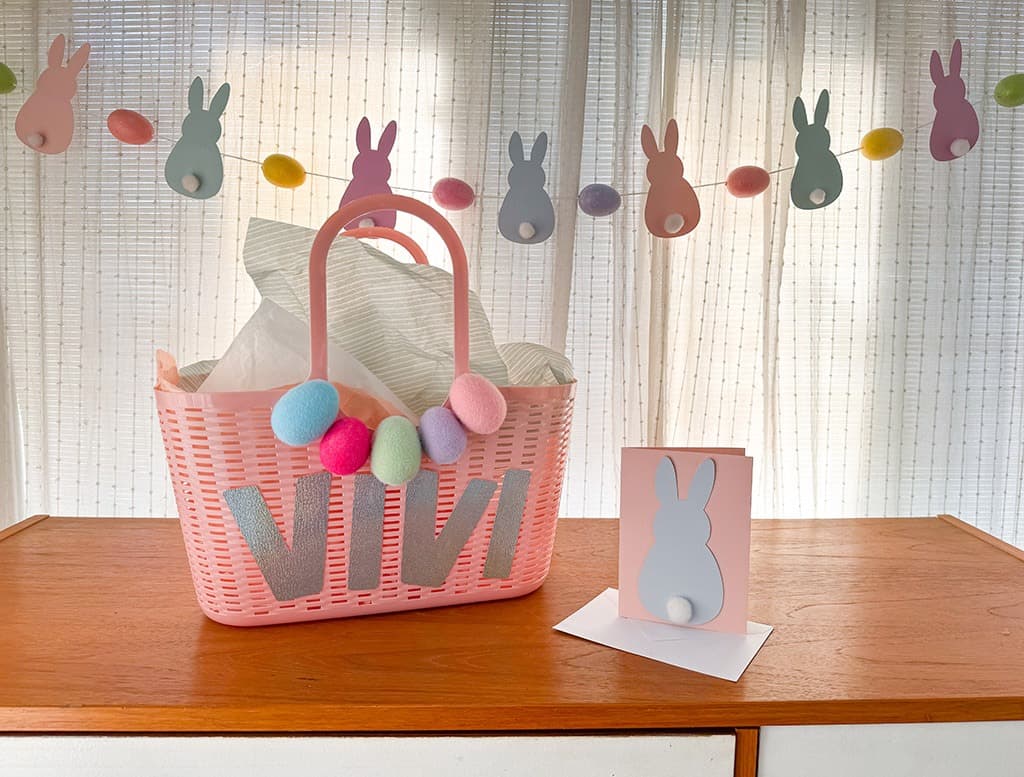
For my next project used an extra Dollar Tree basket I bought for some Mother’s Day gifts I made a few years ago, and added some personalization to it.
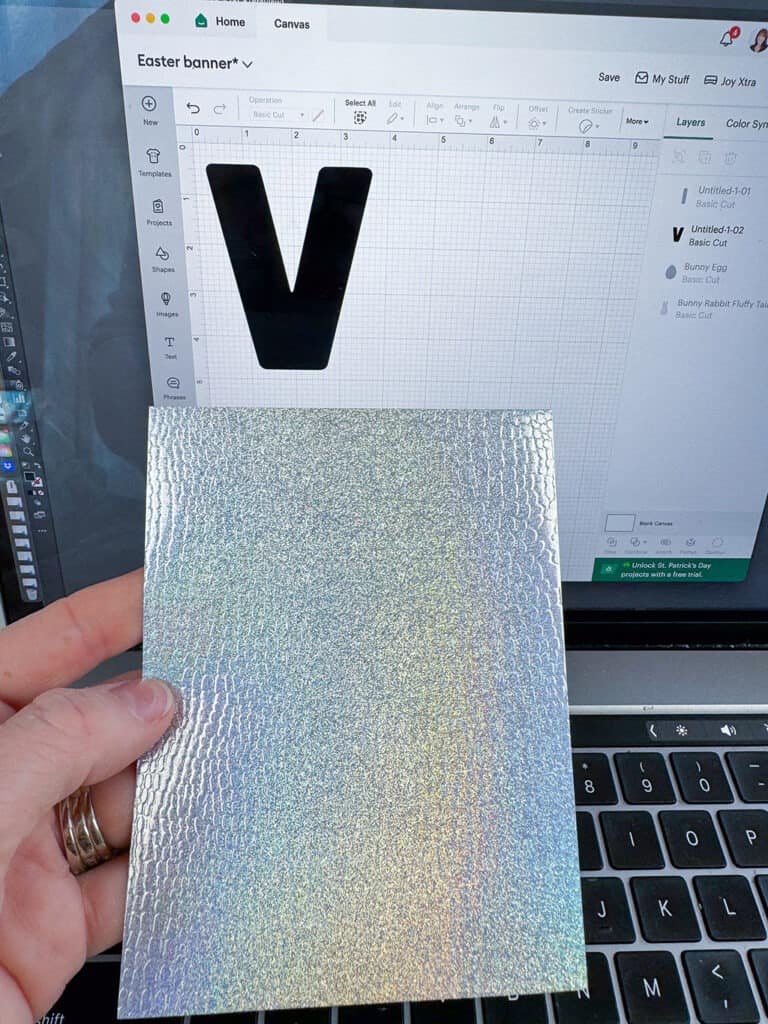
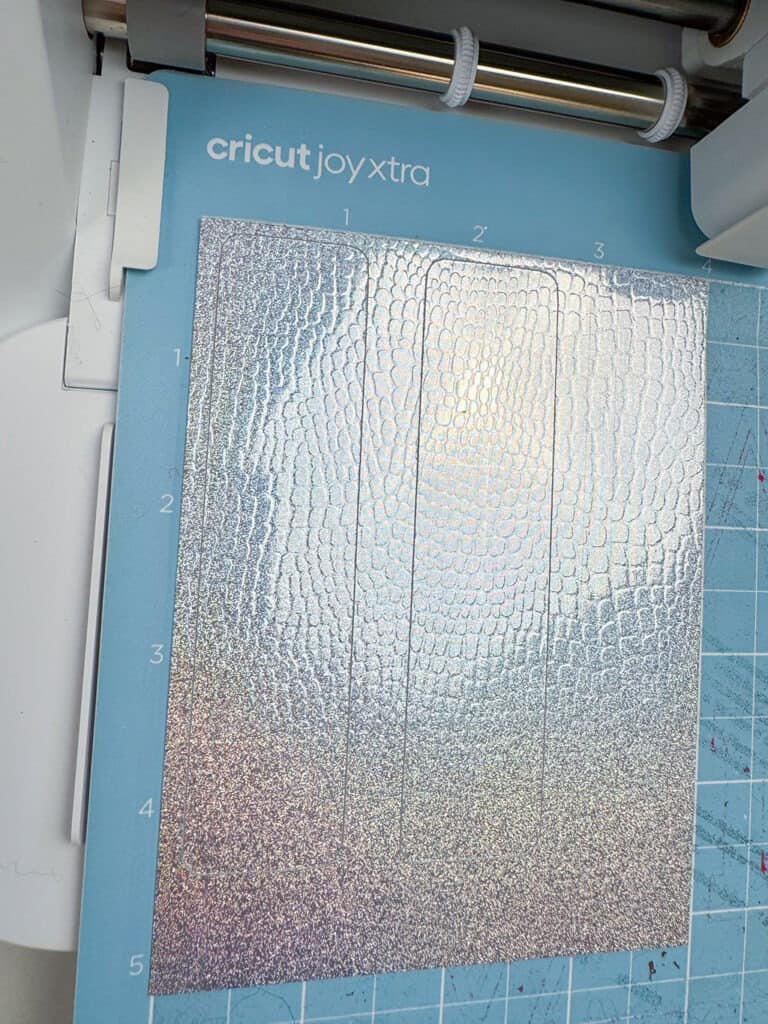
Using my Cricut Joy Xtra I cut out my daughter’s nickname, Vivi (short for Vivienne) out of some holographic card stock
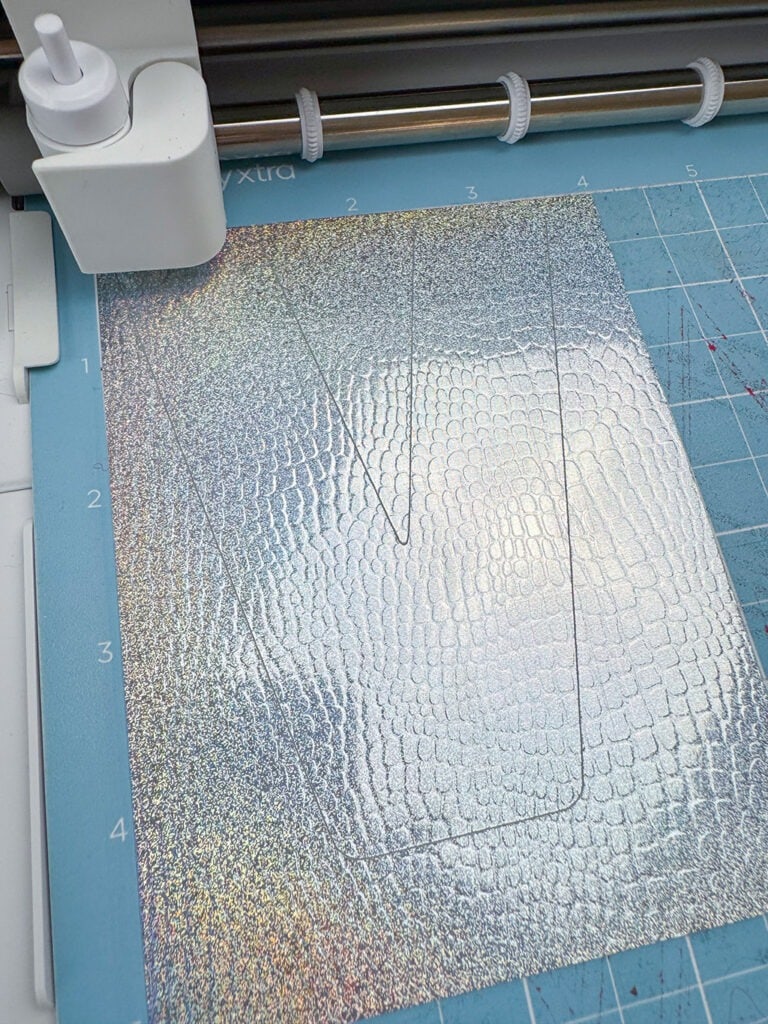
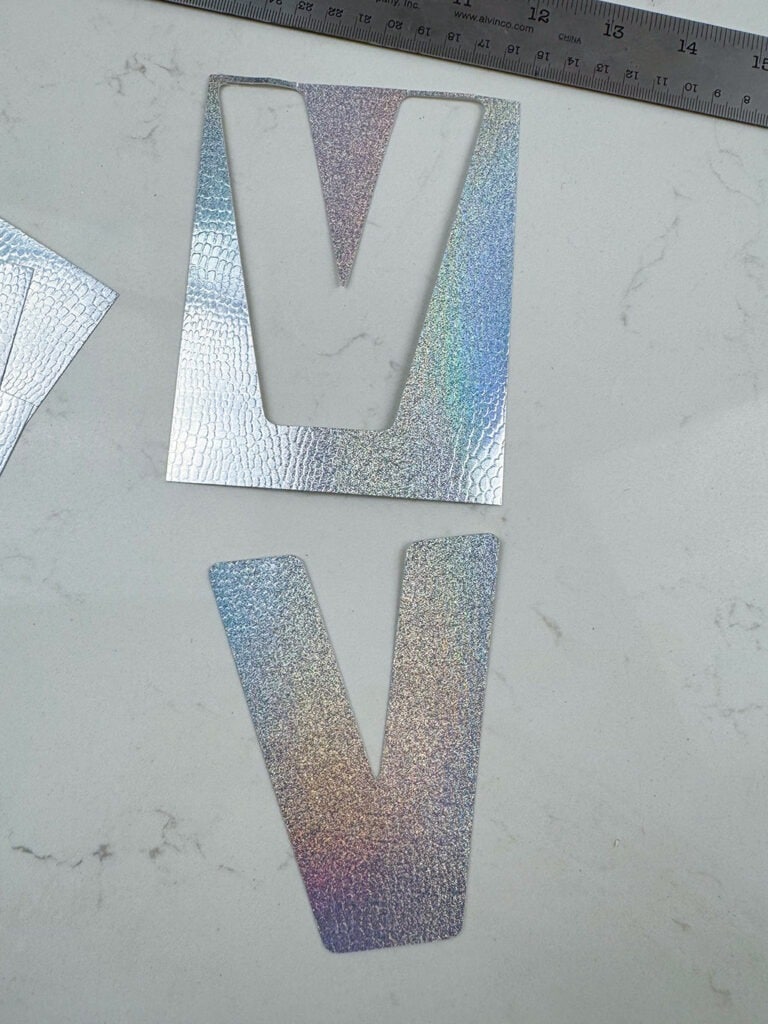
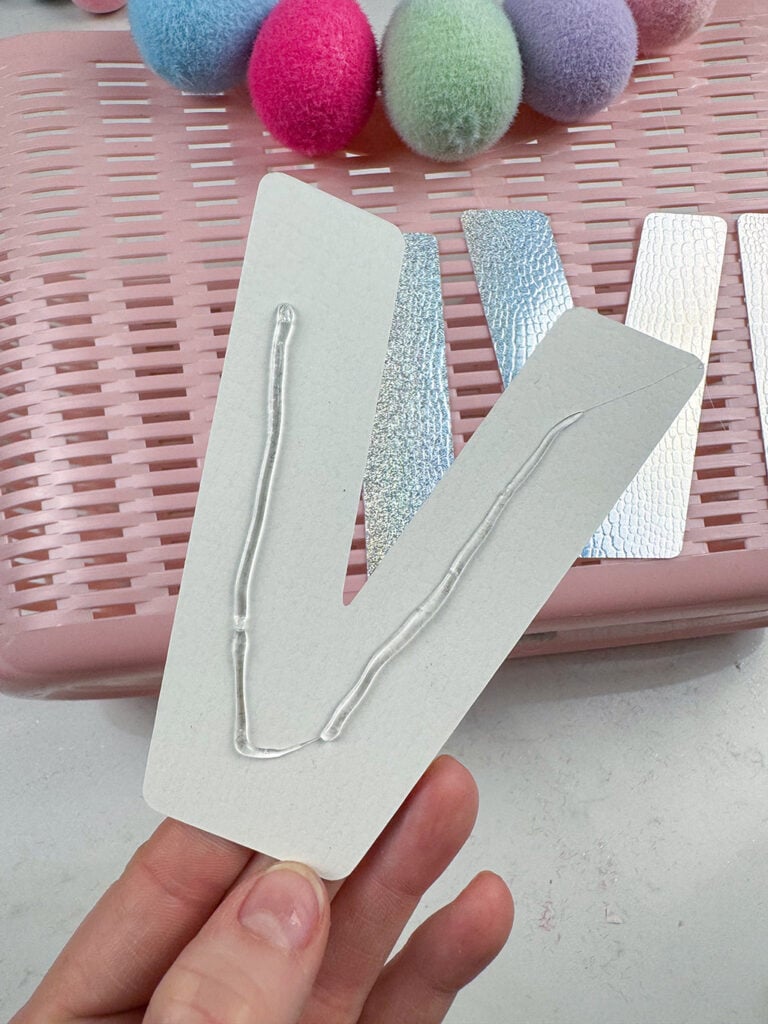
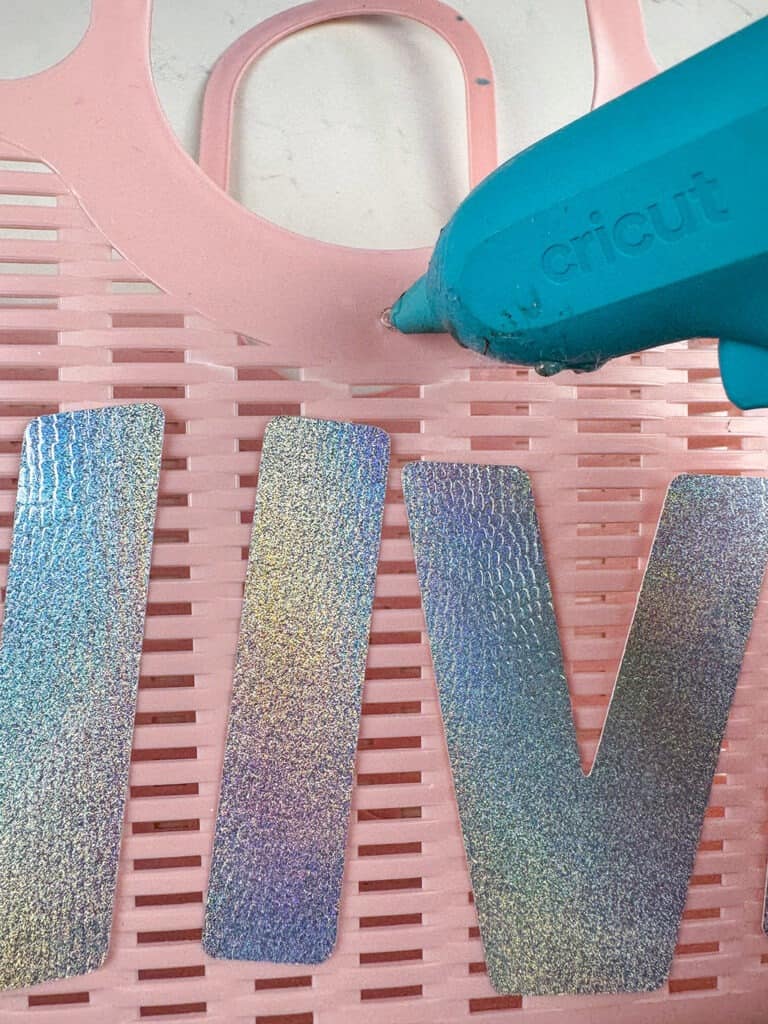
Once the four letters were cut, I grabbed my hot glue gun and simply glued them onto the basket.
Then I decided to hot glue five colorful felt eggs to it as well for some more color. You can get creative and add anything you’d like to personalize it.
I decided that the basket needed a card too, so I simply hot glued one of my extra bunnies from my banner onto a pre-folded Cricut insert card.
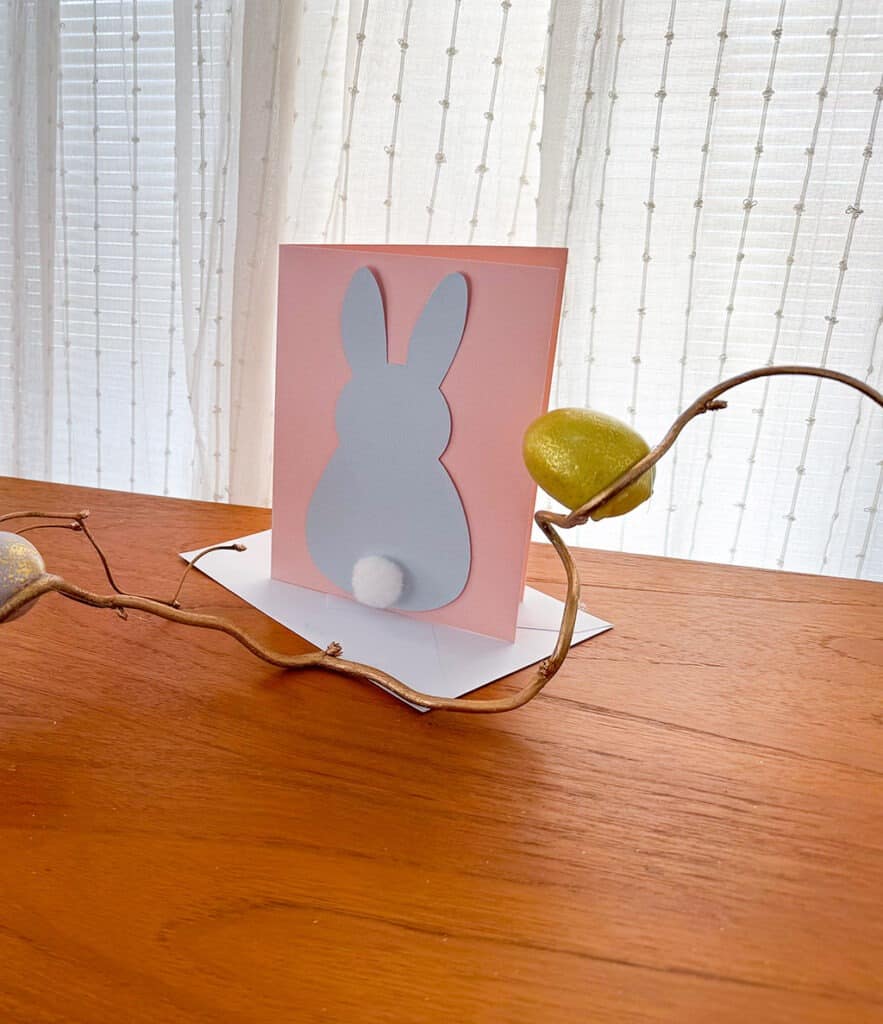
It’s not exactly DIY Easter decor, but it’s a quick and easy way to personalize a gift or Easter basket.
Easter egg stickers
Supplies:
Cricut Joy Xtra
Cricut Deluxe Adhesive Backed Paper
Light grip mat
Cricut Design Space (check out Cricut Access)
Using my Cricut Joy Xtra and some Deluxe Adhesive Backed Paper, I cut some simple Easter egg shapes in various sizes.
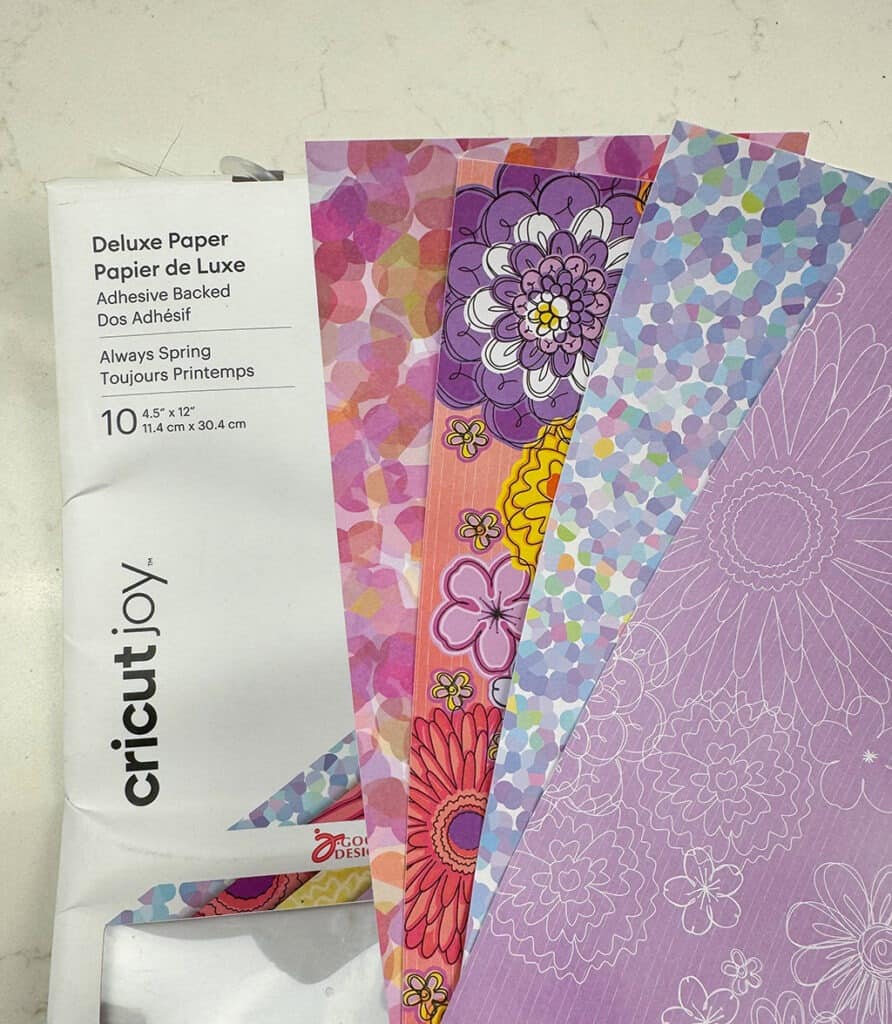
The designs were free to use in Cricut Design Space and took less than 2 minutes to cut on three sheets of sticker paper.
It was as easy that that – these stickers can be used on anything from cards to easter baskets, and so much more!
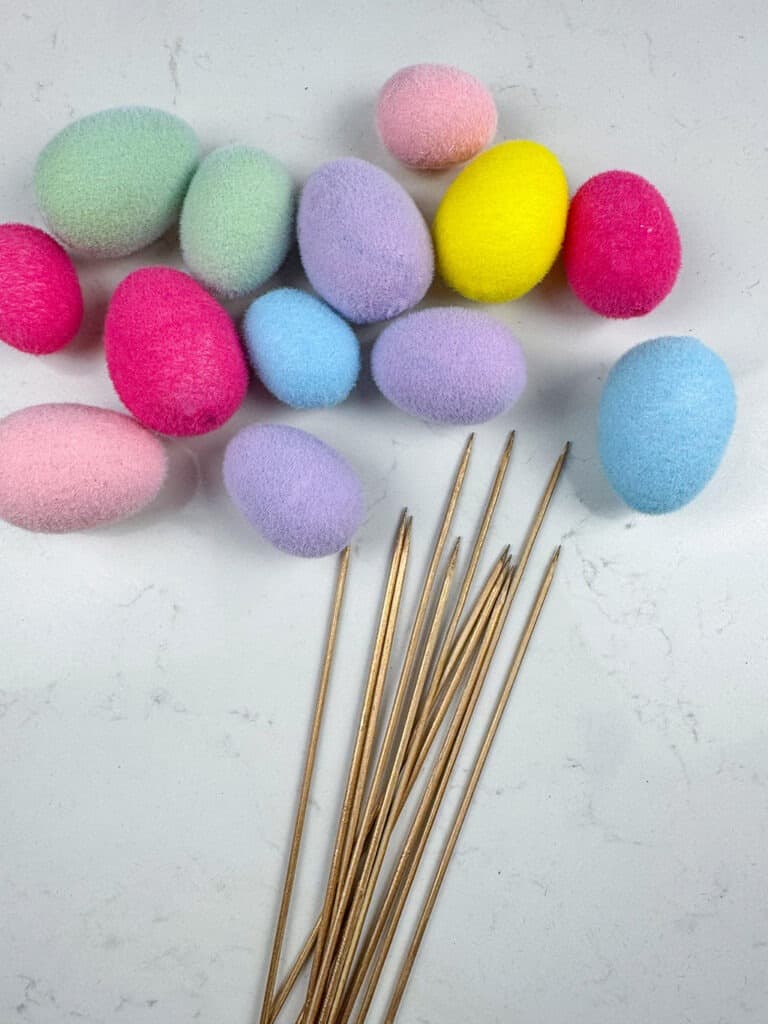
Easter egg picks
Supplies:
• Decorative eggs
• Wood skewers
• Spray paint (optional)
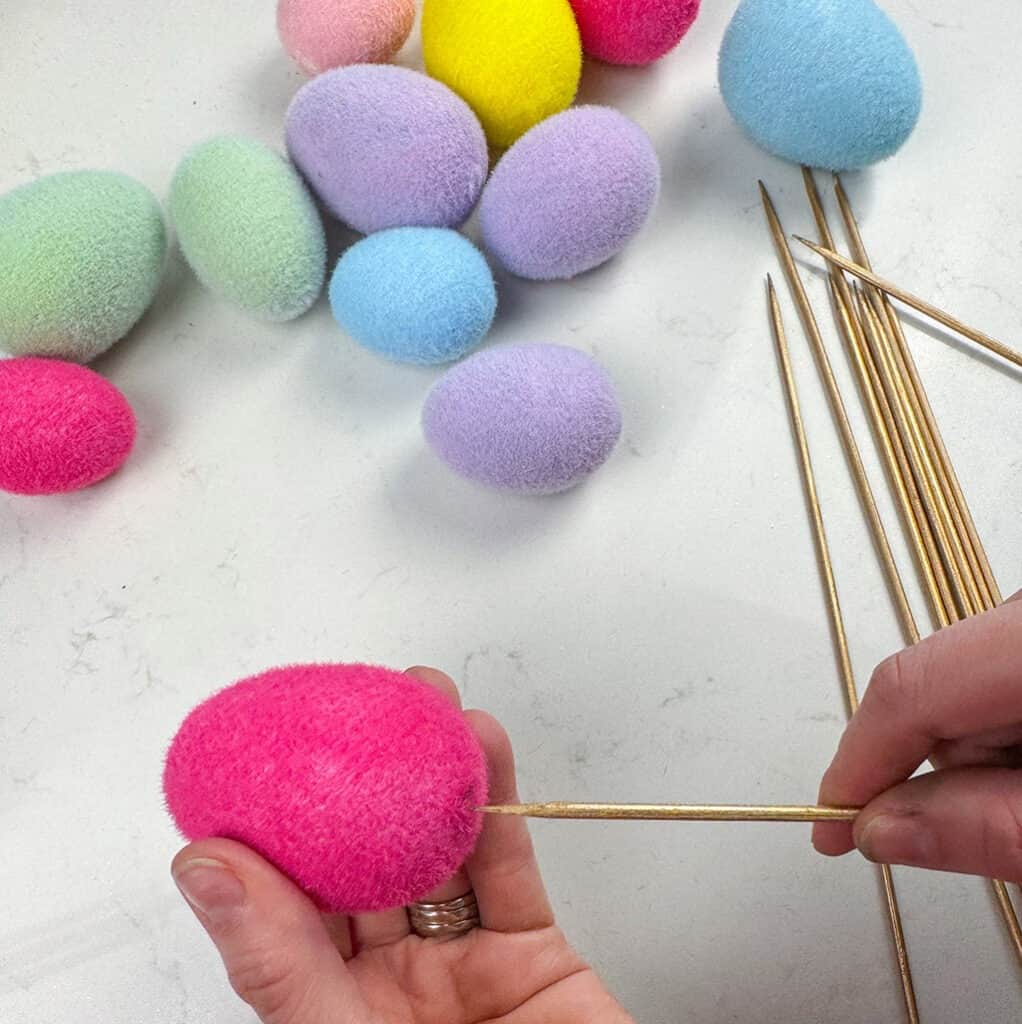
This project is SOOO easy and only requires a few supplies. I started with some wood skewers I had on hand and spray painted them gold (again, I’m a little extra, ha). Then I simply pushed them into the bottom of a handful of eggs.

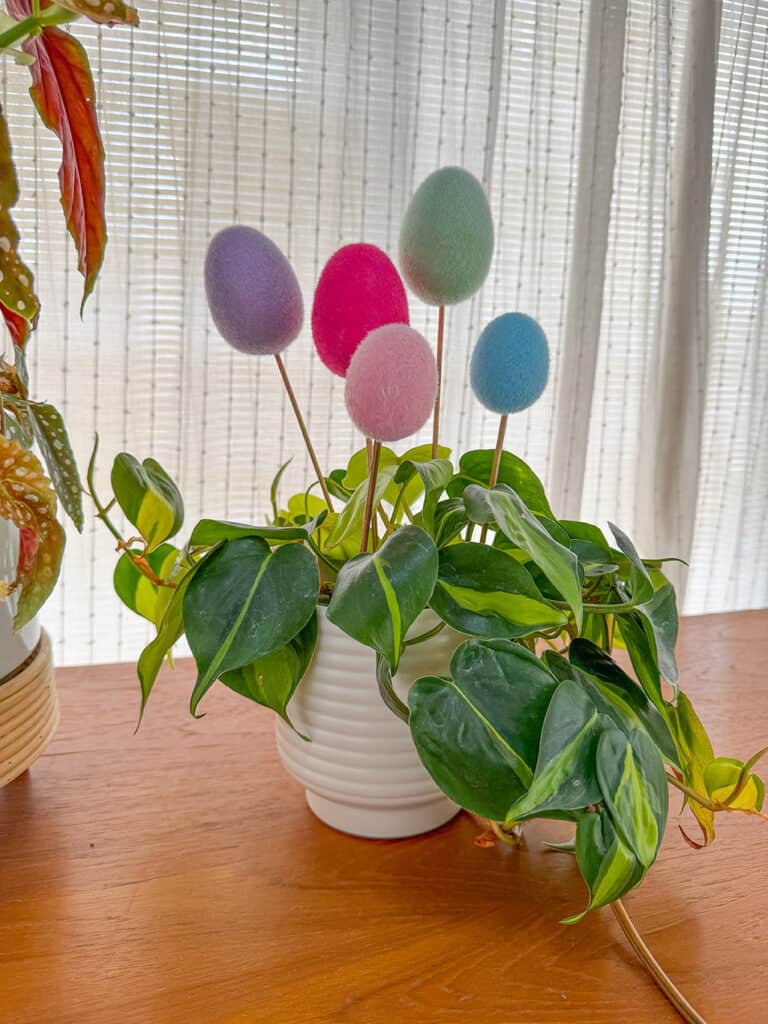
That’s it – seriously so easy! I decided to stick them in a plant for some extra festivity.

Looking for another Easter egg pick option? My DIY gold foil eggs are a fun project too!
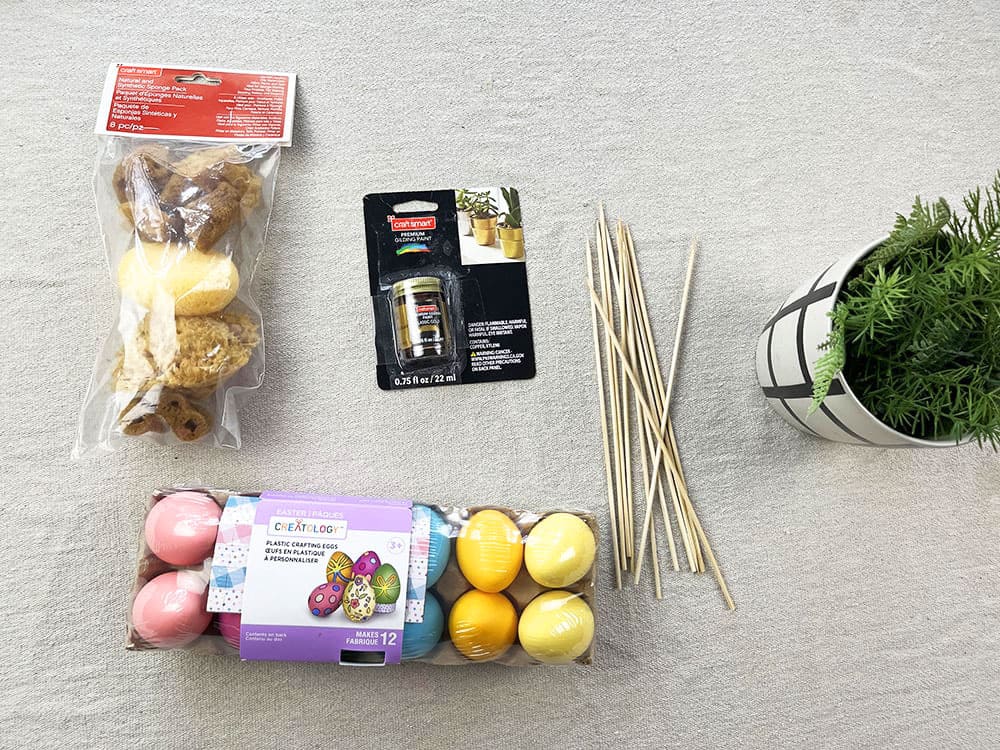
Supplies:
• Crafting eggs
Grab some pre-painted foam eggs (option 1, option 2, option 3), but if you wanted to paint your own you could buy these paintable plastic eggs.
• Gold gilding/liquid leaf paint
• Wood skewers
• Crafting sea sponges
• Drill and bit
• Paper plate or cup to pour gilding medium into
• Potted real or faux plant(s)
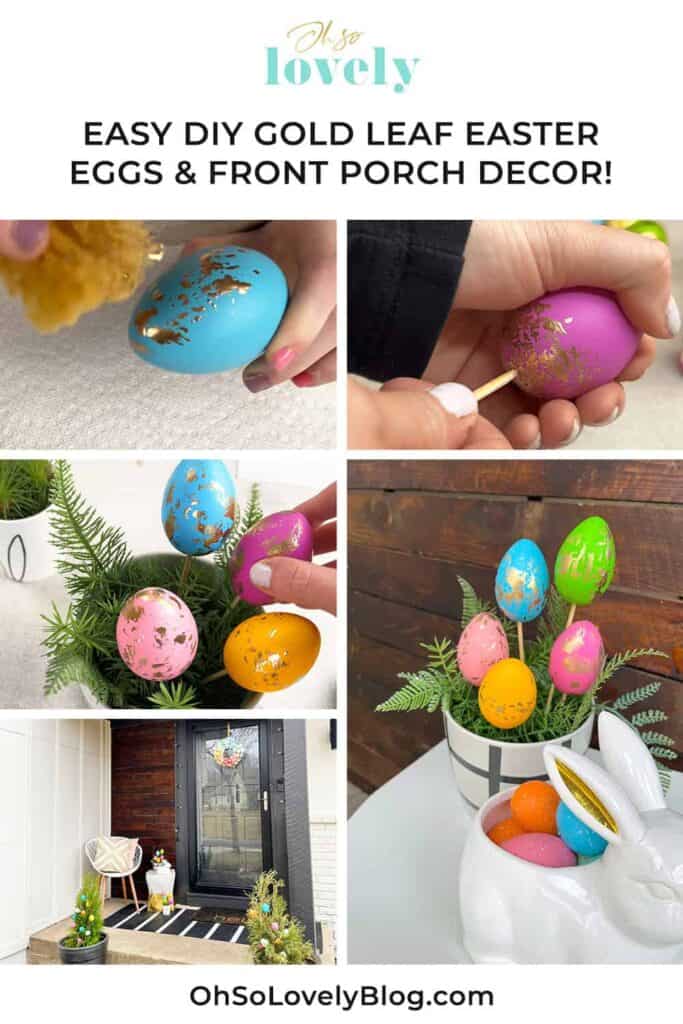
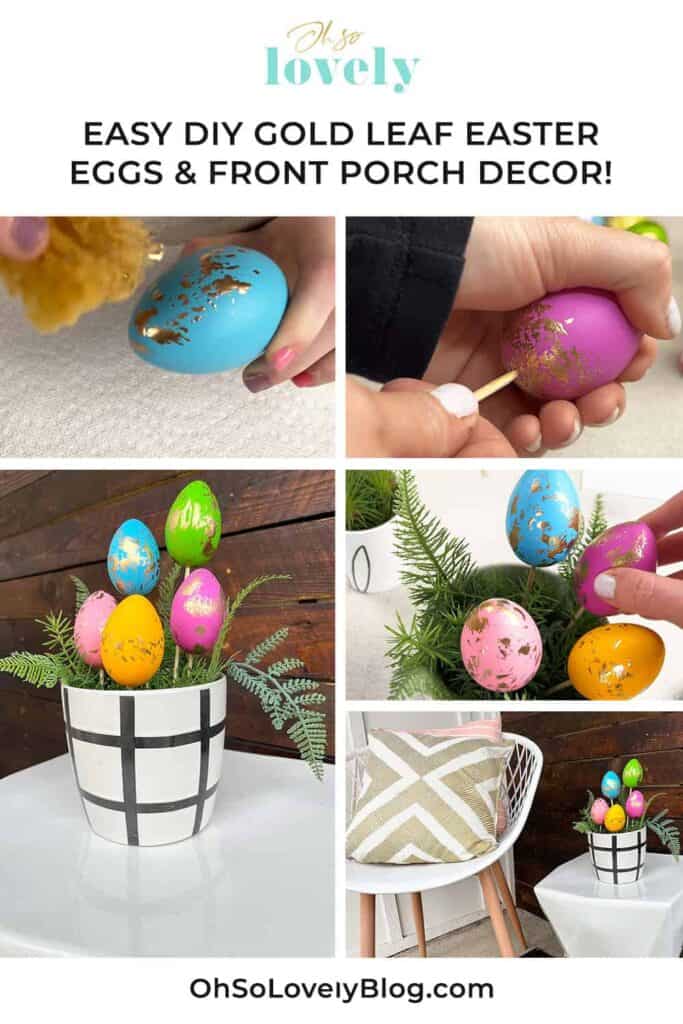
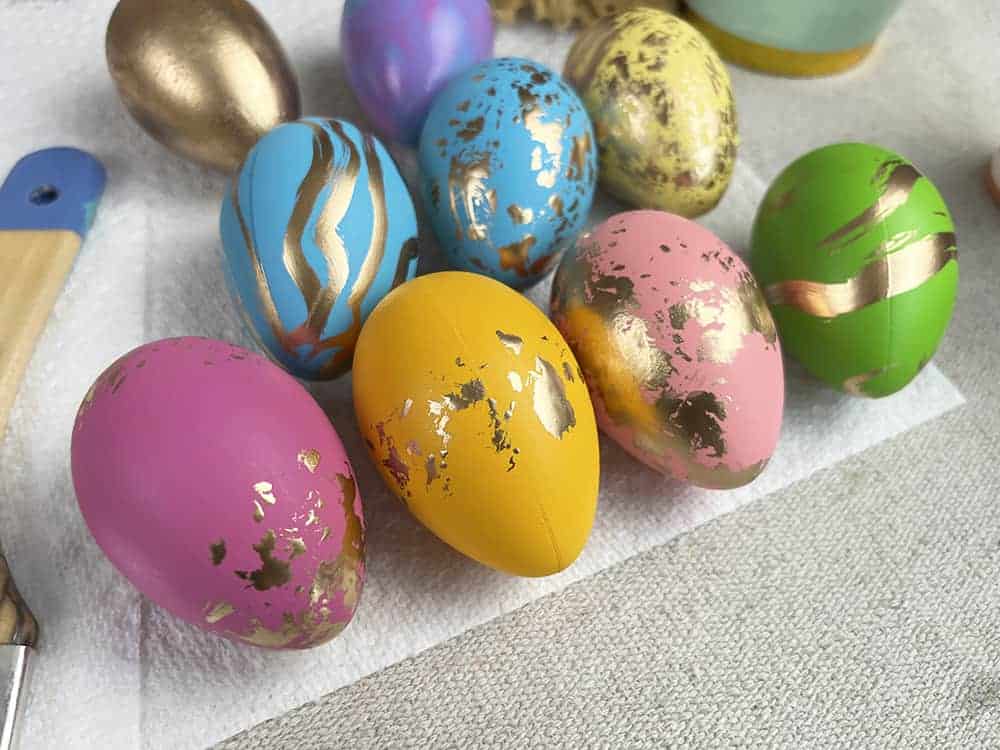
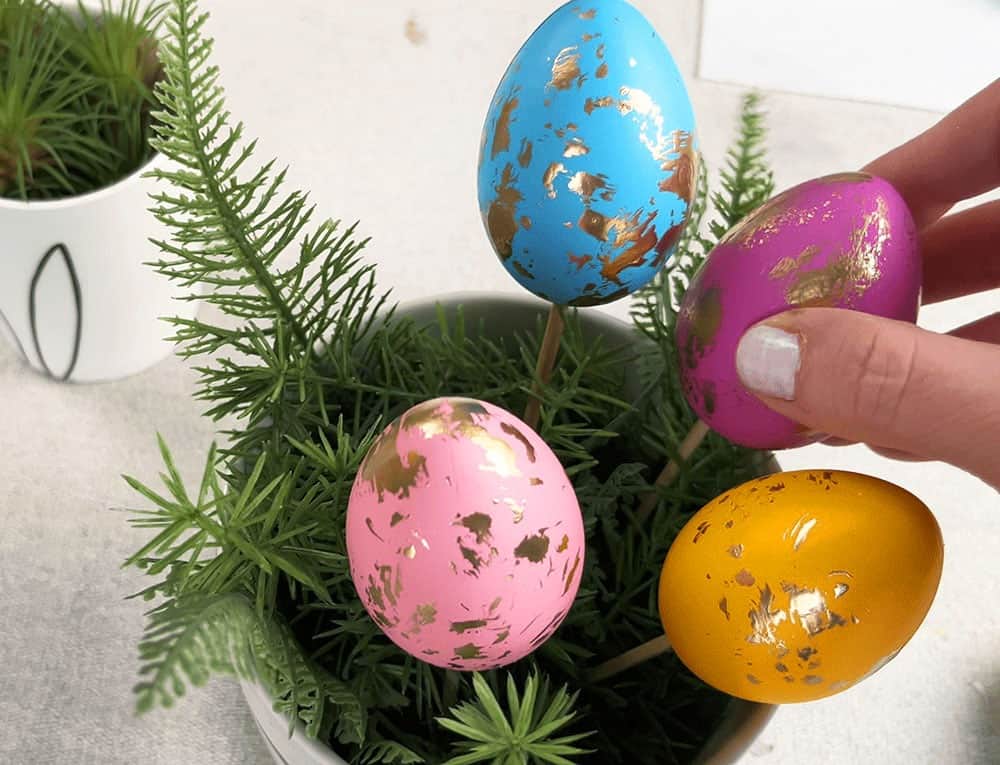
My daughter and a friend volunteered to gold leaf the eggs for me – it’s a great kid project!
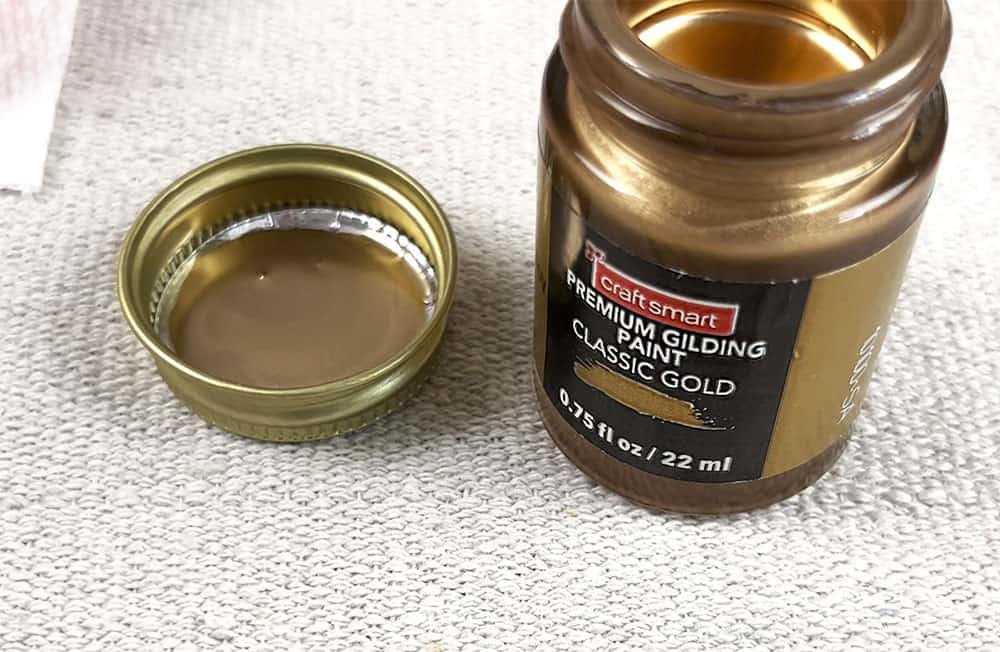
First I shook, then opened the gold leaf gilding paint and poured a little bit in two disposable cups. It’s very runny, and a little goes a really long way!
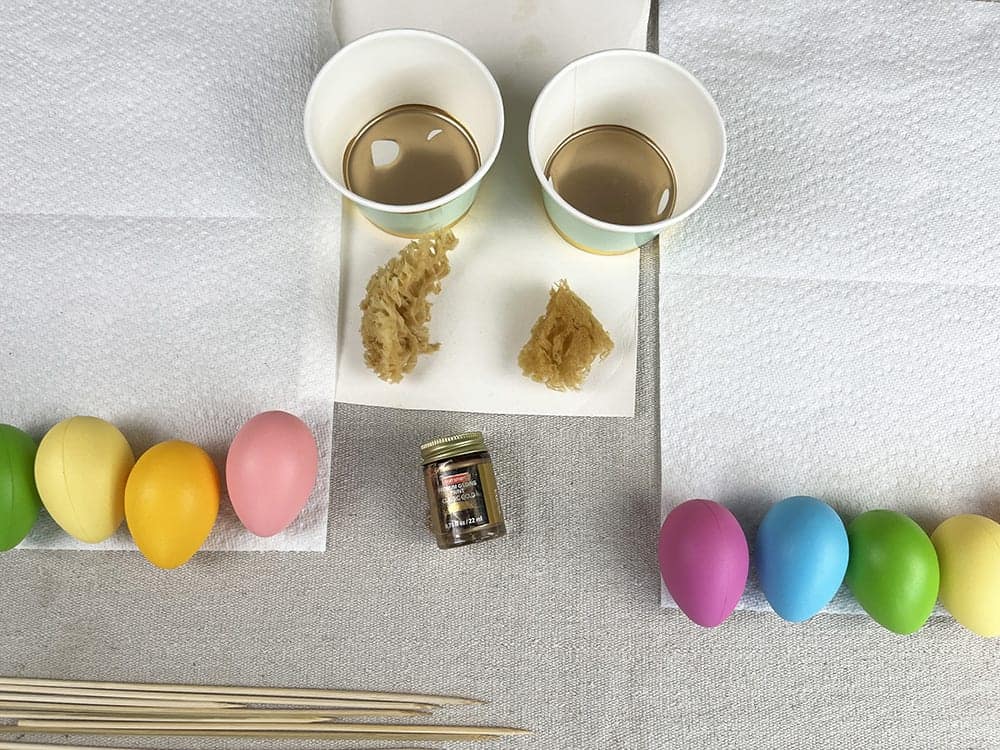
Then, I very gently tore a sea sponge into sections and the girls got to work dipping the sponge into the gold paint and tapping it onto each egg.


A warning: This project does get a little messy, so a painting shirt might be helpful.
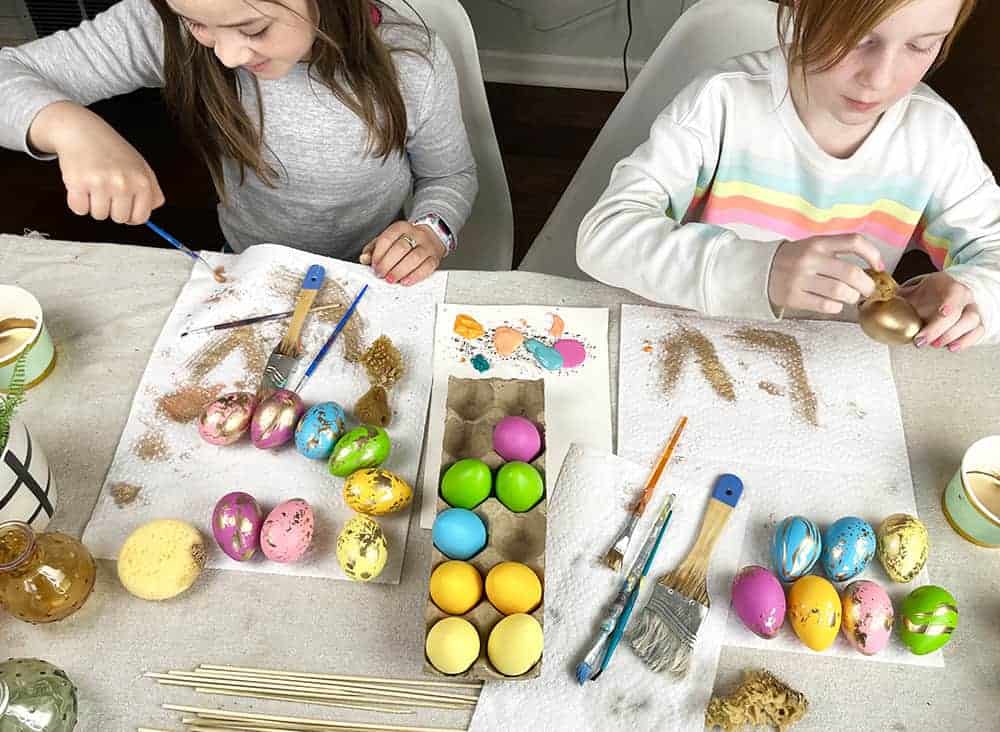
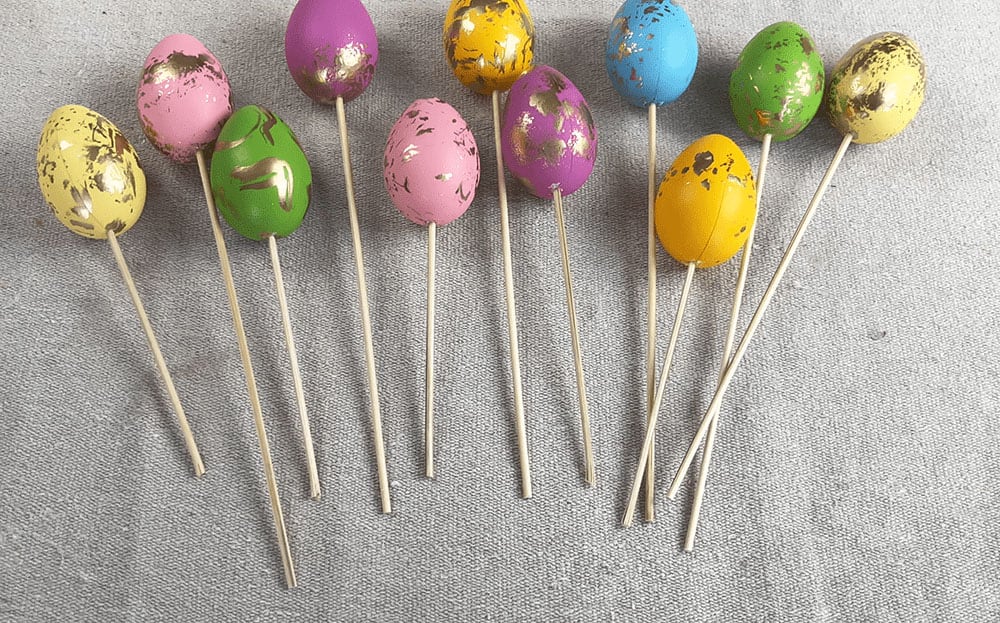
After just a couple minutes all the gold leaf Easter eggs were finished!
They completely dried in only 10-15 minutes.
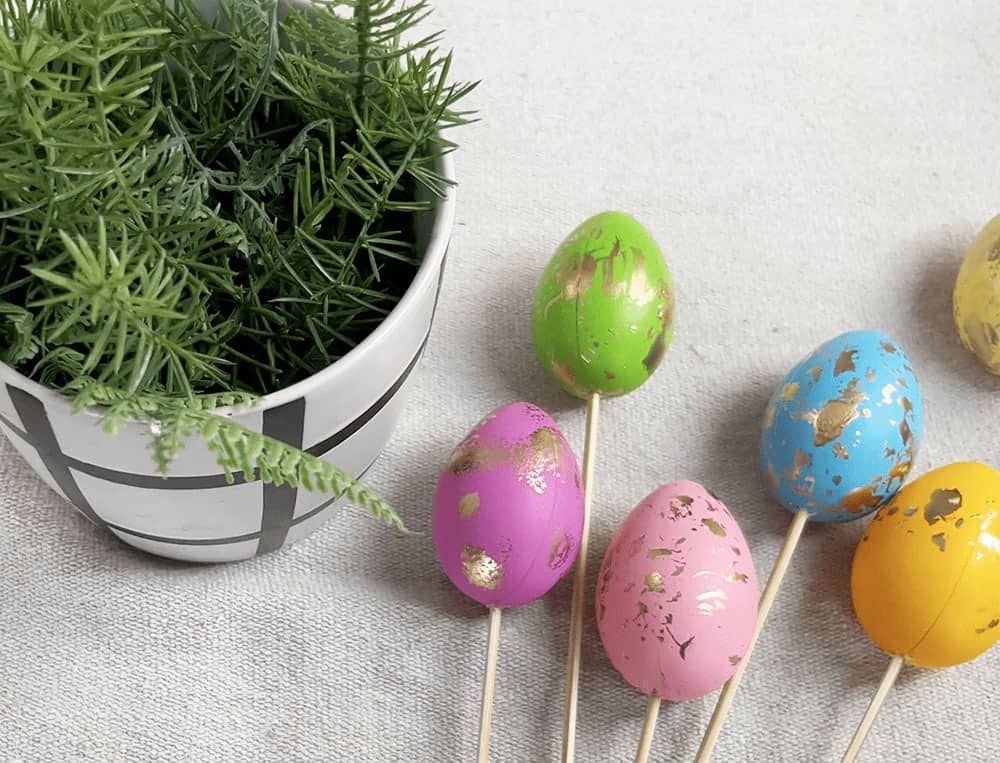
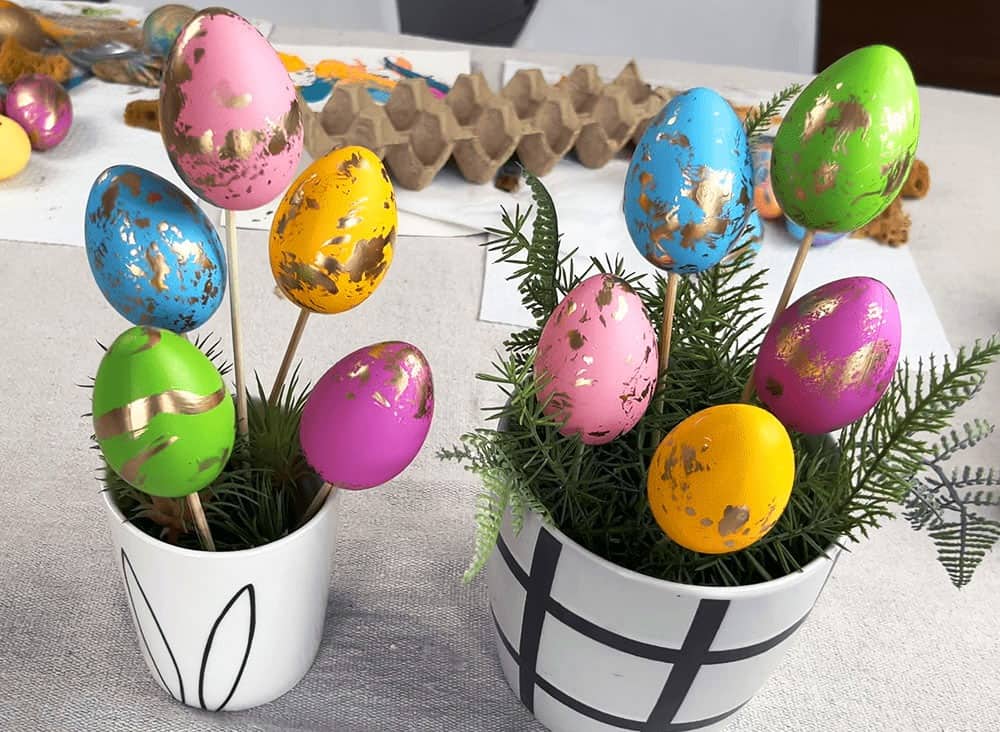
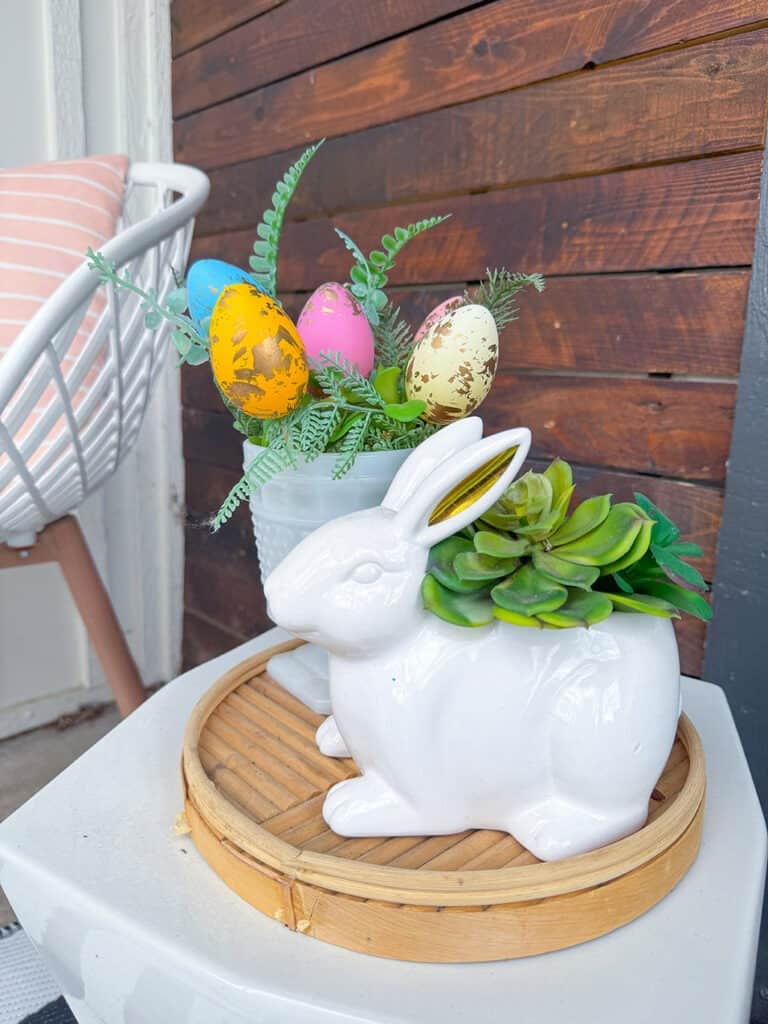
They’re so pretty on their own, but I wanted to take them a step further and make egg floral picks for use in a front porch planter.
Adding the skewers to the eggs
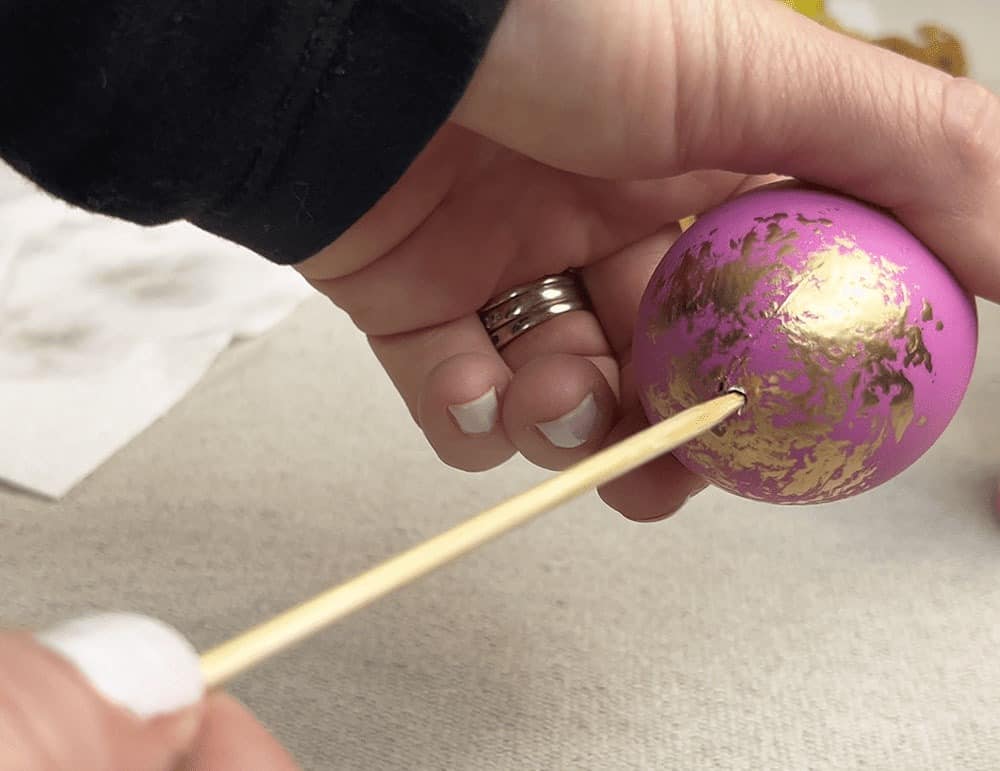
Many craft eggs are thin enough for a pointy wood skewer to puncture right through, but these were much more sturdy.
To remedy this, I grabbed our drill and some bits choosing the bit closest in thickness to the skewer.
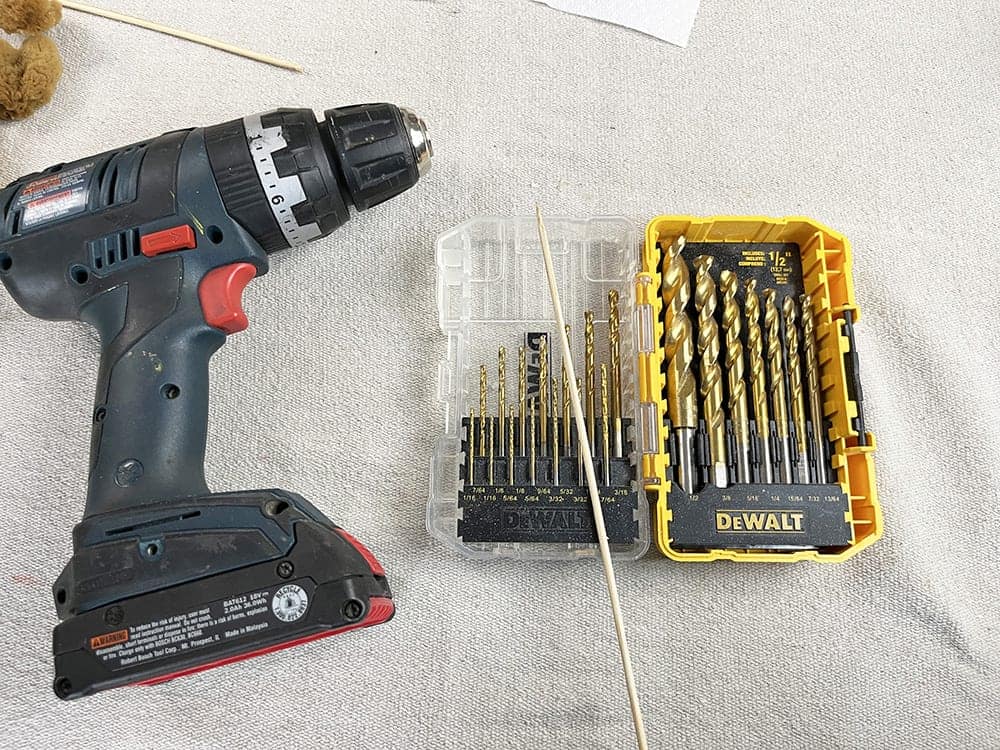
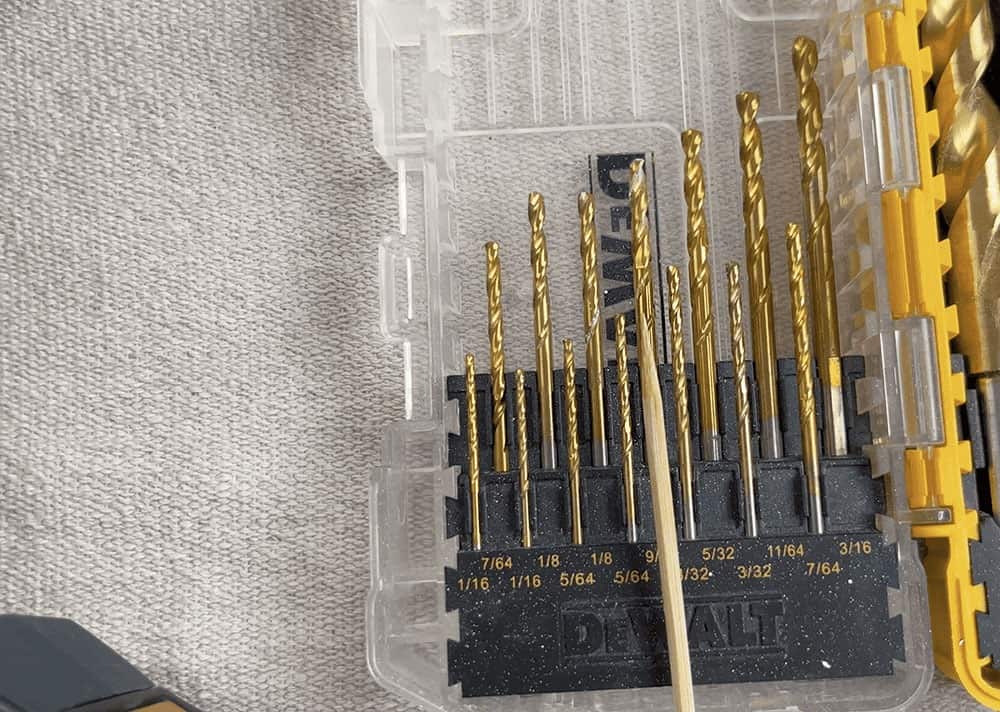
Next I easily drilled a pilot hole into the bottom of the egg. Drilling slightly off the seam keeps the egg from splitting.
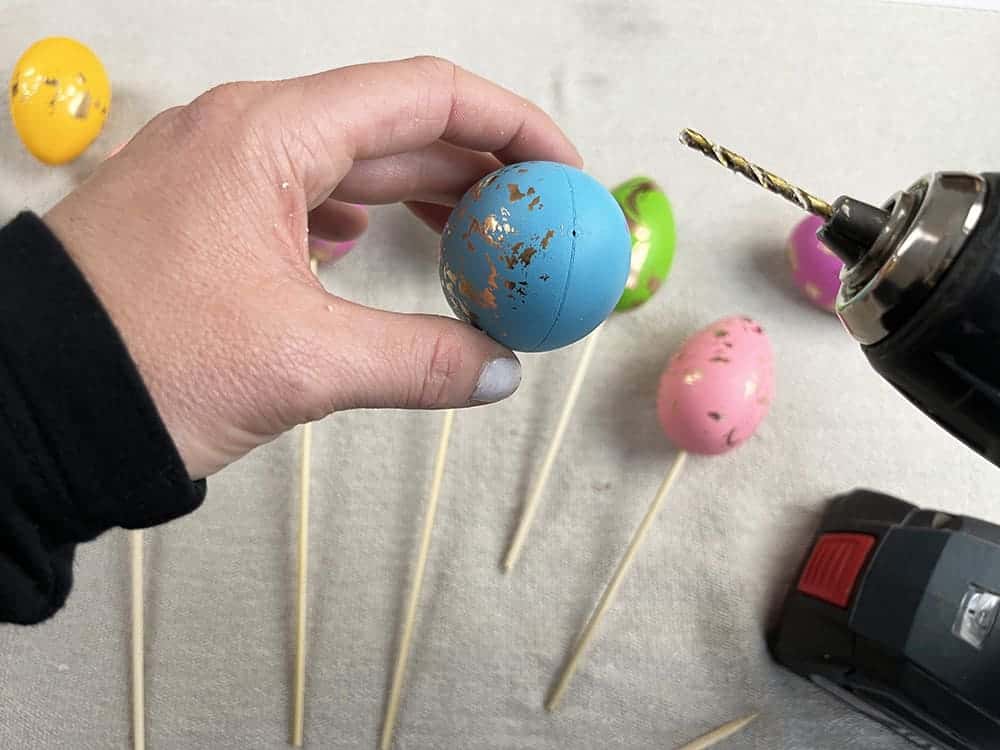
Once the holes were drilled I slid each skewer into the eggs.

They make the cutest DIY Easter decor!
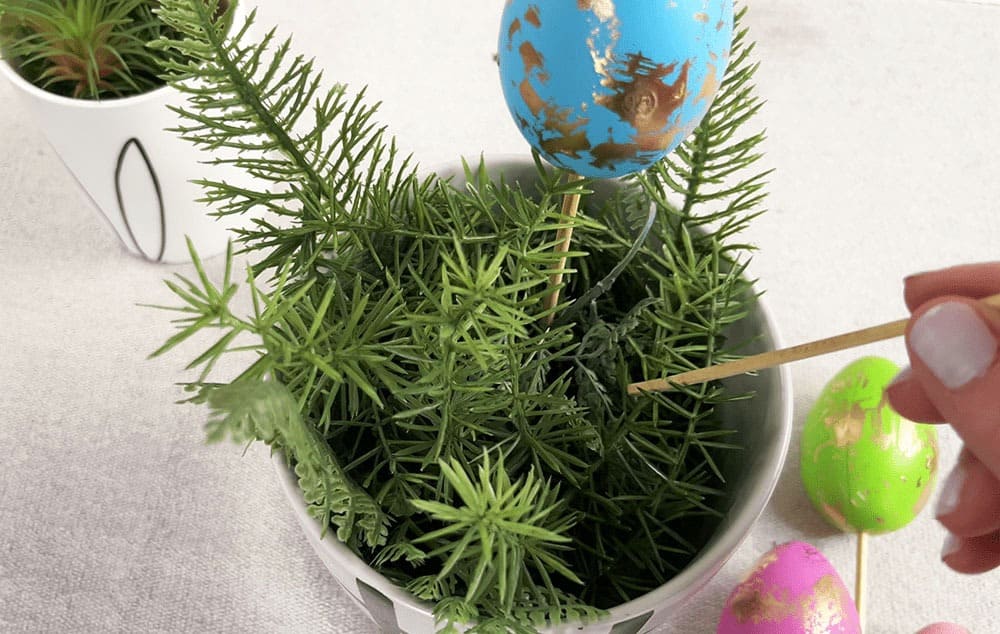
I like for my decor pieces to have varying heights for interest, so I used pliers to snip a couple inches off of a handful of sticks (step not shown).
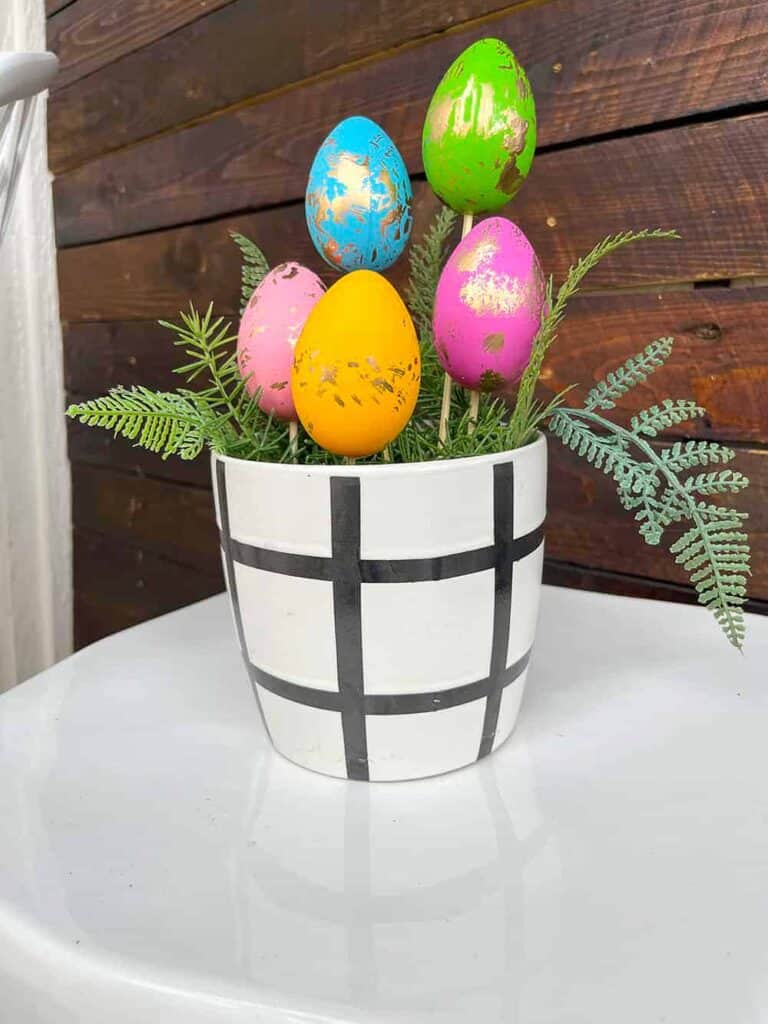
I love the look of Easter eggs in planters, so I grabbed some faux greenery and inserted it into a flower pot that I had on hand.
You can also use a real plant – totally a personal preference. The midwest weather is still a roller coaster of 80 degree days and 30 degree days , so faux works best for now.
To finish, I simply added a handful of the lollipops to the planter until I was happy with the placement.
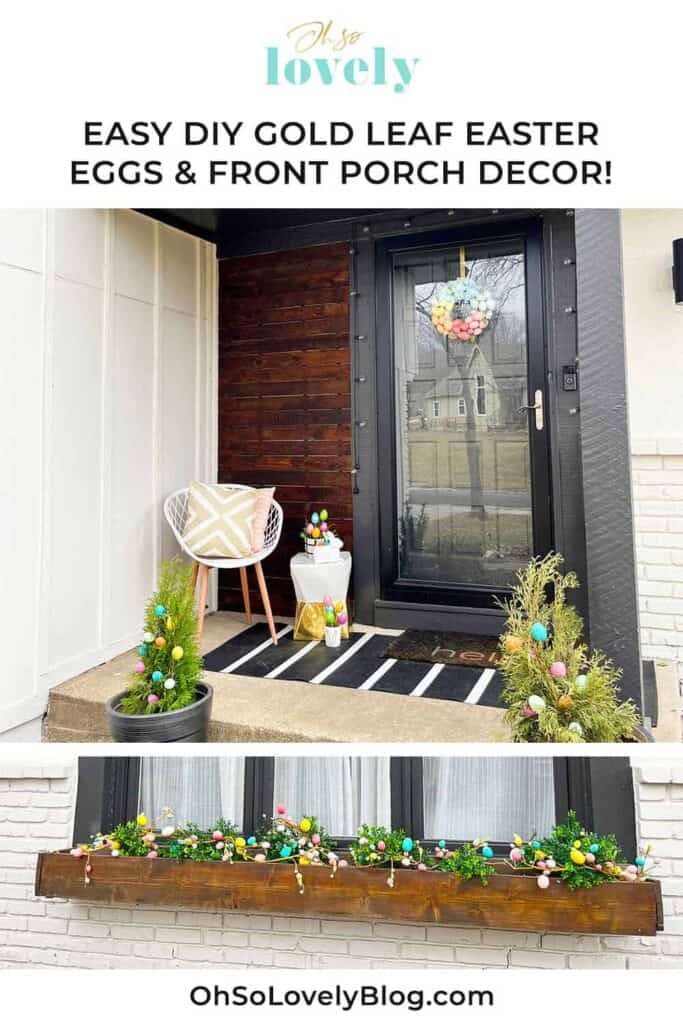
Time to head out to the front porch and window boxes to decorate!
I started off using the colorful plastic egg lollipops I made last year and placed them into our two planters flanking the steps.

Then I wiped down the garden stool and made a spot for the larger planter.
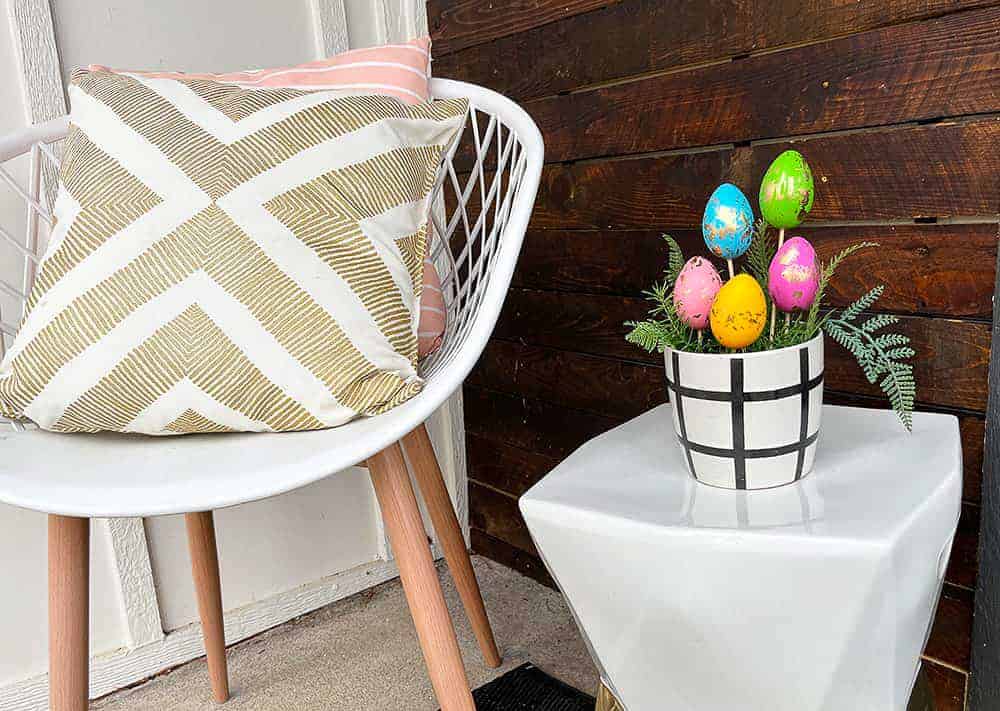
I added a couple springy outdoor pillows to the modern chair (I got mine for a steal at Home Goods a few years ago).
Something was missing, so I decided to add a glass bunny I got a few years ago at the Target Dollar Spot next to the planter. I filled it with some extra craft eggs I had on hand. I love how it looks!
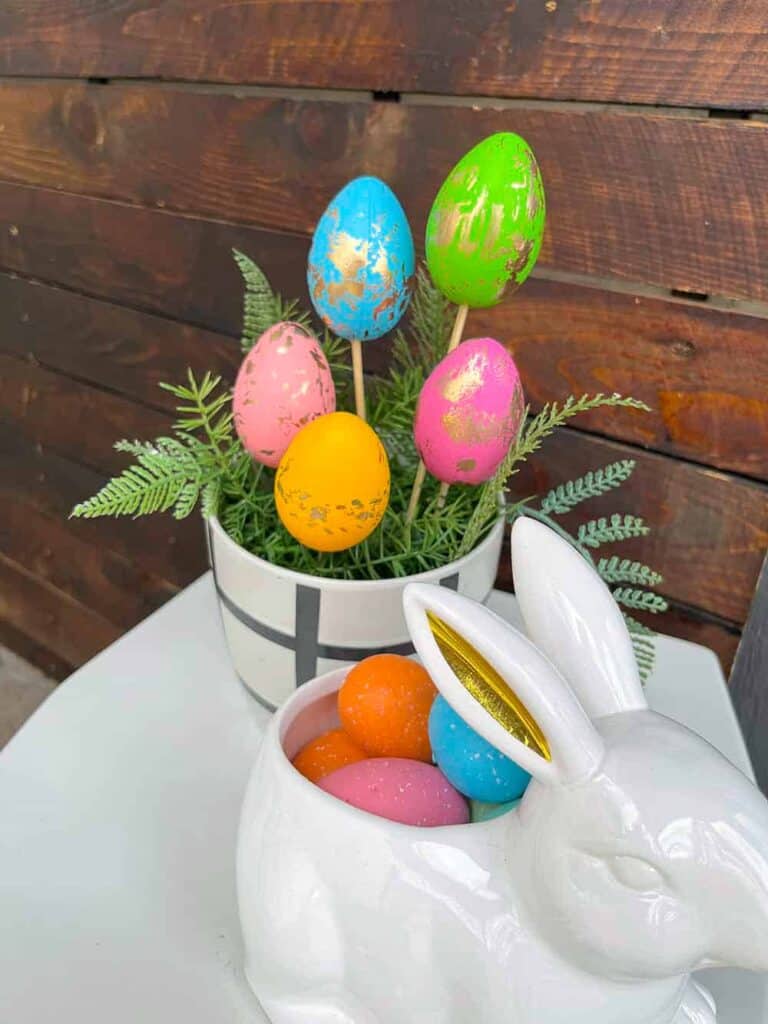
You could also add both items to a tray and instead of eggs in the bunny, you could do faux succulents. i like to mix it up each year.

I hope my DIY Easter decor ideas inspired you!
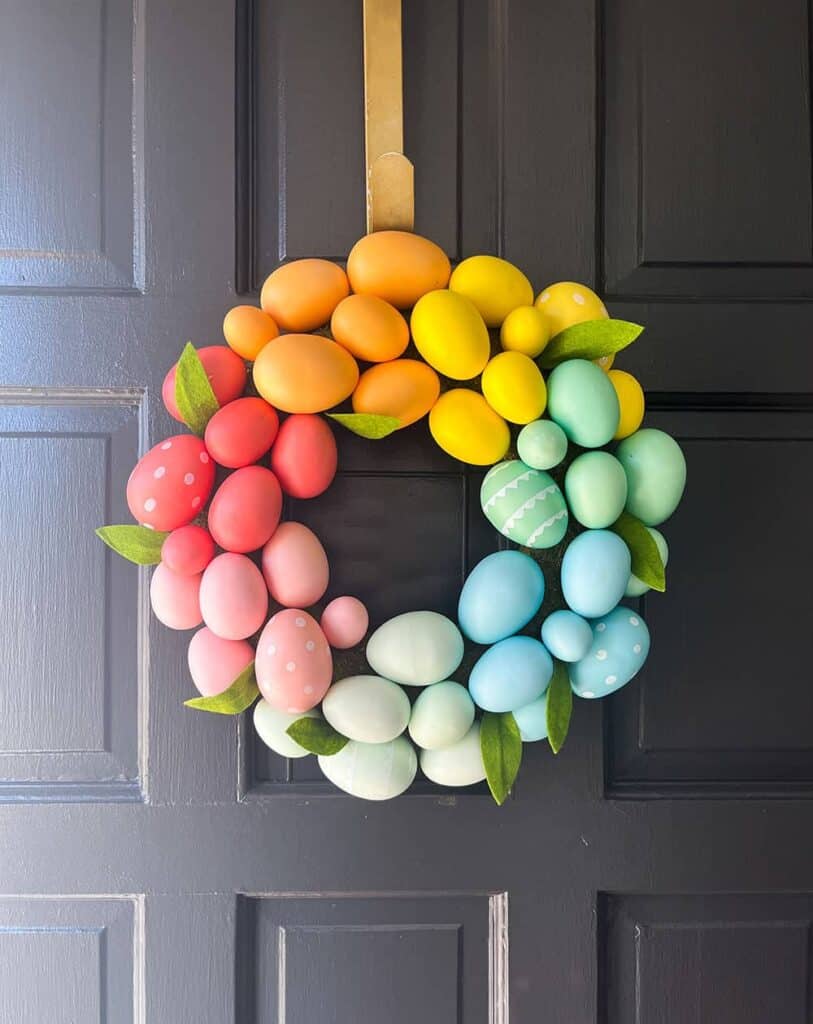
It’s not a DIY project, but I wanted to also share my super affordable Easter wreath from Michaels (similar option here and here and here).
I used to hang our wreath on the front door, but since we added our new front door, I like to hang this wreath on our larger window above the window box shown below.
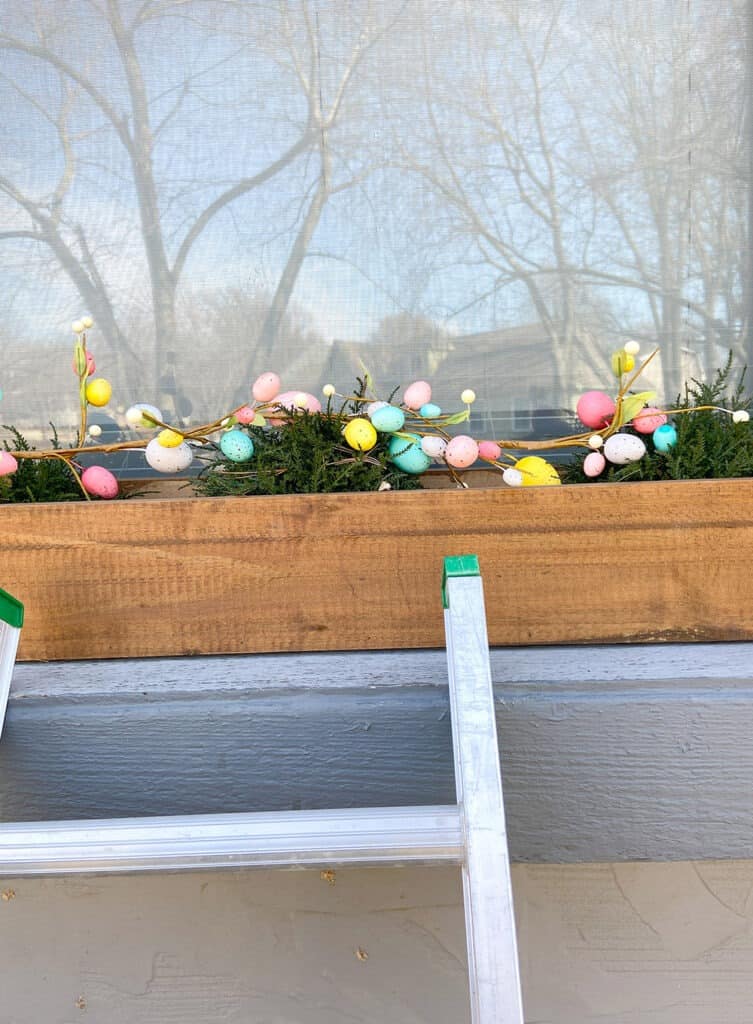
We have three window boxes that I love to decorate for Easter using simple strands of egg garland.
For the large window box I used 2 strands (similar option here) mixed with 6 faux sweet grass bushes. So easy!
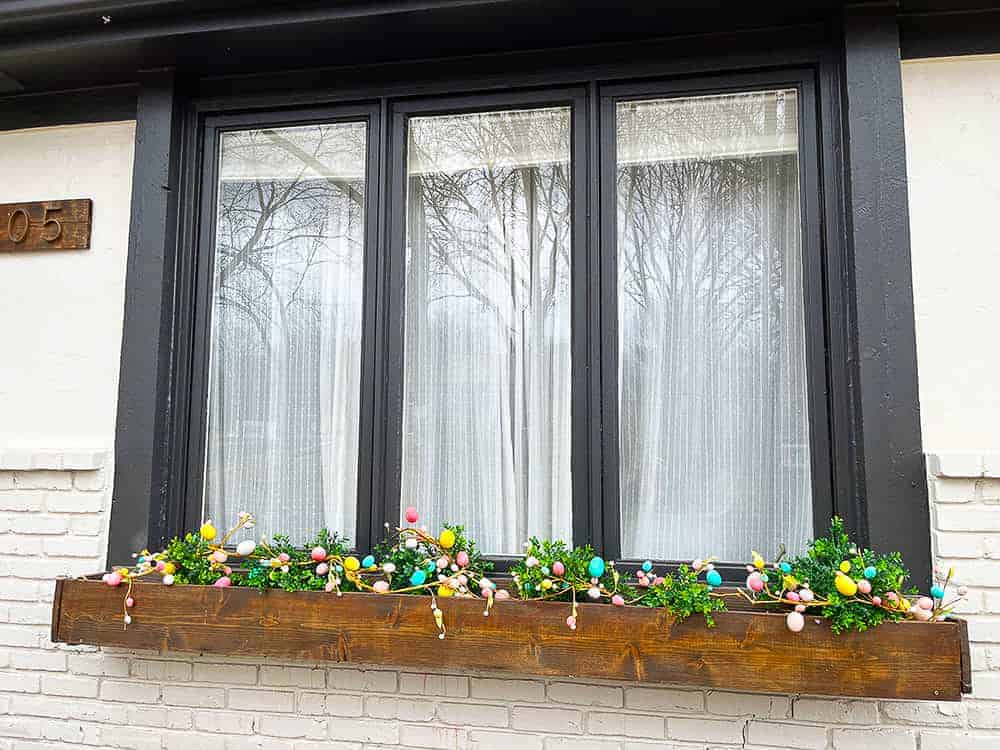
For our two smaller window boxes, I took one long strand and cut it in half before adding to the window box.

These egg garlands are soooo cute don’t you think? If you’re ore into neutral colors, Michaels has other more muted color combos.
In each box I use faux cedar bushes that come in a set of 3, and really like them for all seasons. I’d prefer real plants, but it’s too difficult to keep them watered year-round at this height (our window screens don’t open unfortunately).

I hope you like my DIY Easter decor ideas!
I always have such a great time decorating for holidays!