Do you have a dated kitchen? Learn all about our $500 DIY kitchen remodel below.
We were pleasantly surprised when the update caught the attention of Better Homes and Gardens, Apartment Therapy, and other popular publications.
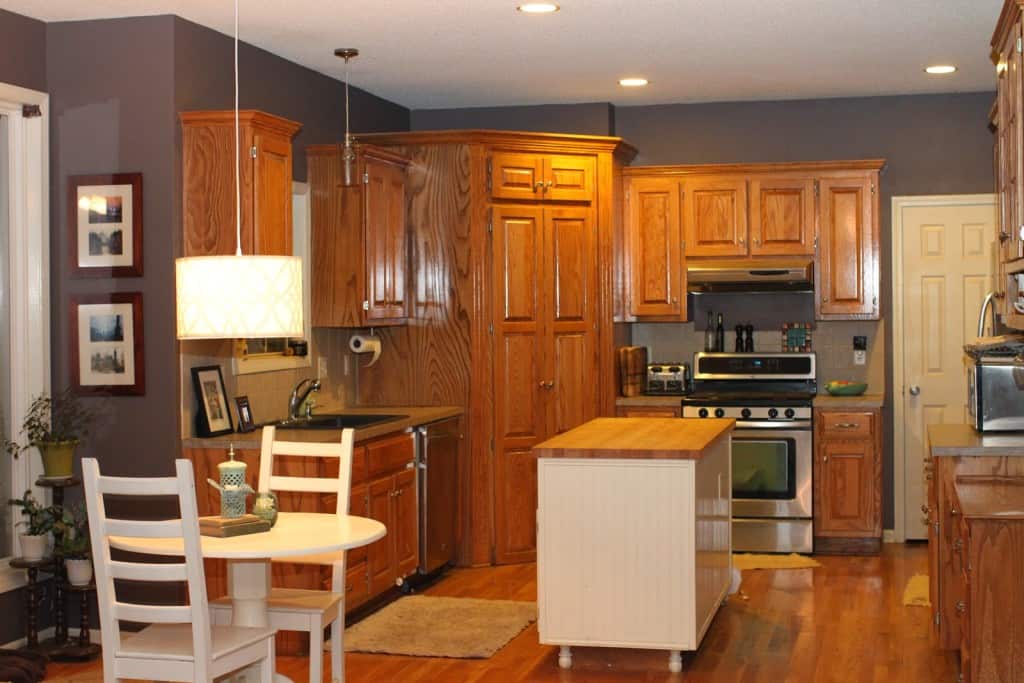
We bought our house 3 years ago and the kitchen looked something like this:
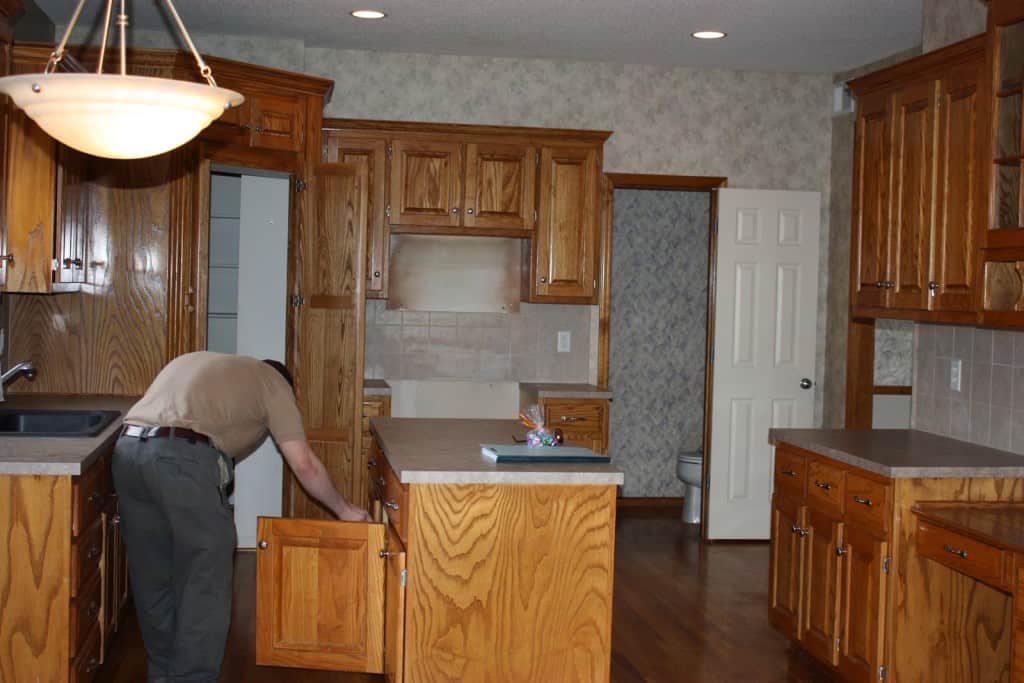
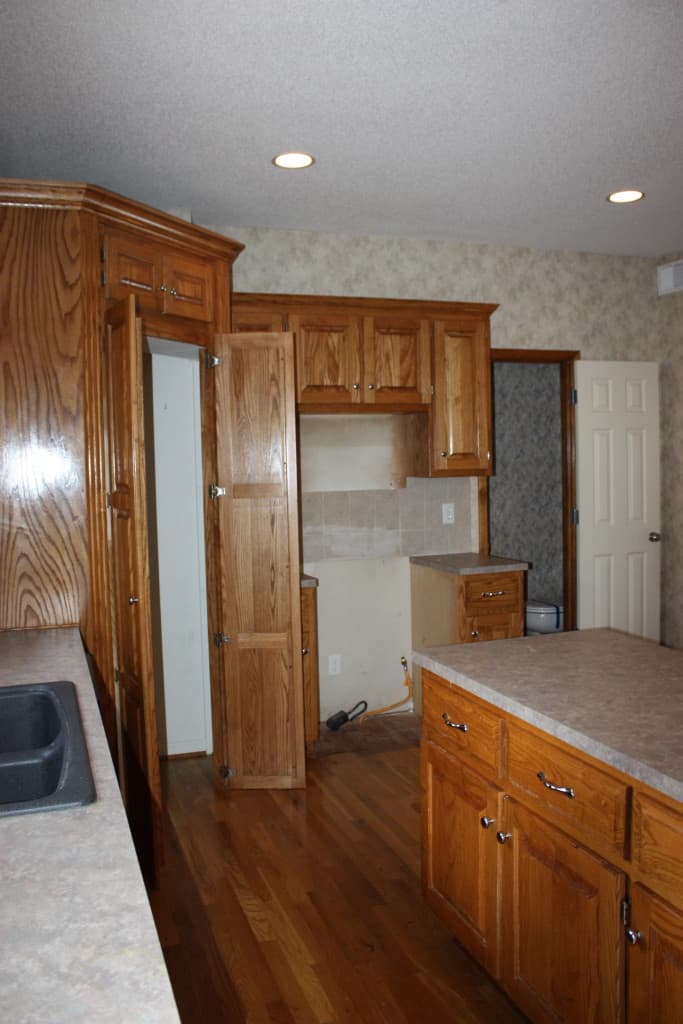
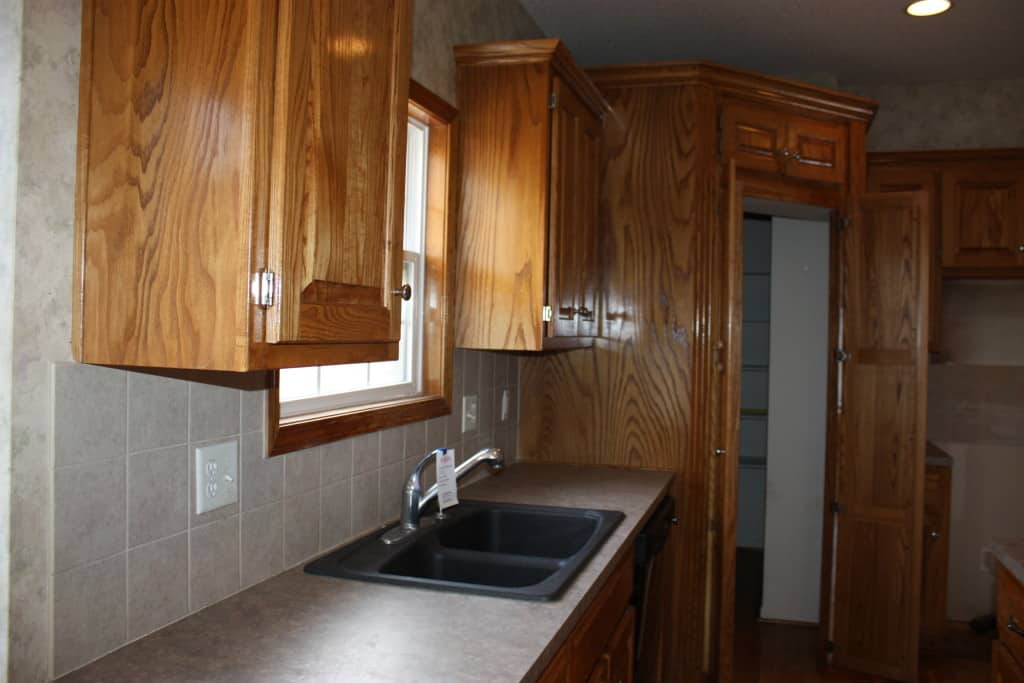

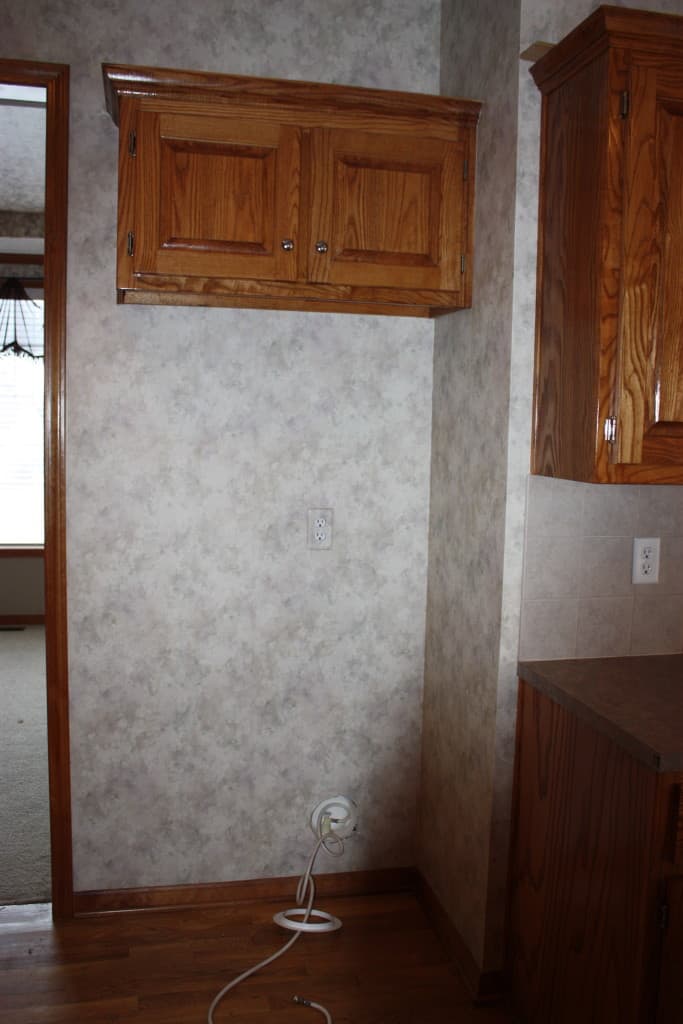
Can you say DATED?!? Even though it was built in 2002 and served as a model home for our subdivision early on, the wood everything and tacky wallpaper made it feel much older.
Thankfully Tedgar and I were able to see past this and envision something much more up to date, fresh and modern in our future kitchen.
We had to buy new appliances when we moved in, so we opted for stainless steel. This helped bring it into the now a little bit.
Then over a year ago, out of curiosity, we got a quote from a local home improvement company and to paint or stain our cabinets, install granite and a tile backsplash it was going to be roughly $12,000.
Being the frugal DIYer that I am, I just couldn’t stomach paying someone to do this project for us, and I knew Ted was handy (and patient) enough to tackle a future remodel – so I waited it out.
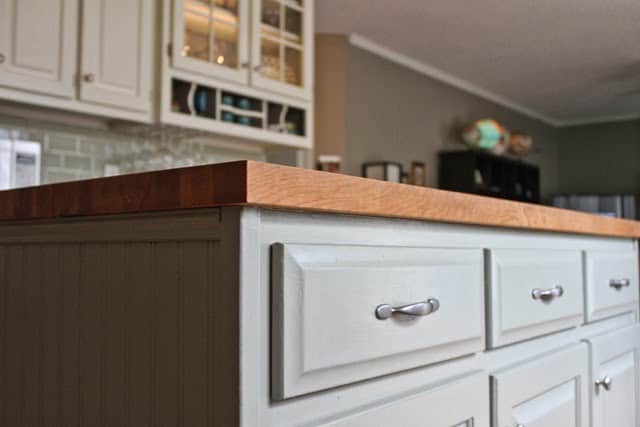
To help us “get by” with the kitchen as is for the time being, Ted added wainscoting and trim to the island and painted it a creamy white (Behr, lunar light) and I painted the walls a deep eggplant (an accidental color…long story) and the window and door trim the same creamy white (these were the only colors that sort of coordinated with the purple/mauve countertops and backsplash…barf).
Then the addition of the updated pulls (which Ted got for free) and the butcher block island top (a very nice gift from Ted’s mom) helped make the room feel more tolerable (I’m so dramatic, I know:).
IN PROCESS PHOTO
Until we decided to pull the trigger on a compete $500 DIY kitchen remodel (which took us almost 2 months from start to finish).
Here are the details:
CABINETS
While perusing Pinterest one day I ran across this blog post with very detailed directions on how to paint your cabinets WITHOUT SANDING them first, I got the bug to finally paint the cabinets. I quickly got my hubby on board and we set out to Home Depot to buy our supplies the very next day (which ran us about $65).
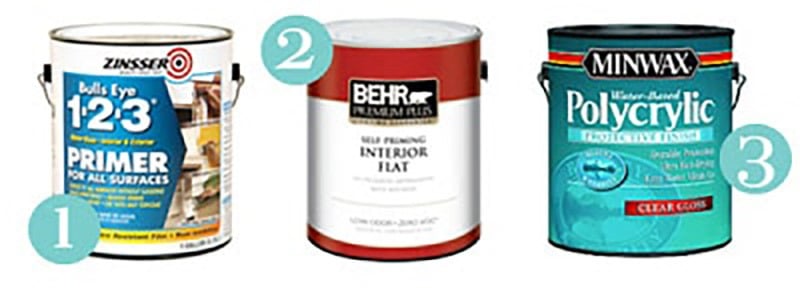
1. Bulls Eye 1-2-3 Primer for all surfaces
This is crucial and the only way I recommend painting cabinets without sanding them first.
2. Behr paint in lunar light (We used flat, but if I were to do it again, I’d use eggshell/semi-gloss or similar and use a paint roller rather than a brush for a smoother finish.)
3. Polycrylic Water Based Protective Finish (semigloss)
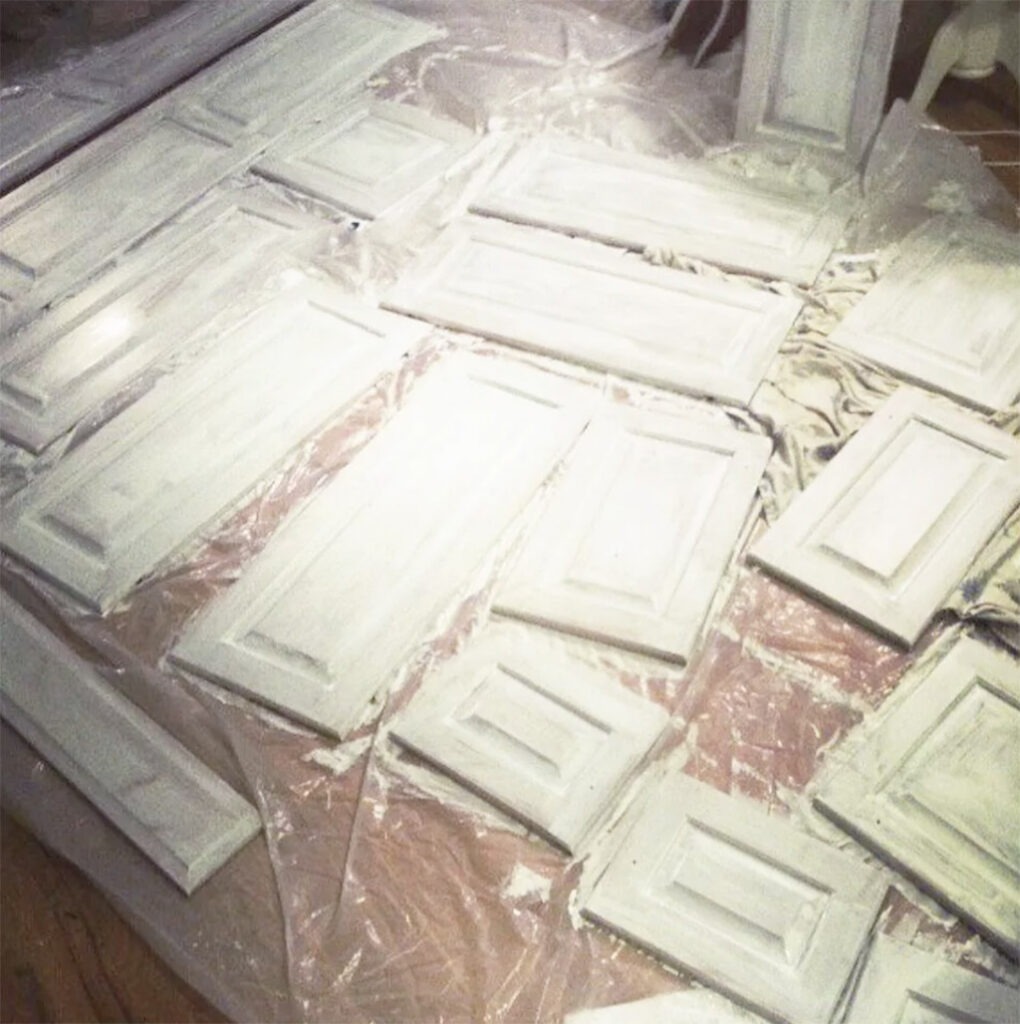
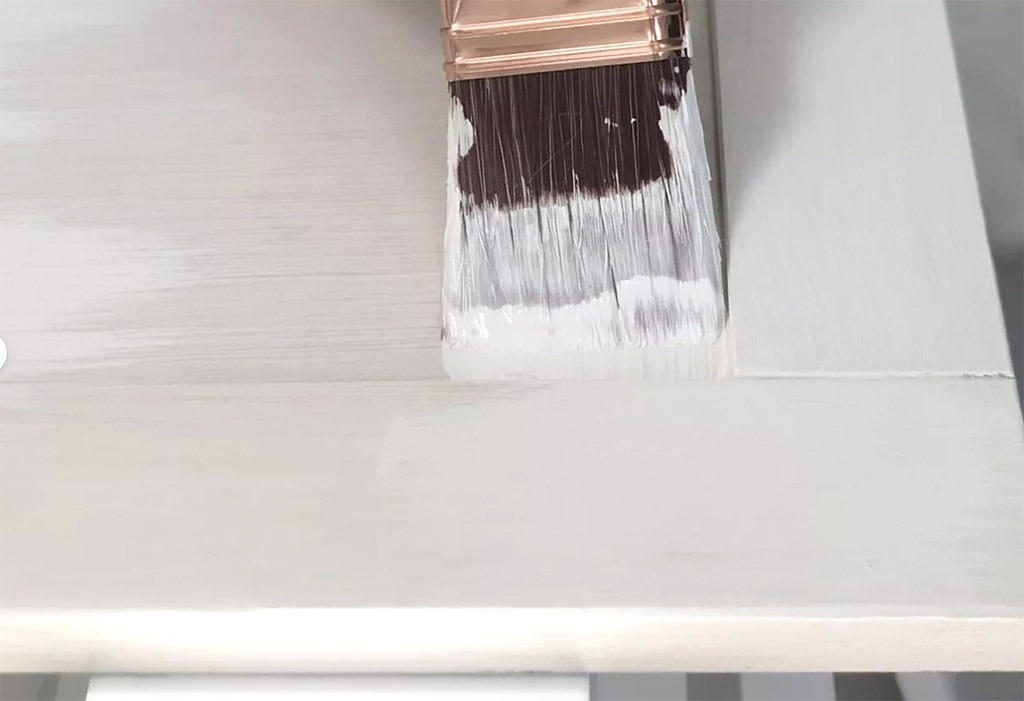
We immediately got to work and after 3 days of priming, painting and sealing, we were done with the cabinets. We couldn’t believe how much brighter the kitchen had become.
That was exciting and all…but I couldn’t stand having the fresh white cabinets and keep our existing purple/mauve laminate countertops and backsplash!
COUNTERTOPS
We wanted new granite (or similar) countertops, but with a new roof, a baby on the way, a home refi (and a few other larger expenses) we just couldn’t swing it.
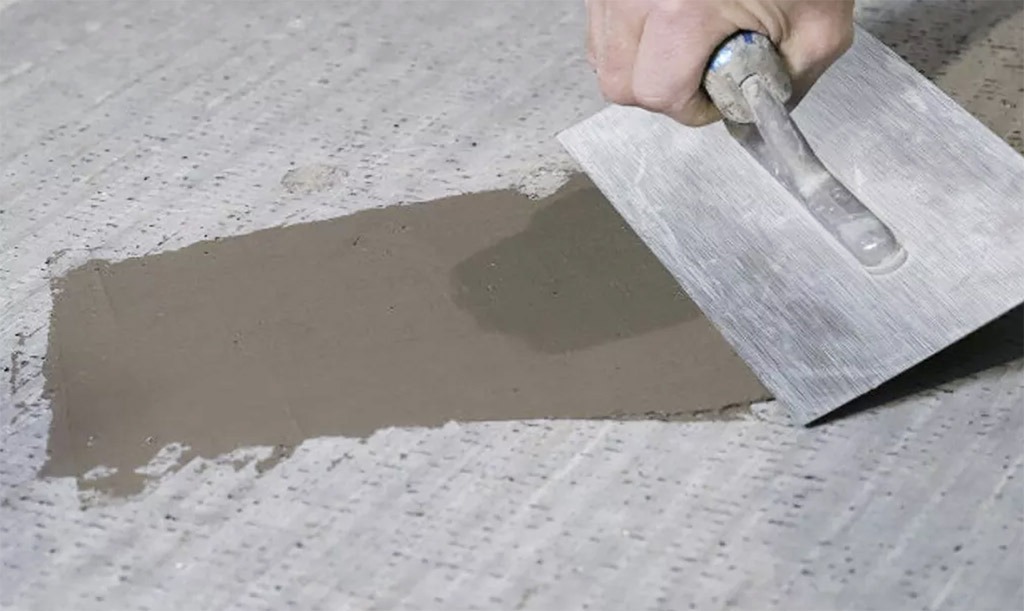
We investigated pouring our own concrete countertops, but decided that we were not ready to take the plunge quite yet, so I once again turned to Pinterest, where I stumbled upon this blog post with steps detailing how to pretty easily convert your existing countertops to polished concrete coated ones. We decided that this was the only way for us to go (at least for now until we are possibly ready to professionally update them in the future).

We ordered our 4. Ardex Feather Finish ![]() concrete mix from Amazon (1 bag was all we needed and it was under $20). It arrived on or doorstep a few days later and Ted got to work.
concrete mix from Amazon (1 bag was all we needed and it was under $20). It arrived on or doorstep a few days later and Ted got to work.
He followed the directions on the blog very closely, and a few days later we had smooth concrete covered countertops.
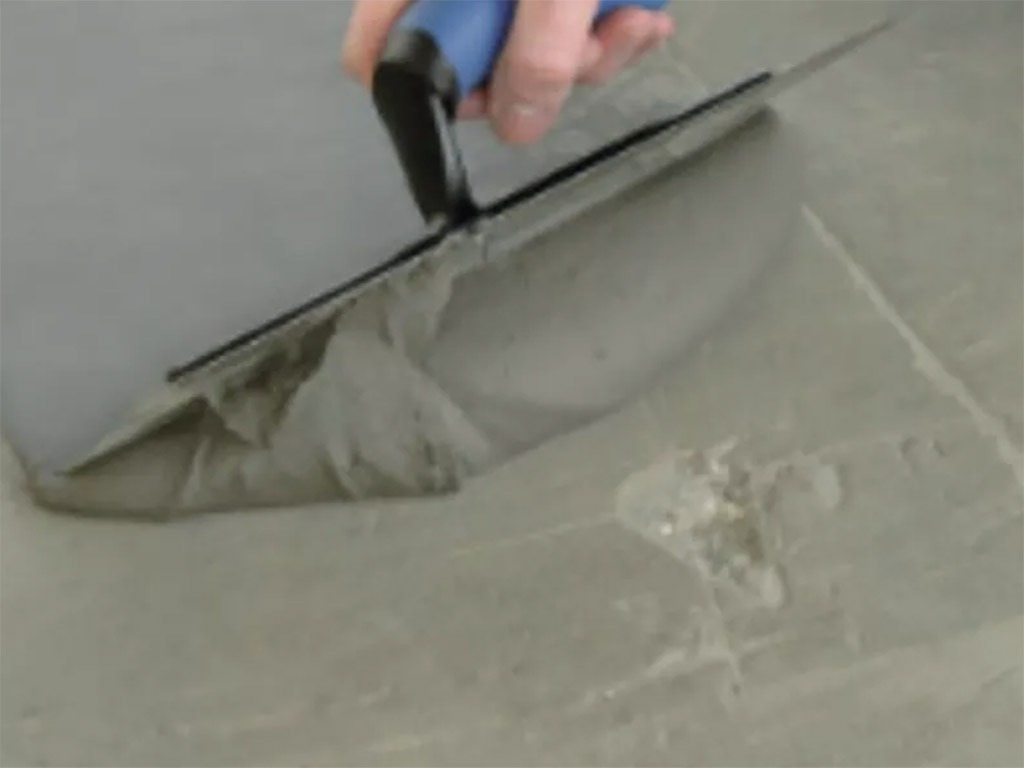
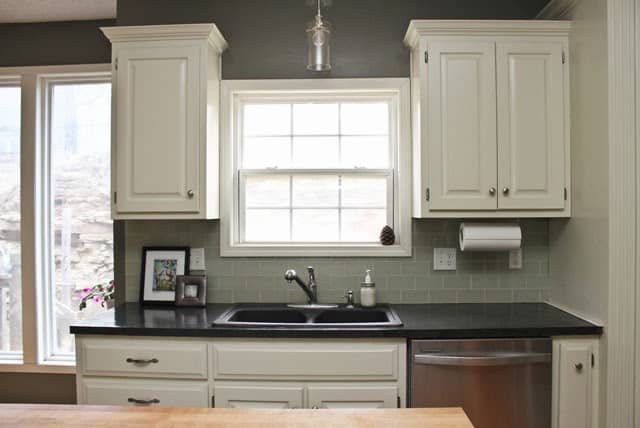
Ted took an orbital sander to them once they were dry to smooth them out even more (thanks mom and dad). We wanted to stain the concrete a darker charcoal color for a nice contrast, so we went to Home Depot and got this 5. concrete stain in Dark Coal STC-35 (for around $25).
We applied 2 coats with a spray bottle and a small paint roller. We wanted the end result to be very high gloss (wet look), so after the stain dried, we applied 4-5 coats of this 6. wet look sealer (also from Home Depot for around $25).
***Just a warning. The concrete stain has a navy blueish tint to it for a couple weeks or so after it is applied. We sealed over it while it had the blue tint. It eventually turned to black, so don’t be alarmed (like I was).***
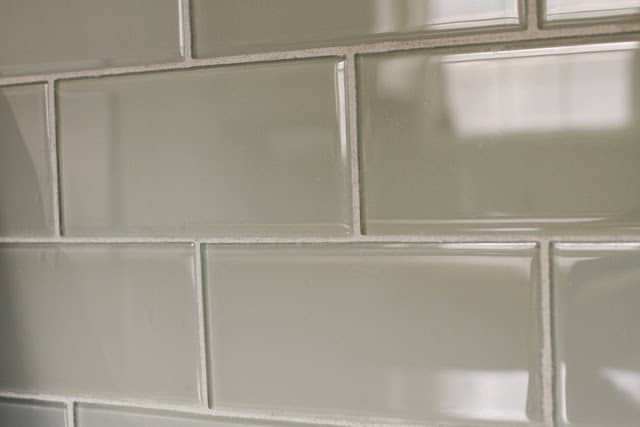
BACKSPLASH
Tiles came next…we knew all along that we would go with 3″ x 6″ subway tiles.
We have enough white subway tiles already on hand to complete the project (we got them for free awhile back), but felt that they might be too much white.
After collecting samples from various places, we finally decided on 35 sq. ft. of light olive colored glass subway tiles. This was our only “splurge” for this project (ran us just under $350 shipped).
We removed the old tiles and realized that there was no way around the fact that no matter how gentle and precise we were, we were tearing off drywall with each section of removed tile (nothing is ever as easy as you think it is going to be).
We decided that Ted would just rip the walls out from behind the older tile and re-sheetrock the areas that were damaged. We purchased the new sheetrock (for around $10) and Ted measured, cut and installed (he is my hero).
ISLAND PAINT
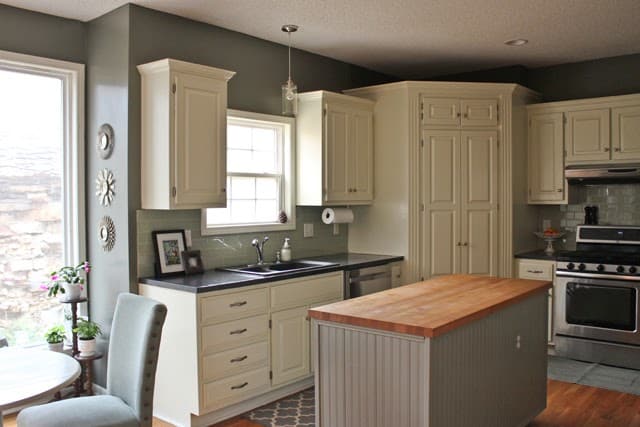
I painted the walls a deep shade of grayish green (Martha Stewart, thunderhead for about $25).
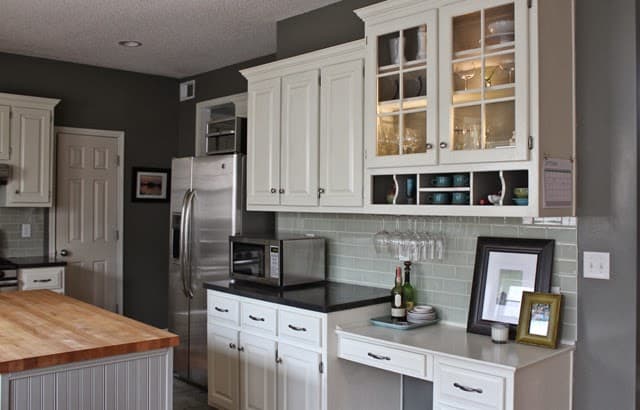
Then for the island I mixed the same wall paint with the creamy white paint (Behr, lunar light) in a ratio of 90 (thunderhead) / 10 (lunar light) and painted the island. I used the same paint mixture to paint the insides of our one double glass front cabinet and then installed 3 battery operated lights inside the cabinets to add some much needed light and interest.
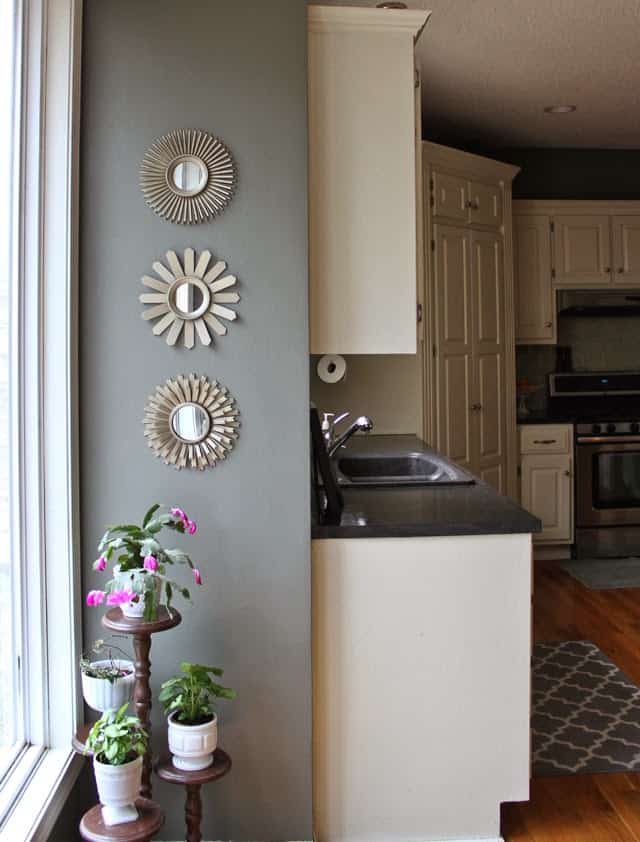
THE AFTER
…and FINALLY here are the finished results for our $500 DIY kitchen remodel:

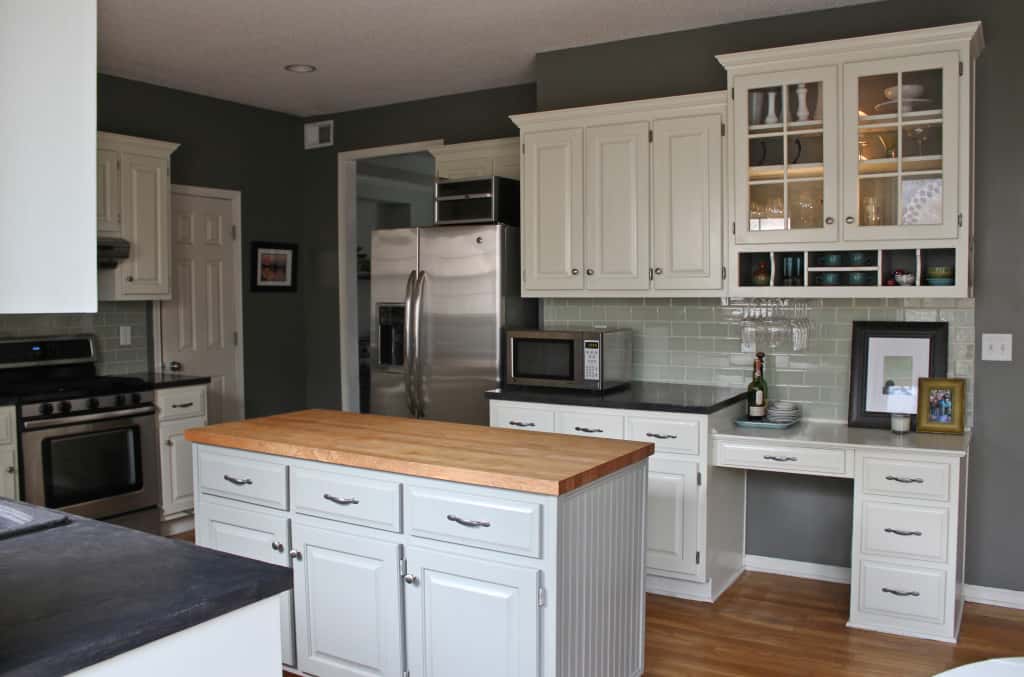
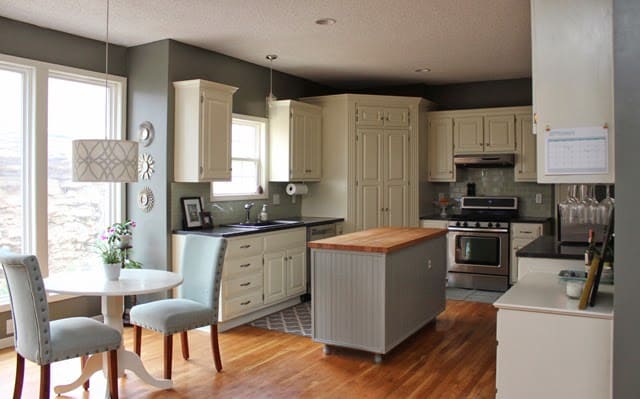
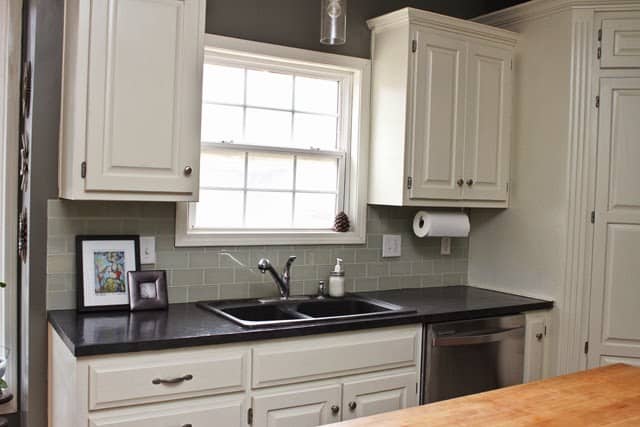
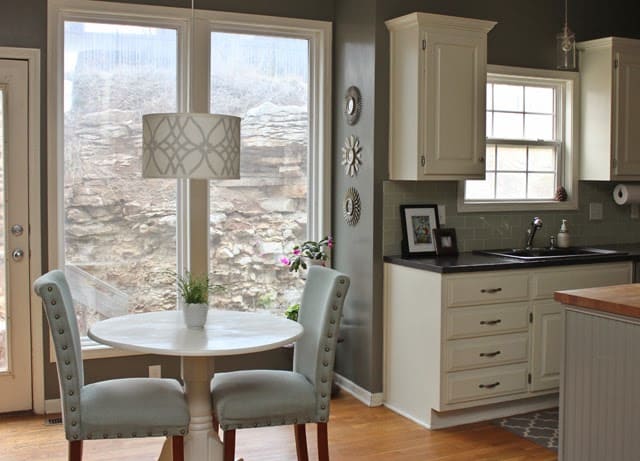

I think our $500 DIY kitchen remodel came together pretty nicely (if I do say so myself) and the grand total was only $520!
If we would have used the tiles we already had on hand it would have only been $173…crazy! We are very happy with our splurge though.
You can also check excellent articles on Bob Smith Tools.
*** Update:We recently sold this house. After 2.5 years, the cabinets were holding up great. The countertops were also doing really well. There are a few small chips in them, but I fix them by taking a Qtip of the concrete stain to them and adding another Q-tip of the sealer or by touching up the paint as needed. ***
Pin it for later!

PS. If you’re interested, you can see a few of our other home improvement projects by clicking here and here.


Splendid job!
When you can take $500 and perform a makeover like this, you deserve the great comments that have been left.
Great Post !!
Thanks for sharing diy countertop resurfacing ideas.
Beautiful as everything for kitche remodel ideas in ohsolovelyblog website. amazing look!
http://aplushomeimprovements.com
Now, you're talking. I like how you brought another feel to the whole kitchen with just the painting alone. It makes things look more finished. It also makes your kitchen seem more vibrant, where bits and pieces stand out and can be easily identified. That's a great first step for an overhaul. Not bad for $500.
Arthur Bryant @ Contractor Express
Stunning results with low cost budget. Great job!
Wow, that kitchen looks amazing! I usually hate covering natural wood color, especially with paint, but that white looks really great, especially with the natural island-top. I simply cannot believe it cost so little; I may have to do my own now. I'm inspired! http://www.economykitchenbath.com
good info thanks
Its Beautiful.You’ve done a wonderful job in this room. I know you must really enjoy using your kitchen now–it’s beautiful! Kitchen remodeling Austin
Your $500 seems to have been so maximized with that kitchen remodel. Painting the surroundings with light colors is a very brilliant decision. The kitchen became lighter and relaxing, and I'm sure you're enjoying the times you spend in there. Thanks for sharing that, Audrey! Kudos and all the best to you!
Rick Greer @ Finlay Brewer
Oh! The result is very beautiful! I never really liked the all brown-colored kitchen, and bravo for the great transformation that you have done. So classy and elegant. Two thumbs up for this project.
Thanks so much!! 🙂
It looks a lot better now, and it is much easier on the eyes. Literally. It’s good that you used these fairly light hues, and a color palette that is pretty well-balanced; the whole area looks more refreshing than before. Anyway, thanks for sharing your kitchen remodel with us. Cheers!
Essie Reed @ Valley Home Improvement
Just wondering what brushes/ rollers you used on the cabinets to get such a smooth, no-paint-brush-lines finish? Your kitchen turned out beautiful and I am making a Teepee for my little one's B-day as we speak 🙂 LOVE your blog!!
We used purdy brushes, and you can see some strokes :/. We wish we would have brushed the paint on and then gone over it with a paint roller. I hear that works really well.
good luck on the teepee. How fun!!! 🙂
hey there! so we're buying a house with those awful oak cabinets 😛 did you just paint the concrete counter stuff right on top of the linoleum? thanks!
No. We peeled/chipped the laminate off of the top, which left only plywood. We applied the ardor tot he plywood. This link might help: http://karapaslaydesigns.com/diy-black-concrete-island/
It's absolutely beautiful…and convinces me more than ever that I really want my white kitchen cabinets and gray walls.
Thank you!!! 🙂
I am really loving the way that this kitchen turned out. Everything about it looks great and I can't believe how inexpensive it was for everything. This post definitely inspired me and I want to remodel my kitchen now. I hope that it will turn out as good as yours did. Thanks for the post and the information. http://www.mckkitchenshalifax.ca/products/products-1
Hey! I LOVE your kitchen transformation! I'm trying to convince my husband to do these countertops! I have a question about painting your kitchen cabinets…do you paint the inside fo the cabinets too, or just the doors and the door frames? Thank you!
Thank you! We painted just the insides and outsides of the doors. 🙂
I love your results! I'm curious how the countertops are holding up to wear and tear? I've heard stories about staining and scratching, have you experienced this?
Thank you! they don't stain, but they do scratch a bit if a ton of force is accidentally applied or something gets stuck on and then picked off. When this happens, I just take a tip dipped in stain and dip it onto the area. That fixes it. It's not hr most perfect thing, but great for the price. We have had ours for 2 years and they still look pretty darn good. 🙂
This looks amazing! What a transformation!
Thank you very much! 🙂
Beautiful! Great job! Thanks so much for sharing your experiences with us!
It take me long to find the best epoxy coating company Northern California. I called them up and my job was done in a week!
Hi there! I found your blog on the YHL forum for growing blog readership. What a great transformation, you must be so thrilled with it! I love the Ardex countertops and painted cabinets and will definitely refer back to this when I'm ready for a kitchen reno.
Thanks Cathy!! I hope your kitchen reno goes smoothly when you are ready to pull the trigger 🙂
wow! You did an amazing job! I love everything. I need to find some way to change my countertops, so I might just try these concrete counter tops.
Thank you Elizabeth!!
How did your sealant hold up? I did nearly the same thing on my countertops and the sealant isn't fully water proof. Oil has gotten through and in a few small places where somebody left something sticky overnight the sealant layer has peeled off.
It is holding up very well so far Alicia! Way better than expected. 🙂
Your kitchen make-over is fantastic. Love the colors you used. I came over from Oh, Hello friend and I am loving all your printables. I got a few of them. The white feathers on gray are so lovely. Thanks so much!!
Hi Katja. Thanks so much! 🙂
Glad you could use some printables!!