Learn how to make a super unique Halloween wreath with only a handful of supplies!
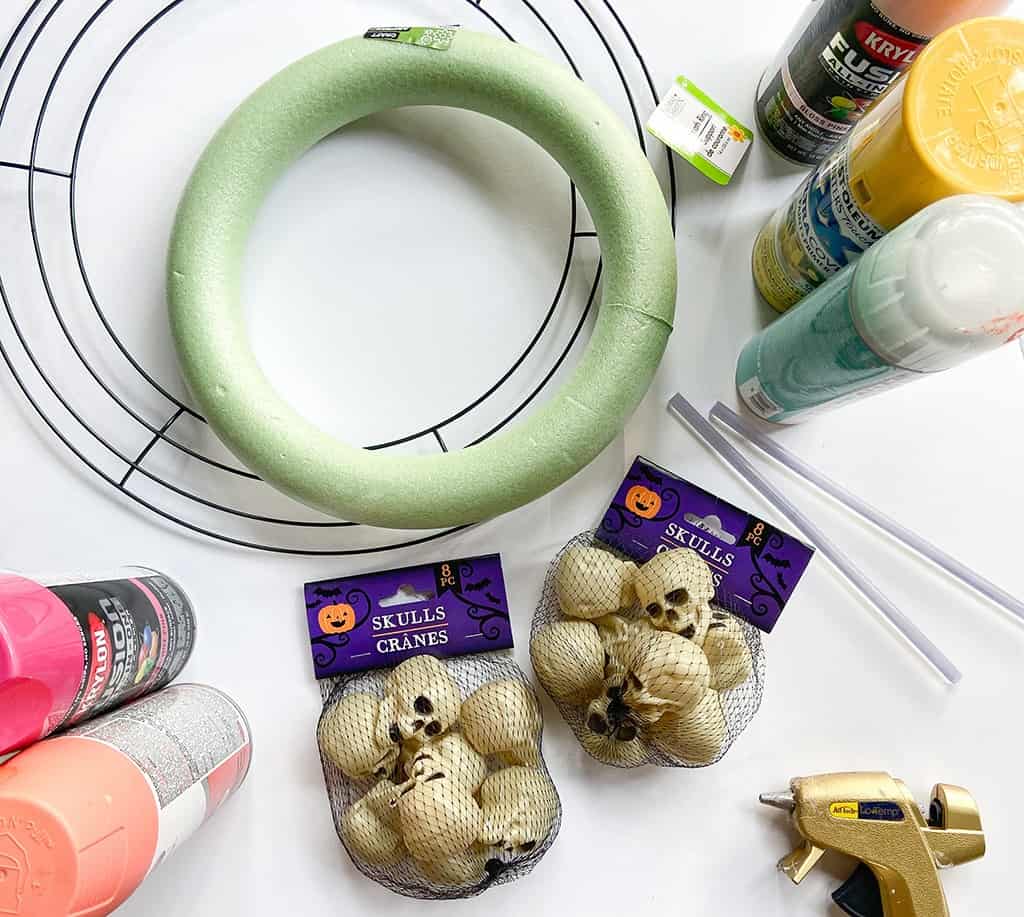
Mini plastic skulls. I lucked out and found mine at the Dollar Tree, but you can get them online here, here, and here as well.
Spray paint in your favorite color(s). I prefer the kind that is made to cover plastic, and have also found that the COLORSHOT brand works very well and has a great, saturated color.
Wreath hoop form. I started off with these two options, but changed my mind to use a simple thin modern hoop form (I’ll show you later in this post).
Hot glue gun and plenty of glue. I used the extra long glue sticks, which really saved time. You’ll go through a lot of glue!
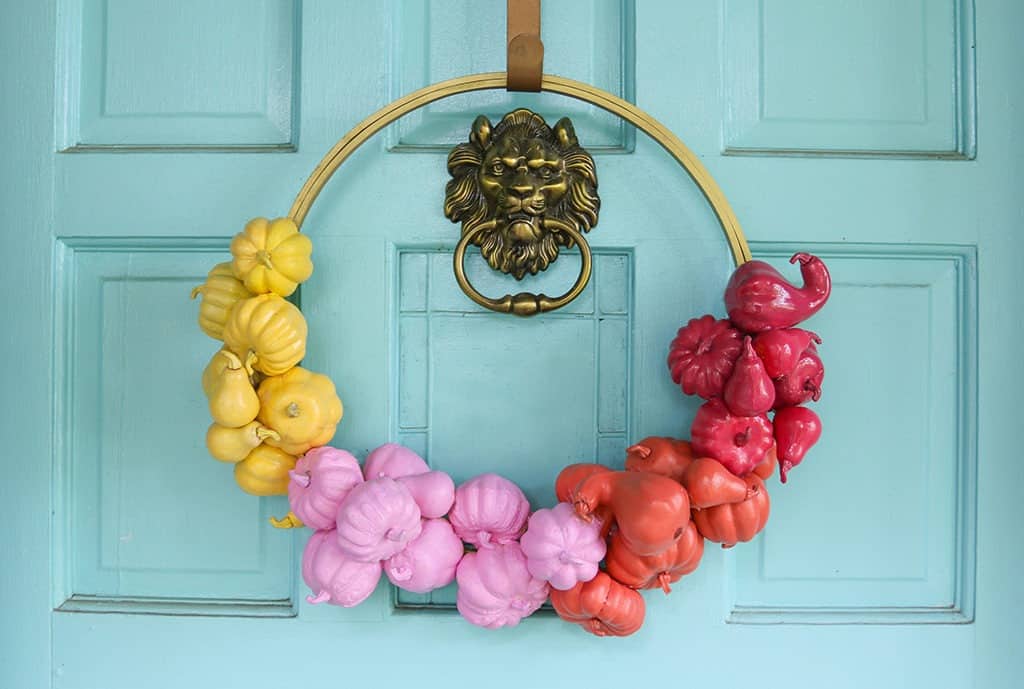
I got the idea to make this wreath from a pumpkin version I made last fall. Once i saw the mini skulls in the store, the idea immediately came to me.
Here’s a photo of last year’s wreath.
Let’s spray paint the Halloween wreath!
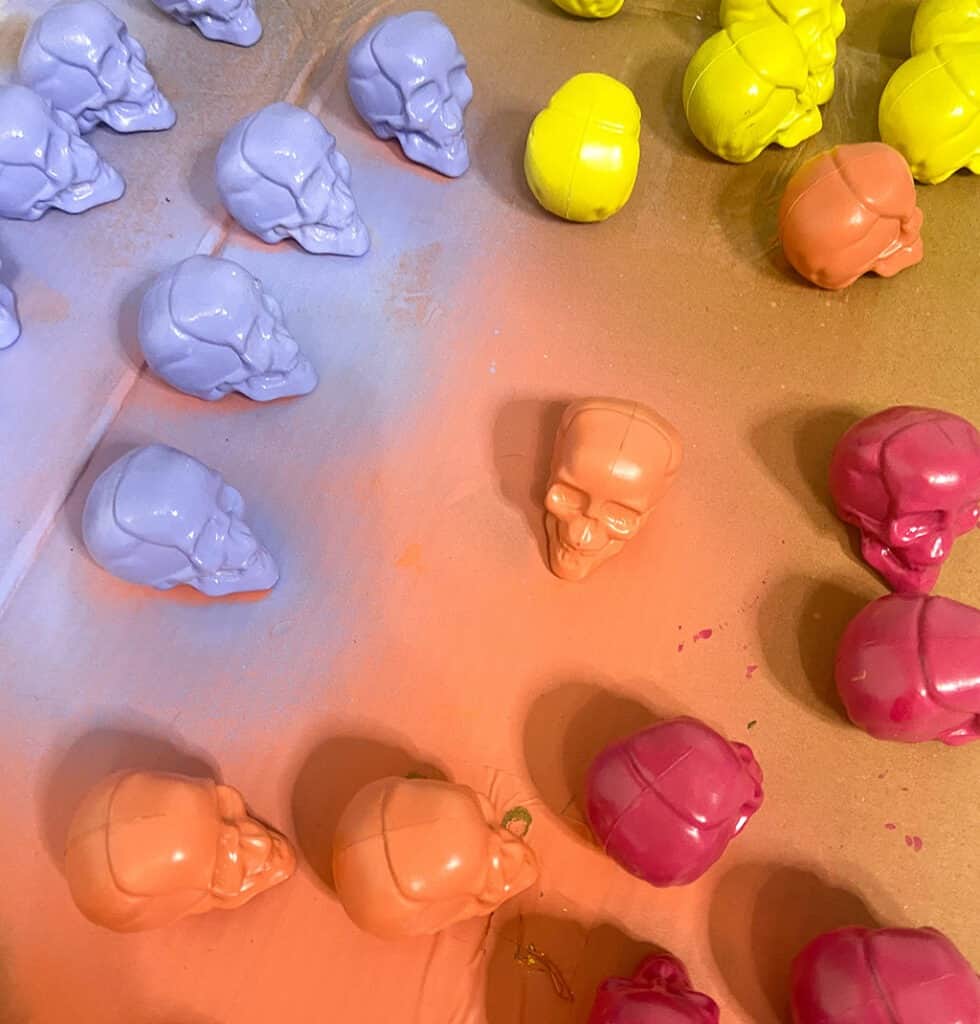
Decide what spray paint colors you want to use for your wreath. I chose to use 4 different colors, but you can choose only one if you wish. This part is a total personal preference.
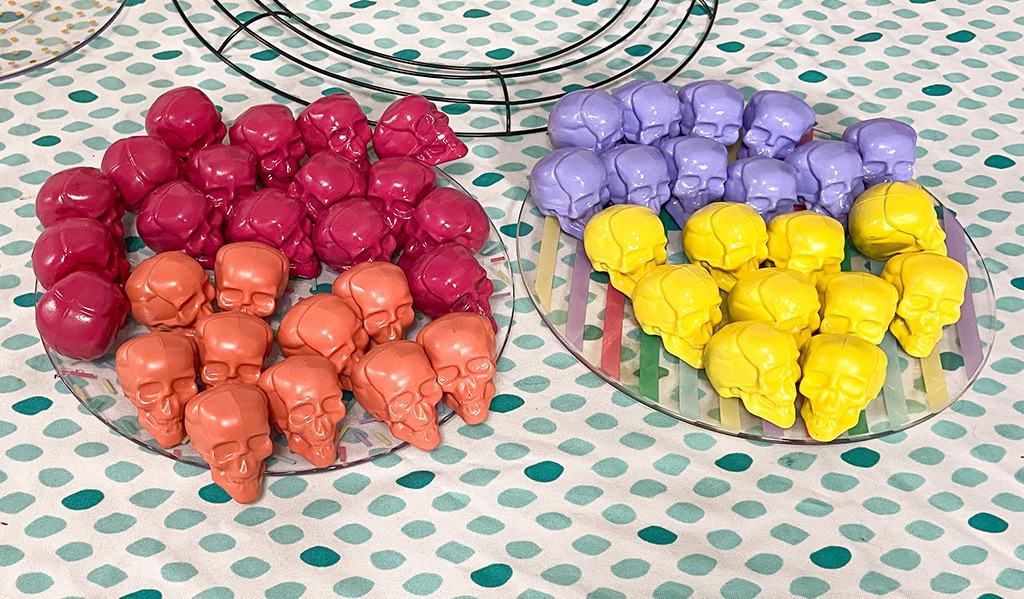
You’ll also need to lay out the skulls over your wreath form to decide roughly how many skulls you’ll need, and I recommend spraying more than you think you’ll need because you’ll probably end up needing them.
I used 62 skulls on my wreath if that helps. 🙂
I started off by laying out 12 skulls on a drop cloth and sprayed my first coat of this beautiful COLORSHOT spray paint. This brand of spray paint has great coverage and color choices.
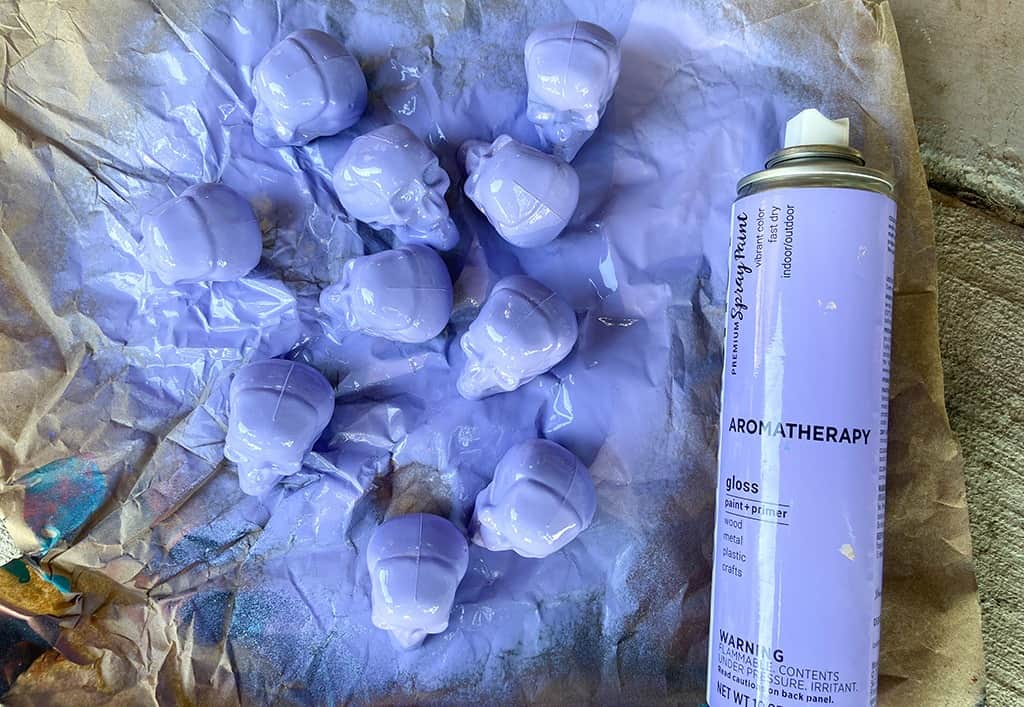
Tip 1: The wind from the spray paint knocked these lightweight skulls around, which made it hard to get a completely smooth look.
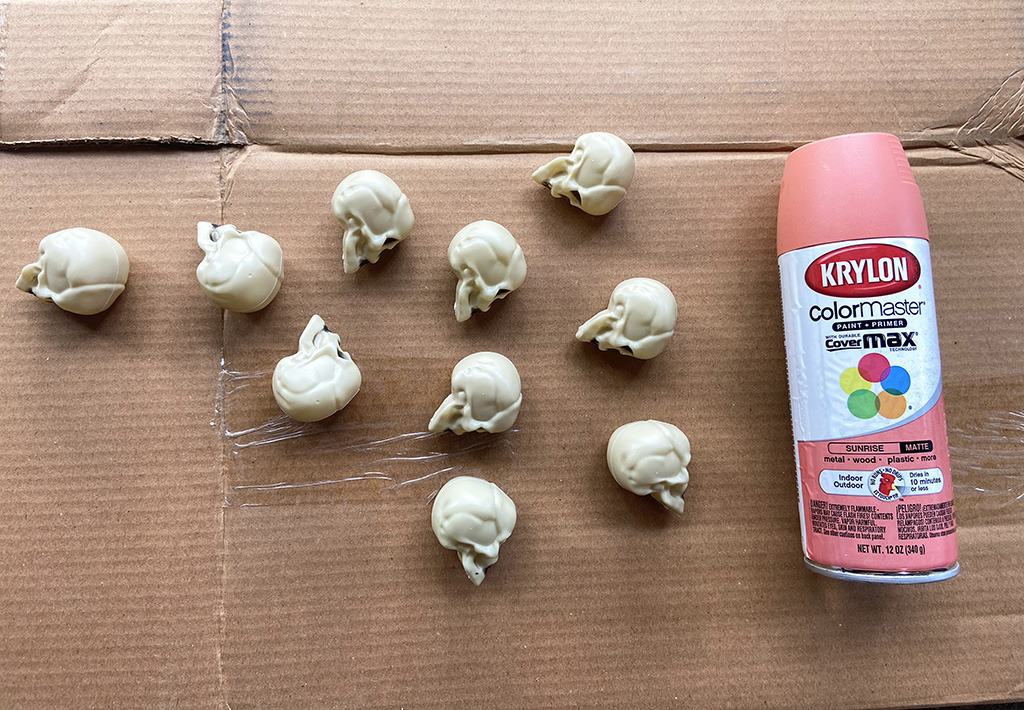
I gathered some toothpicks and stuck them in the small hole at the bottom of each skull. Then I placed them in some styrofoam I found in the garage (you can also use a cardboard box). This setup worked like a charm and I highly recommend it.
Tip 2: If you want all of your skulls to be the same color it would be much quicker for you to glue on your skulls unpainted, then spray paint the whole wreath after all the skulls are glued down.
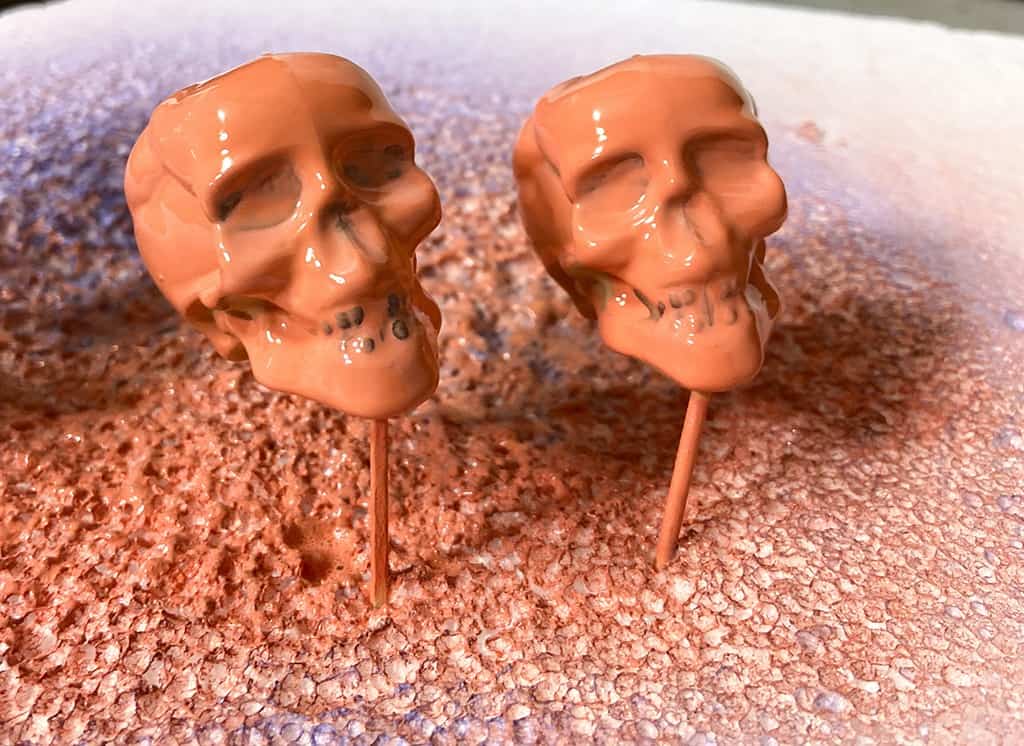
I sprayed 2 coats of paint. The first coat doesn’t usually cover the black eyes, nose, and teeth.
Once you have spray painted all your skulls, let them dry for about one to two hours.
Let’s build our Halloween wreath!
Gather your wreath form, skulls, and glue gun and settle in because this part is a bit time consuming – it’ll be worth it, promise. 🙂
I started off trying to use the wreath form shown above, but didn’y like all the lines that would show through the negative areas behind the skulls, so I grabbed another wreath form from my stash.
The more simple the form, the less it will show from behind.
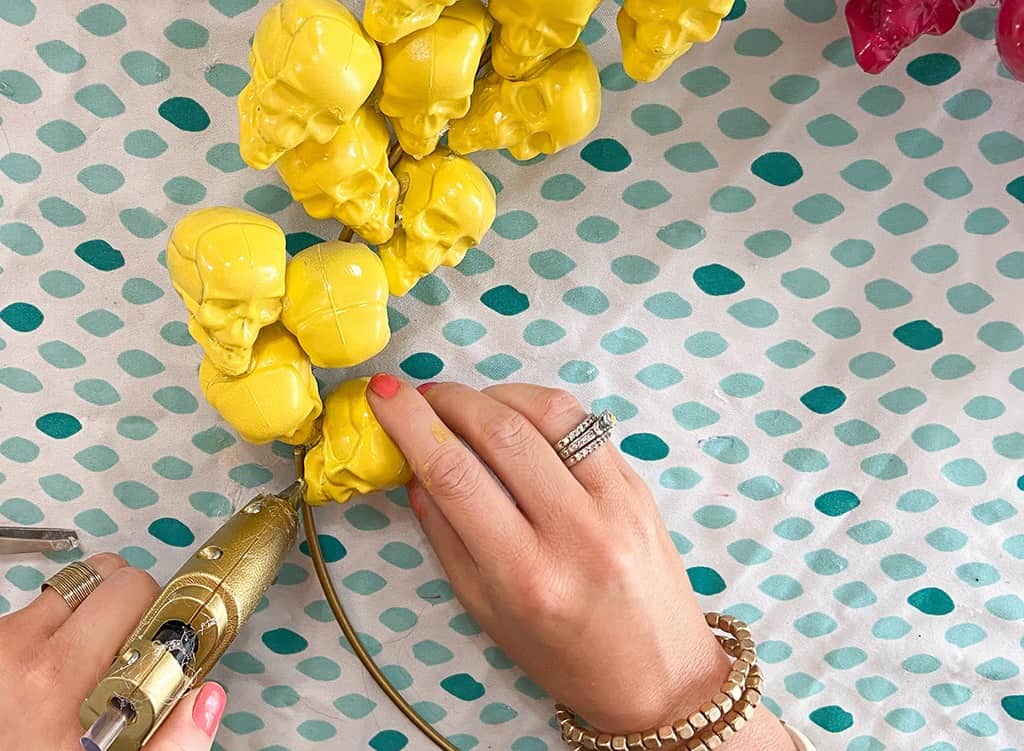
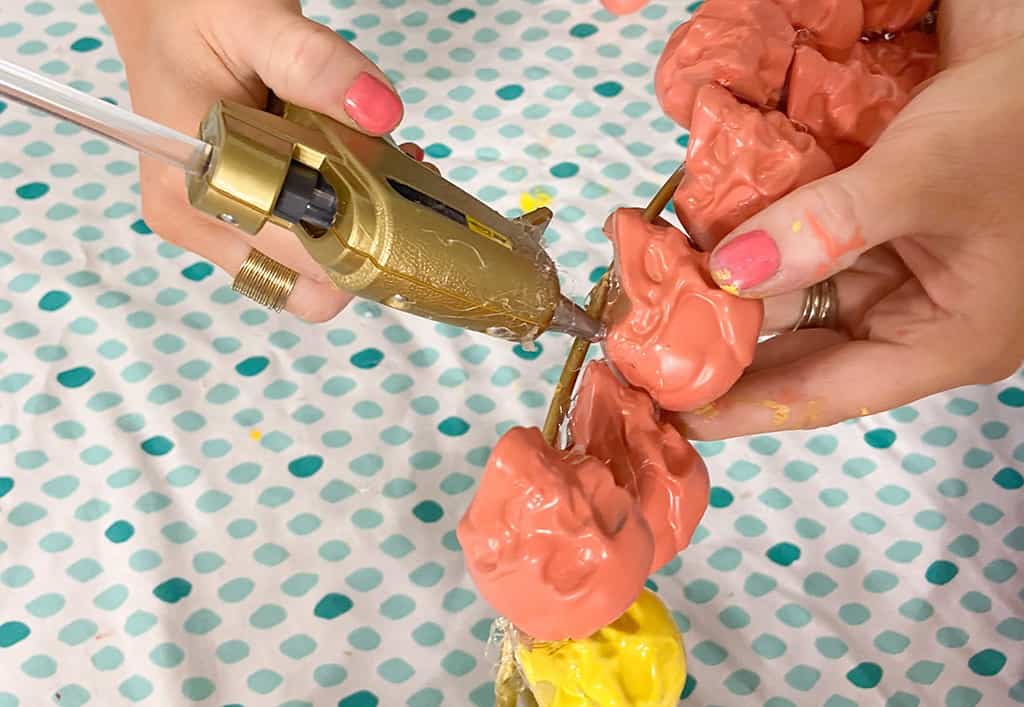
Hot glue your first skull securely to the top center of your wreath form and allow about 15 seconds for it to dry. You’ll want to add more glue than you’d think to support the skull and allow you to continue building.
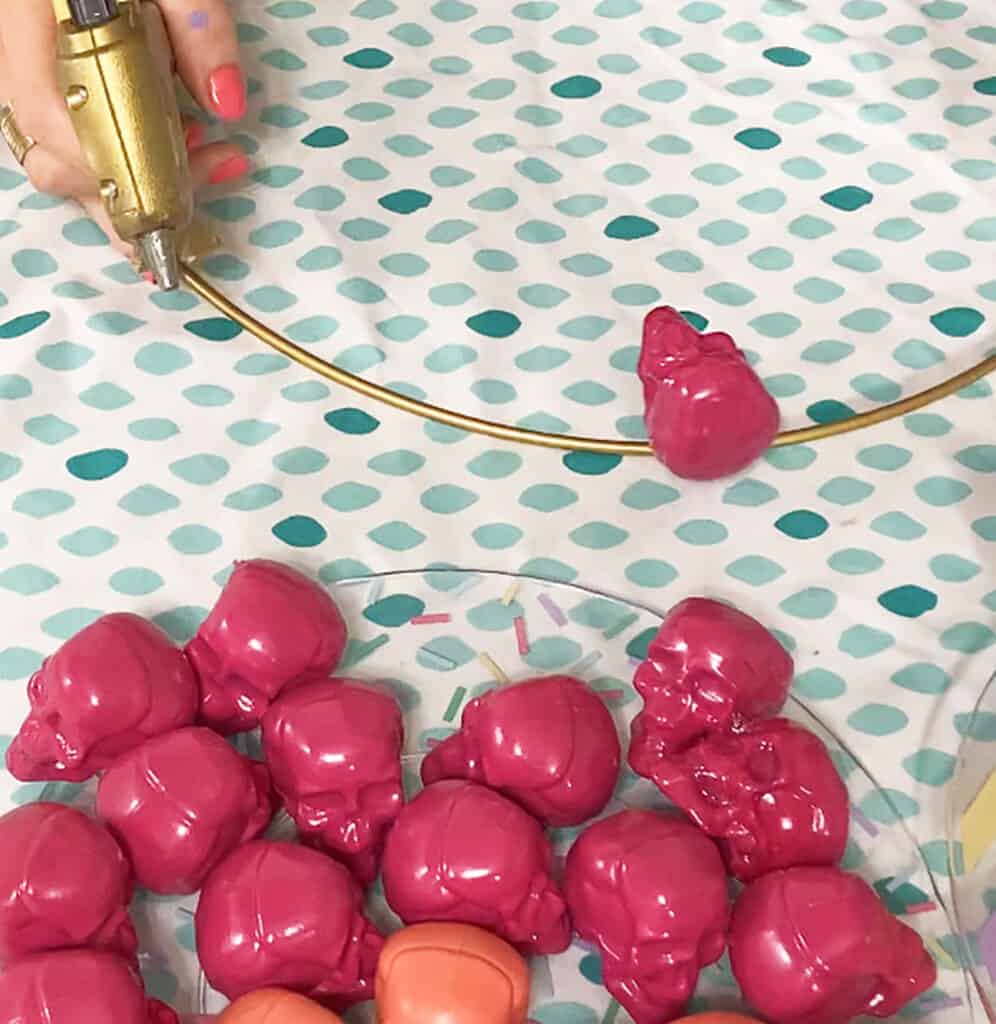
Glue your second skull next to the first skull making sure it is glues to the side of the first skull as well as the wreath form.
I like to have the skulls facing different directions for an organic/imperfect look.
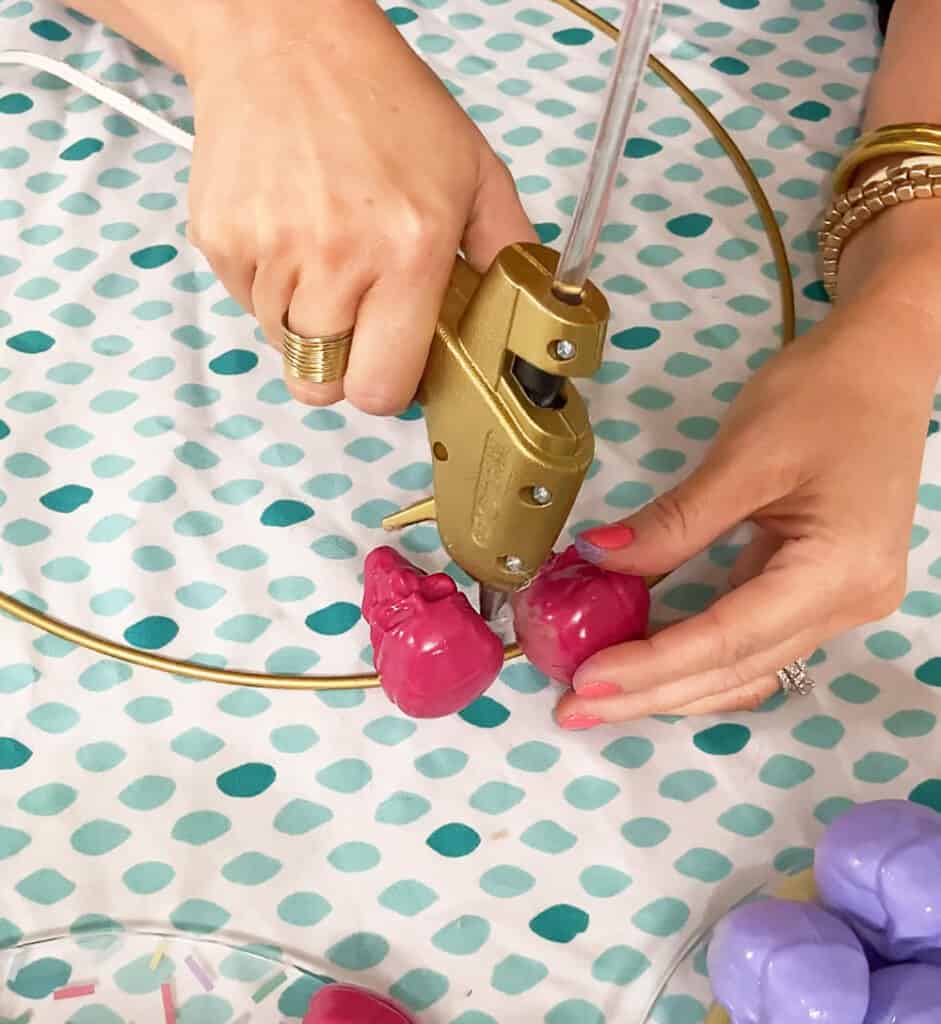
Here’s a closeup look at glue on the side of a skull before placing the next skull – you’ll want to be generous with your glue.

Making progress on this Halloween wreath!
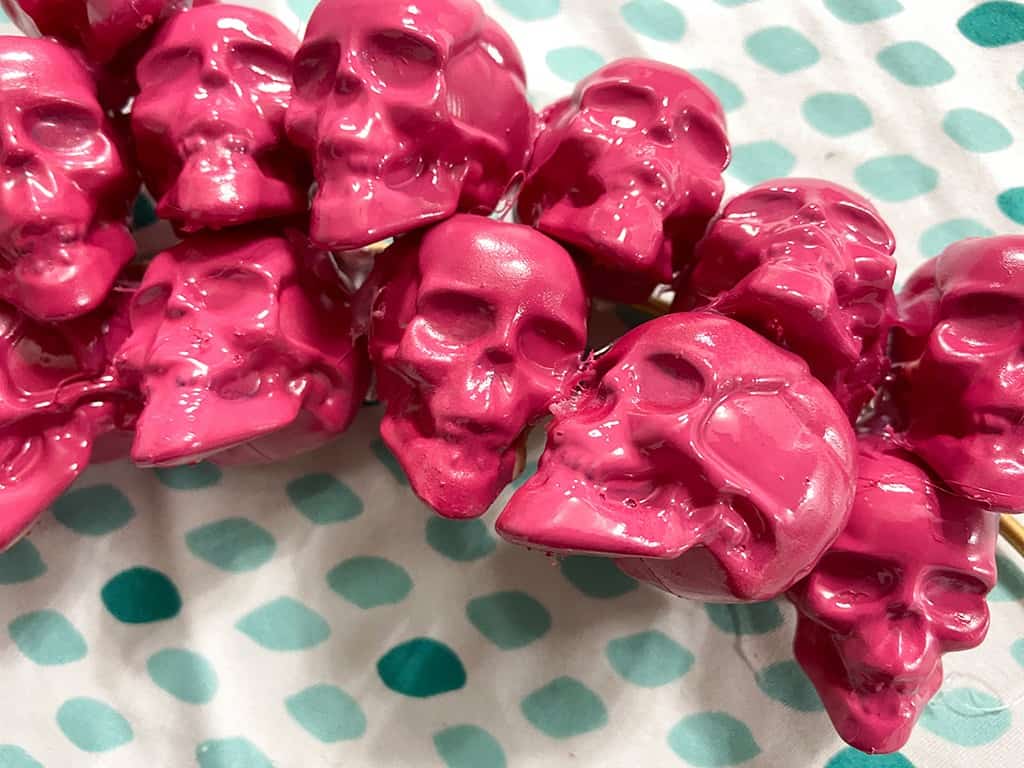
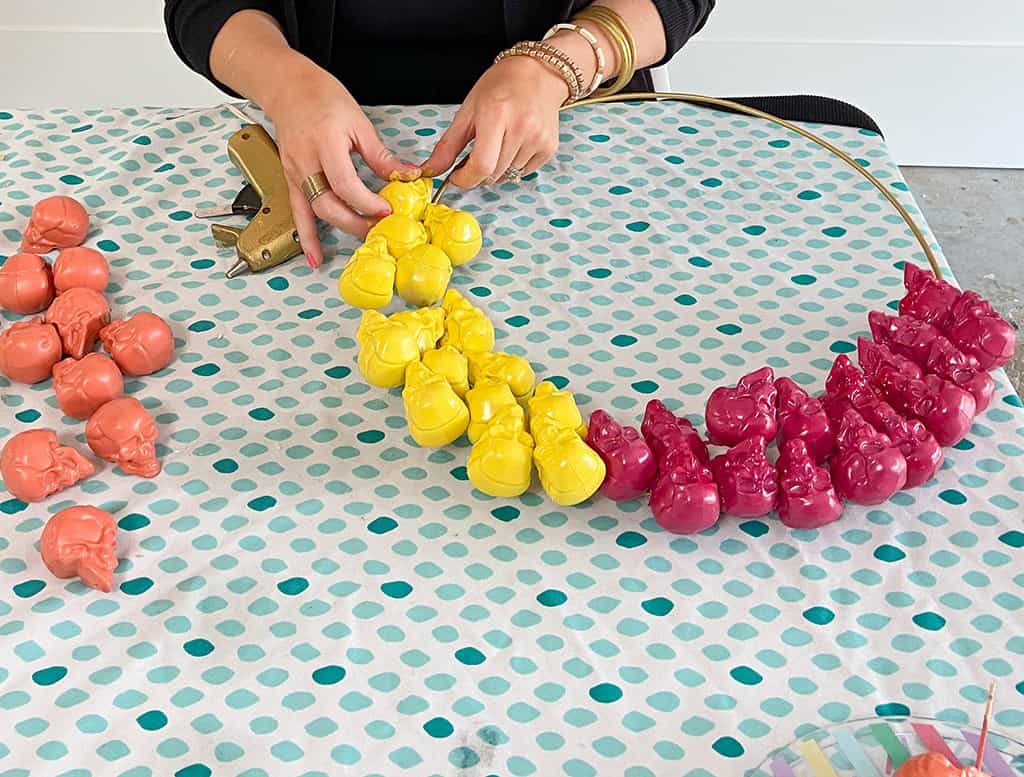
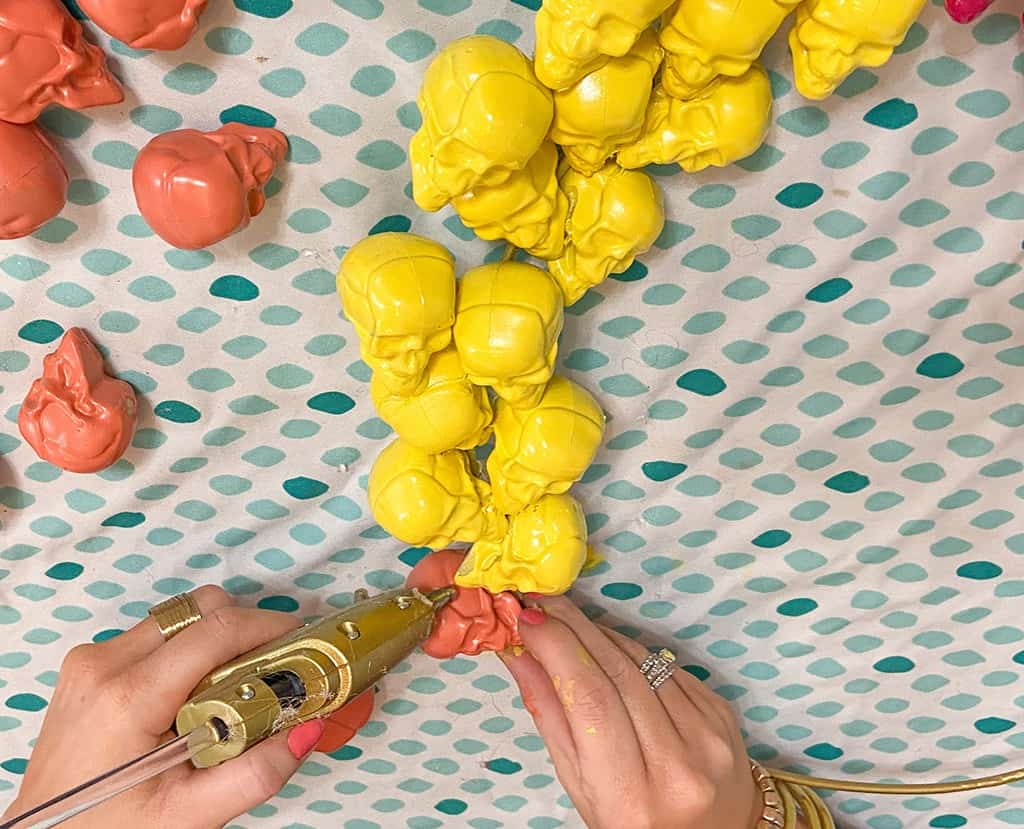
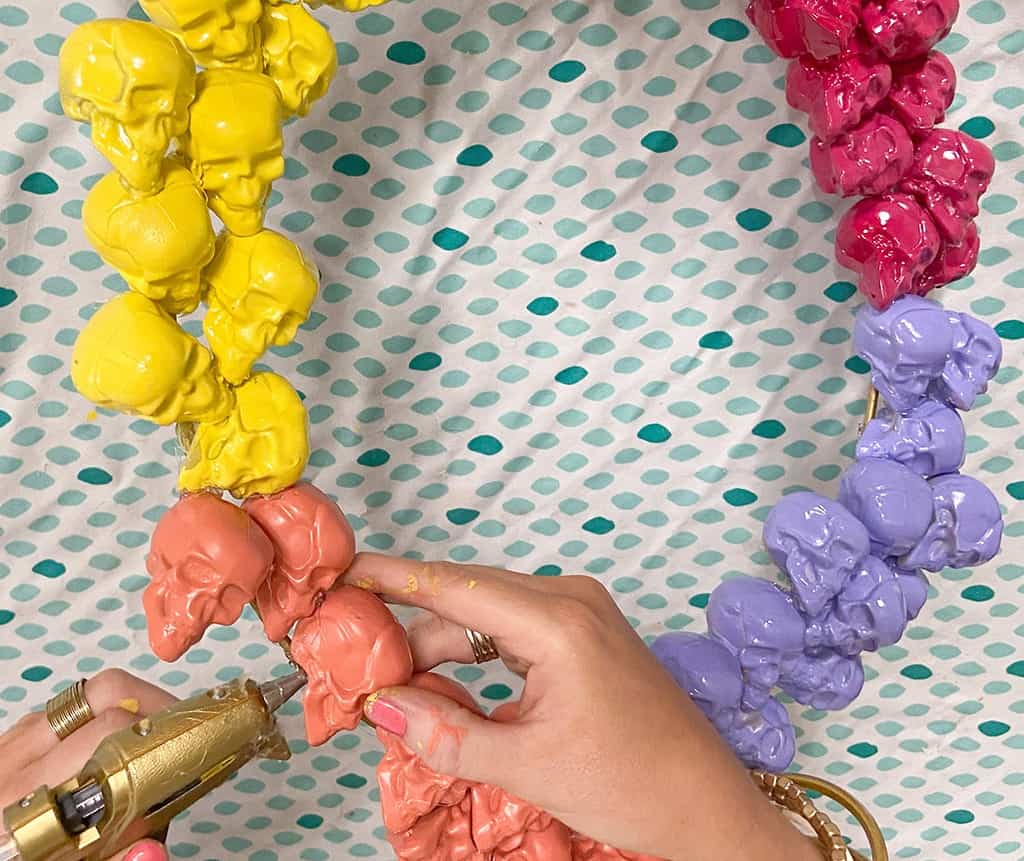
Once your first group of skulls are glued down, it’s time to add your next color of skulls.
I went with a cheerful yellow color and followed the same steps I did to attach the pink skulls. It’s very repetitive, but starts to move pretty quickly once you get the hang of it.
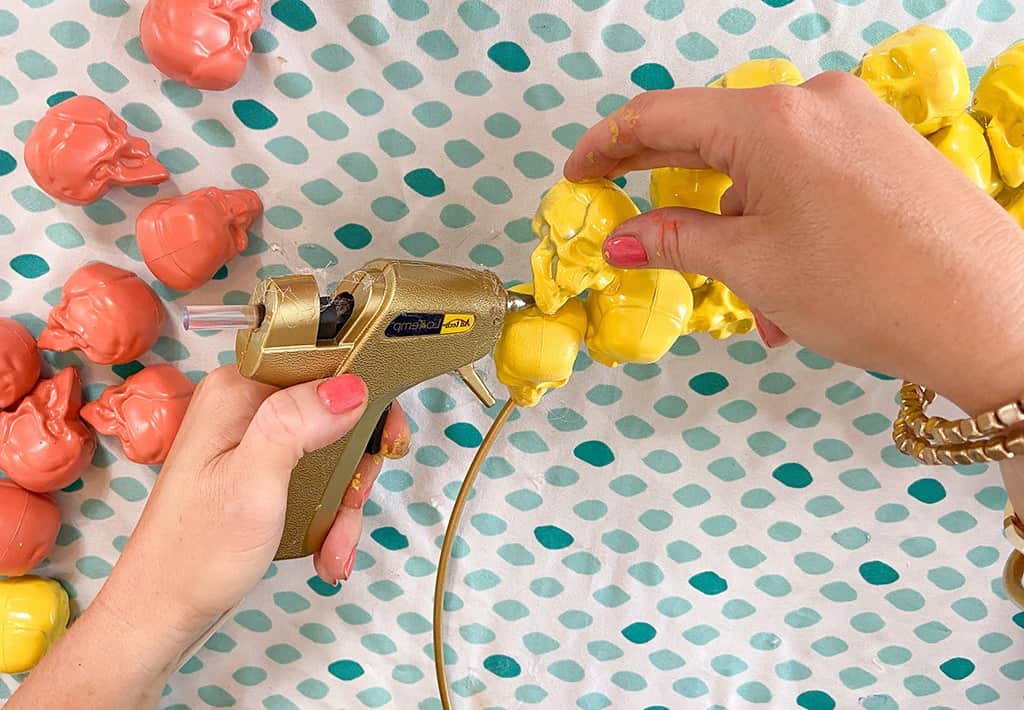
I recommend using a pair of tweezers to pull the dried strands of hot glue away from your wreath as you go. You could also wait and pull the glue away at the very end, whatever you prefer.
Here’s a look at the backside. As you can see it is kind of messy with all the glue, but this side will be hidden so it doesn’t bother me. If it bothers you, you’ll want to add smaller globs of glue. 🙂
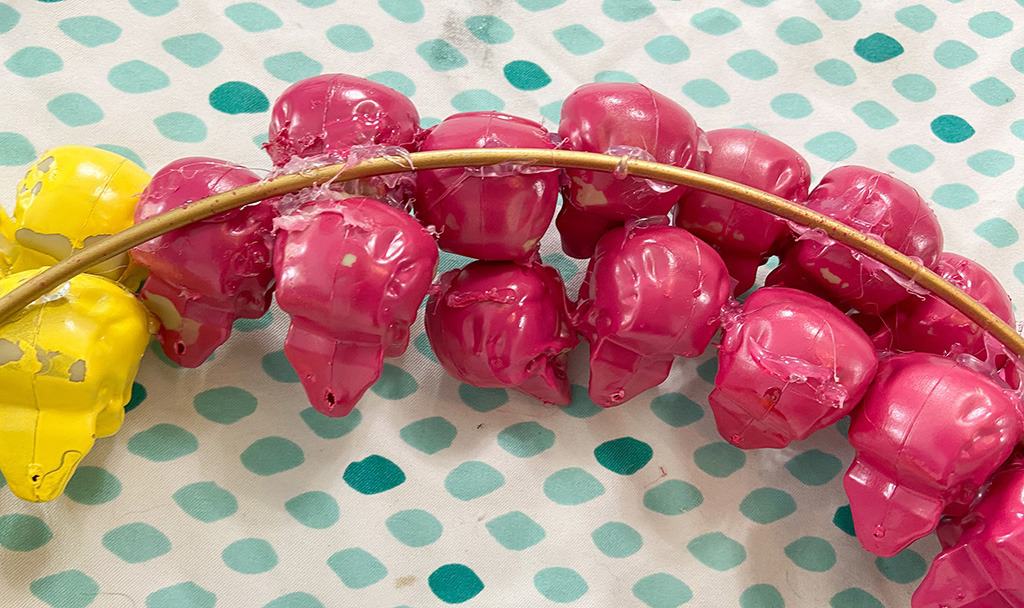
Onto the next color!
Repeat the same steps for your third color of skulls.
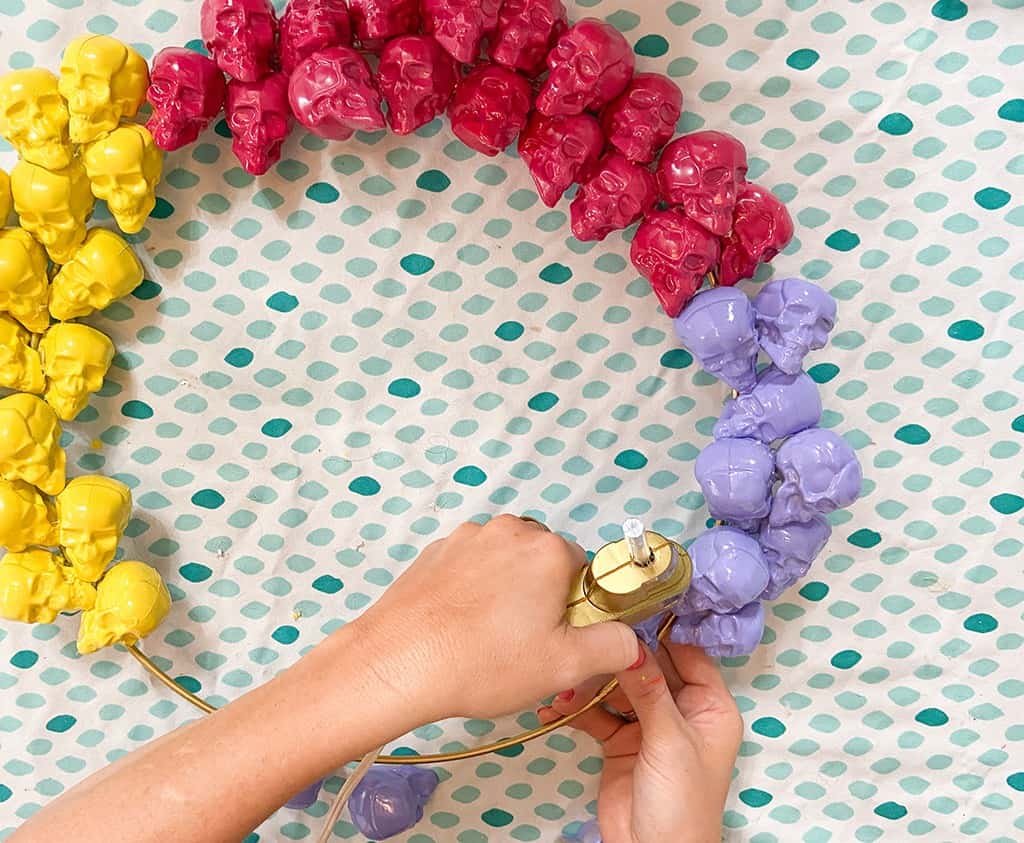
…and then the fourth and final color.
Don’t forget to glue both the front and back sides of the wreath form and skulls for added durability.
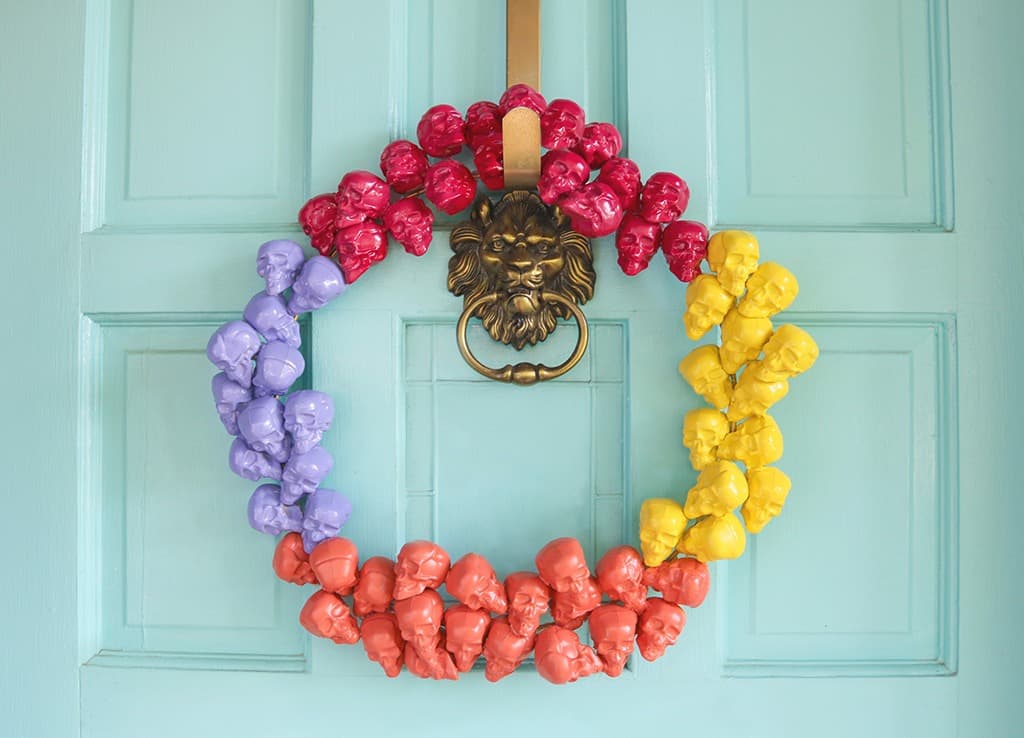
The moment you’ve been waiting for – my completed DIY skull Halloween wreath!
I just love how these four colors pop off of my turquoise front door. It makes me so happy and only cost me $10 to make.
A reminder, if you’re not a rainbow color fan, you can choose whatever color(s) of spray paint you want!
What do you think? Will you try this Halloween wreath project? I highly recommend it!

If you decide to make one for yourself I’d love it if you’d share your finished product with me so I can share in on my Instagram stories and Facebook.
And If you’d be kind enough to pin the images below to Pinterest, I’d be so appreciative!
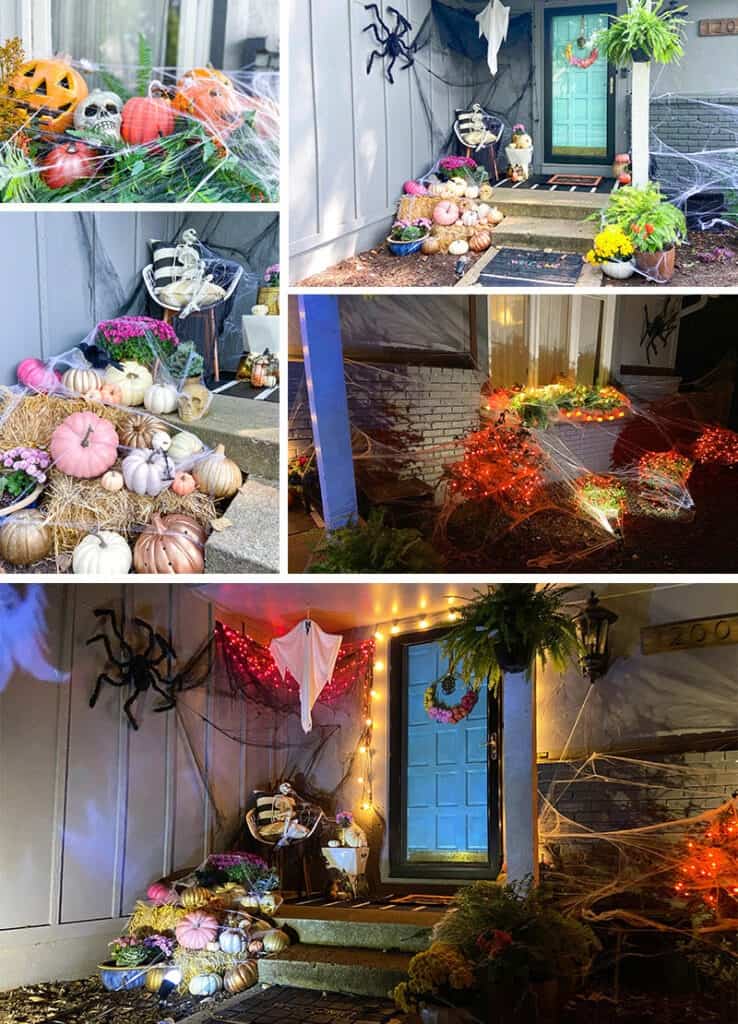
Check out my fall Halloween decor tour!
Pin for later!


You might also like this DIY fall wreath and banner!
