I needed some new pillows, but struggled to find the colors and designs I was looking for, so I decided to make my own DIY Sharpie and alcohol pillowcase! It was a super fun, easy, and affordable project.
I’ll walk you through the easy steps. Let’s go!
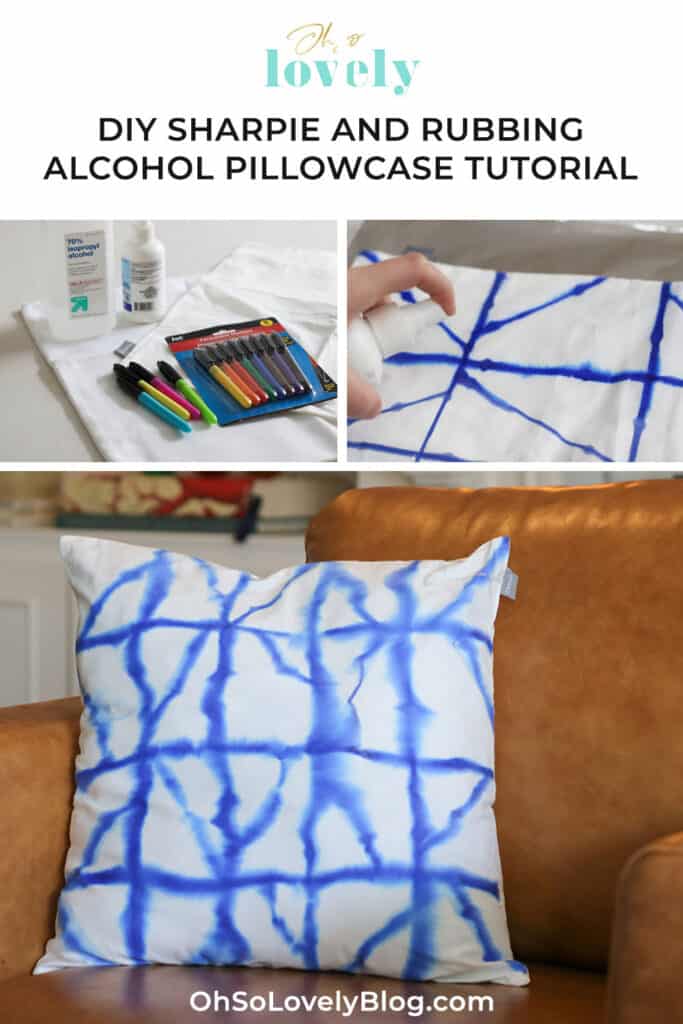
Gather your supplies:
- Permanent markers (I got mine at Dollar Tree, but you can use any kind)
- 70% isopropyl alcohol
- Spray bottle
- Cotton pillow cases – I used these smooth ones and these textured ones and they both worked very well
- Pillow inserts (I used extra pillows I already had on hand)
- Ruler (not required, but helpful)
- Iron or dryer (to set the color)

Plan your design. I’ll start off with a simple dot one. You simply make dots all over the pillowcase. The dots can be any size, but the larger they are the more the color will spread. I’ll show you a larger dot option next.

Once your pillow case is covered in dots, simply pour your alcohol on the dots. The color immediately starts to spread and spreads more over time.
TIP: You’ll want to put down some foil or another item to protect your countertops from the permanent marker.

Once the pillow case dries (usually in about 2 hours) you’re done, but for this one I decided to add more dots in different colors to see what would happen.
I added dots in a turquoise and a dark blue color to the bottom of the pillowcase, and then poured more alcohol on them exactly as I did previously.
I let dry and once I was happy with the design, I ironed the pillowcase. The heat from the iron sets in the color and gives you the ability to wash them in the future with less bleeding.

Here’s how it turned out. As you can see, the ink in the dots really spreads out over time.
Here’s how the one I did with larger dots turned out.

This one spread out so much it takes on the appearance of flowers. So fun!

You can watch the TV segment here if you’re interested:
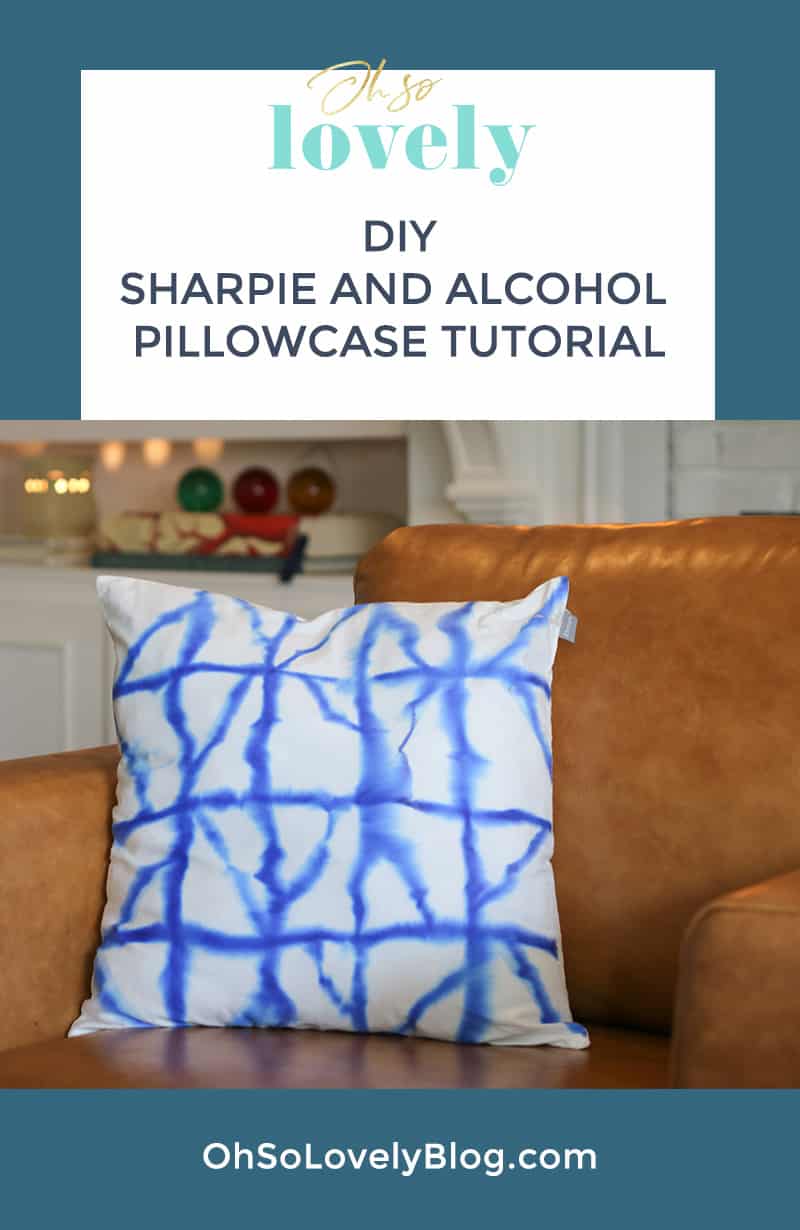
Now it’s time for one of my favorites…in more of an organic batik look.

Take a ruler and draw 4-5 vertical lines—they don’t have to be perfectly spaced.
Next draw 4-5 horizontal lines. I intentionally let my marker sit on the fabric in some areas to mix up the thickness of the lines and to make it more organic, less perfect feeling.

Now you will want to draw angled lines in each square. I started off drawing a line going one direction, then alternated directions until each square was filled.
Again, these shouldn’t be perfect lines (unless you are wanting that look).

For this one I used a spray bottle full of alcohol for a different look. Dumping the alcohol makes the ink spread much further and lightens the color, and spray is a little more less dramatic.
Spray over all of the lines and set aside to dry.

The ink spreads nicely as it dries.

And here’s how it turned out. I absolutely love it, and want to make more in different colors.

Here’s another one I did using simple horizontal lines and the alcohol duping method. Very subtle.

What do you think of these DIY Sharpie and alcohol pillowcases? So easy right?
I seriously don’t want to stop making them. I need to order more pillowcases, ha.
See one you like? I’d love to hear if you have a favorite. I adore it when you tag me in your Insta, Twitter, or Facebook photos, and I’m always so grateful when you Pin my work as well.
xoxo
Audrey
You might also like some of my other DIY projects
Or my free printables:

Pin this DIY Sharpie and alcohol pillowcase for later!