DIY luminary pumpkins are so easy to make and provide a beautiful glow to your fall decor!
Let’s make some, shall we?
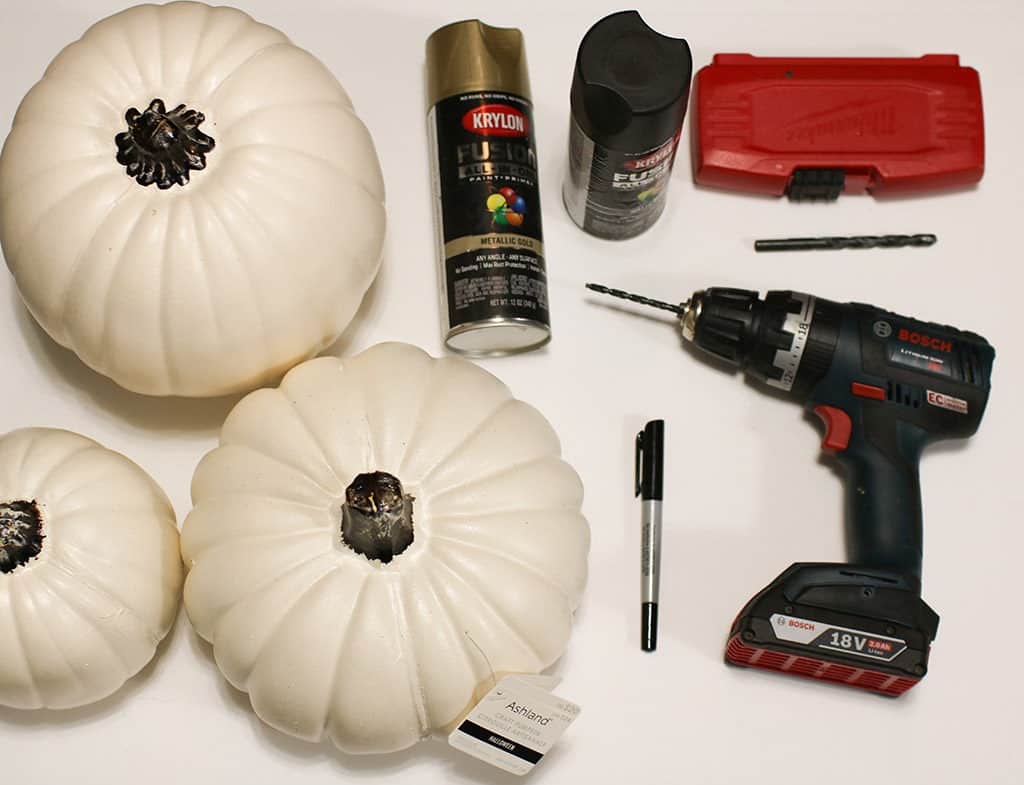
Gather your supplies.
- Faux pumpkins
- Spray paint
- Drill and bits in various sizes
- Fairy lights or faux votive candles
- Pen or marker
- Knife or pumpkin carving kit
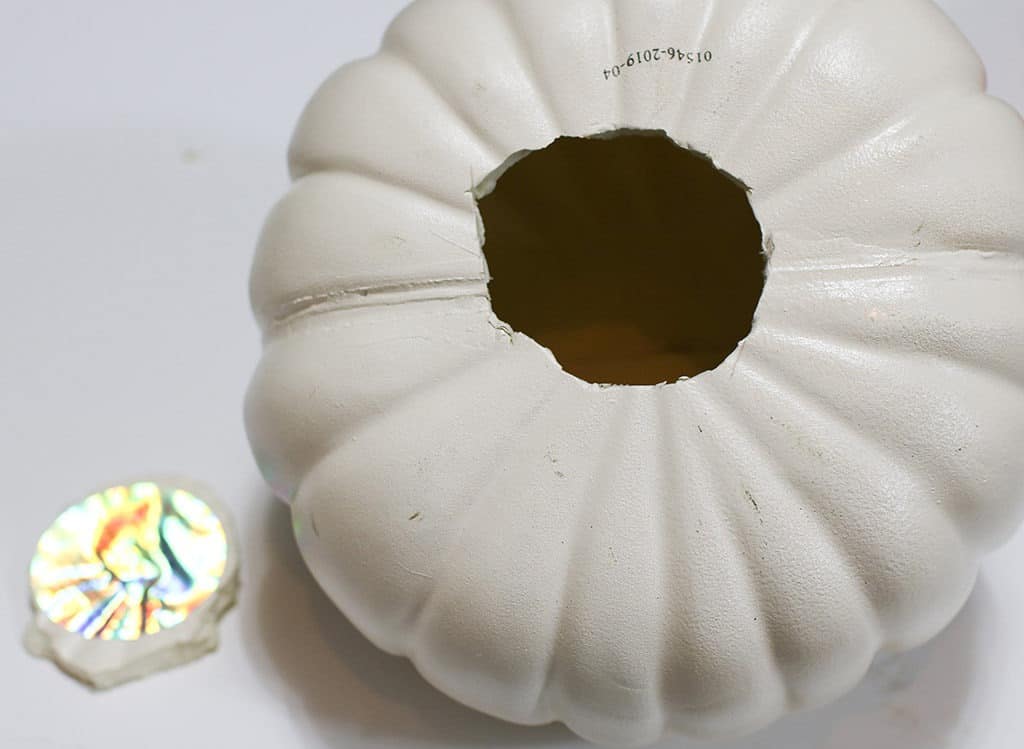
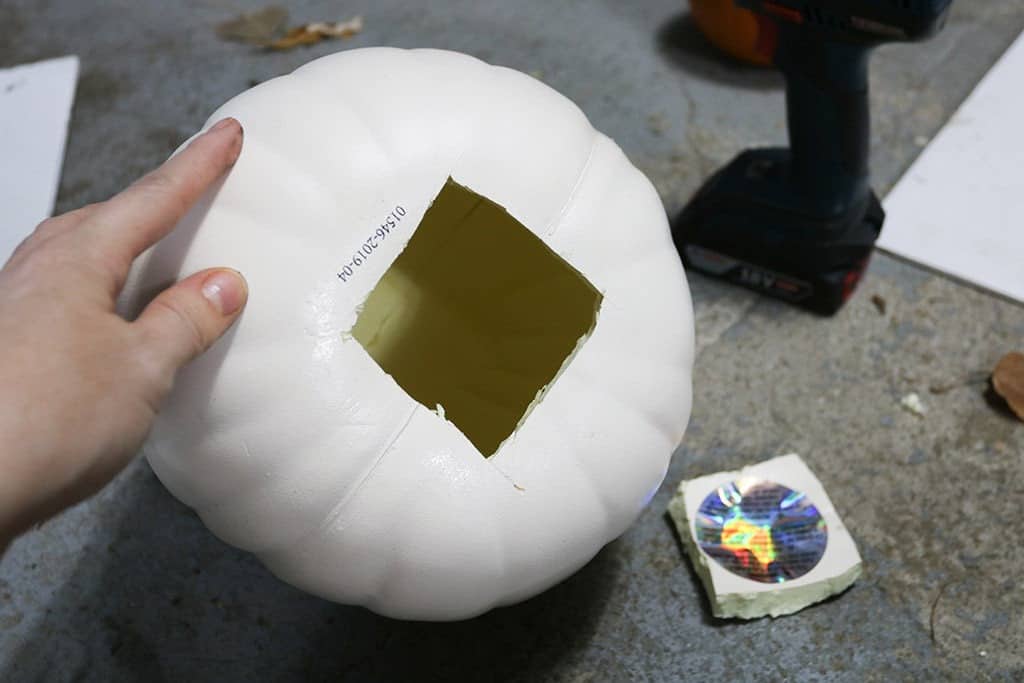
Take your pumpkin and with your knife, cut the bottom out. This is where you will insert your light source once finished.
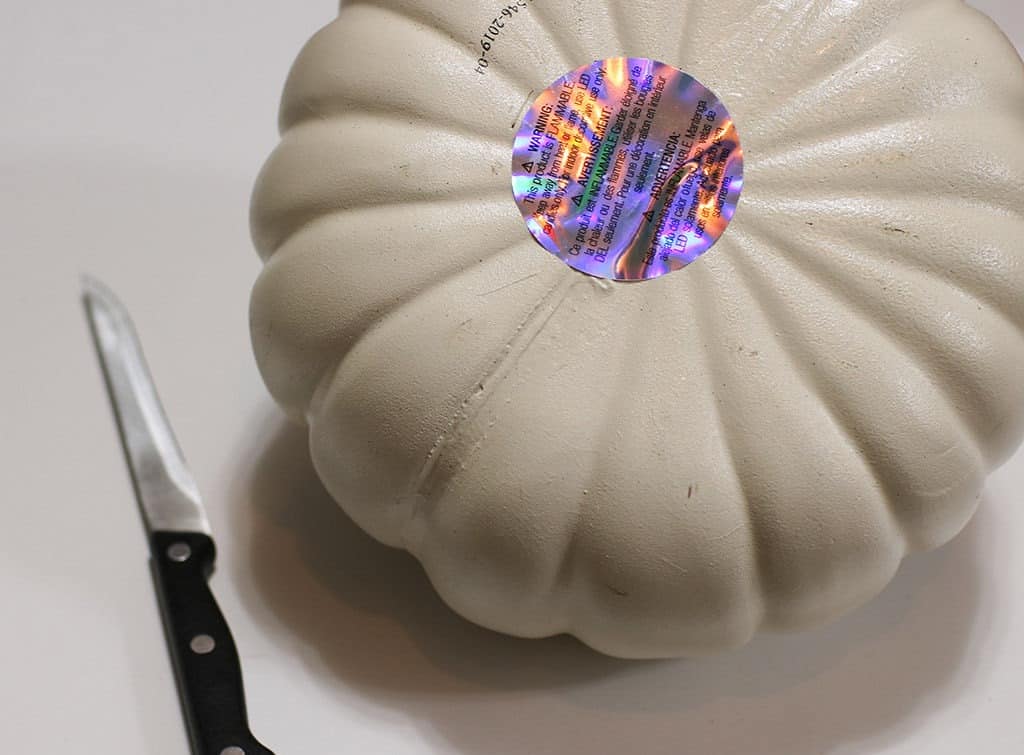
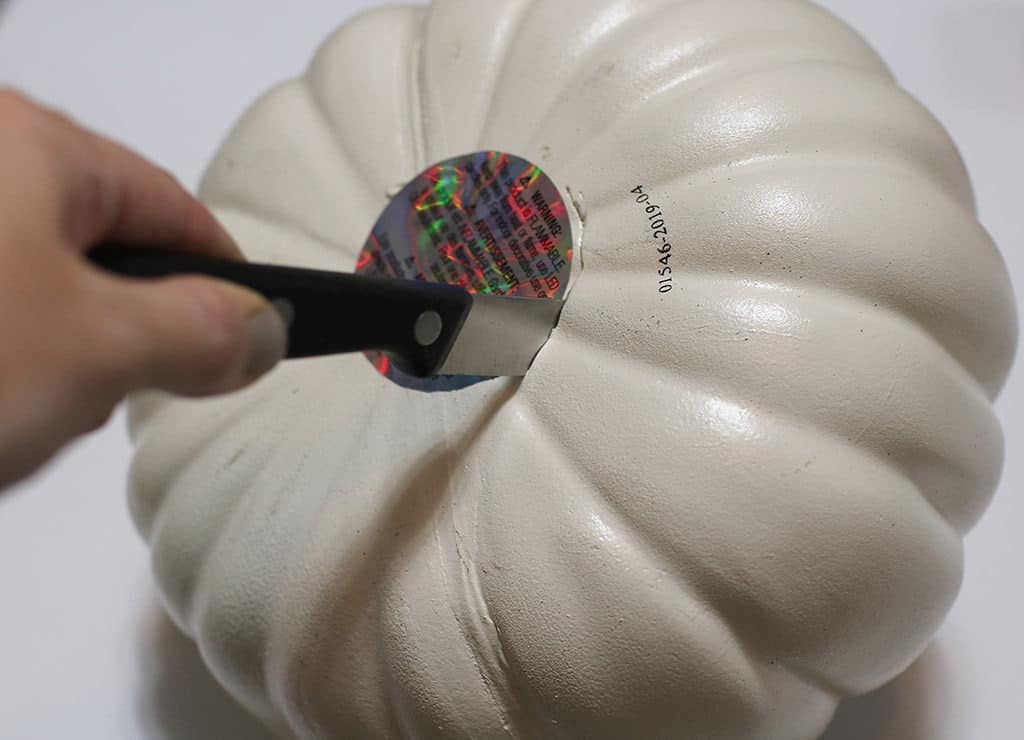
You can cut in a square or circle shape — whatever is easiest for you!
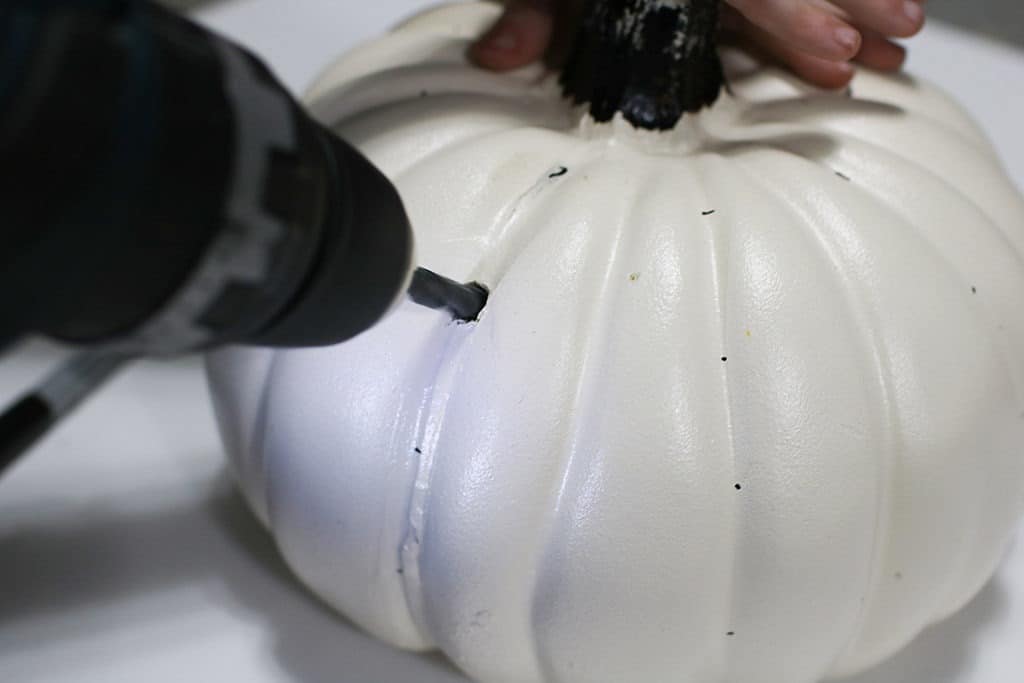
You can start to drill “freehanded” or you can take a marker or pen and mark your drill holes ahead of time.
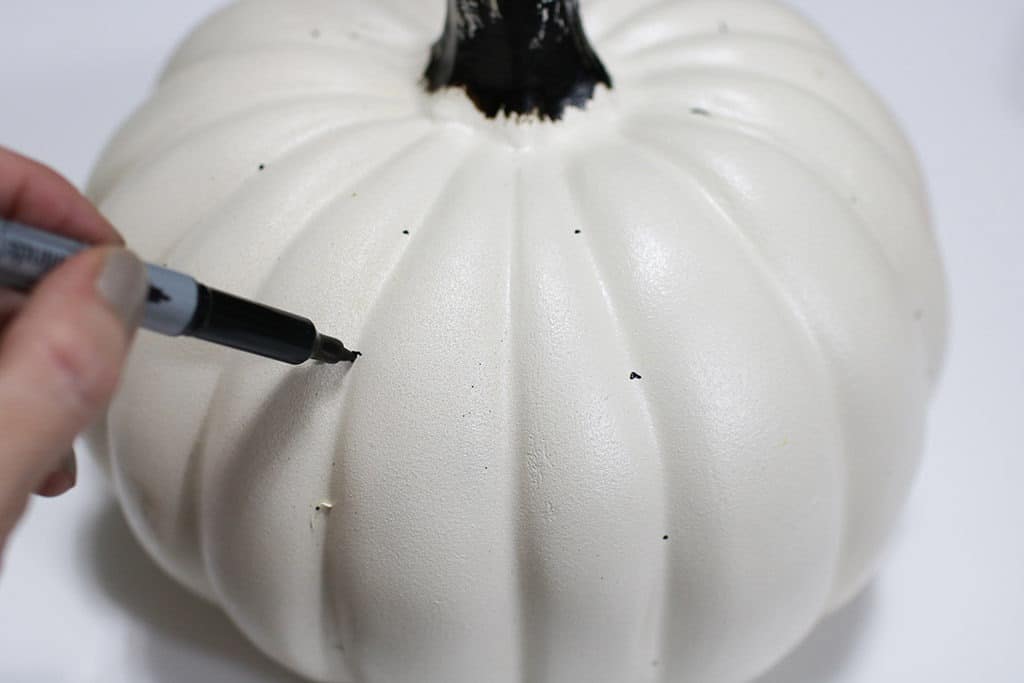
Get your drill and add a bit in your preferred size to it (I used 5/16 for this one). With one hand firmly holding the stem, begin to drill your holes.
Our six year old asked to help since she loves drilling — that’s my girl.
Don’t worry, she was closely supervised.
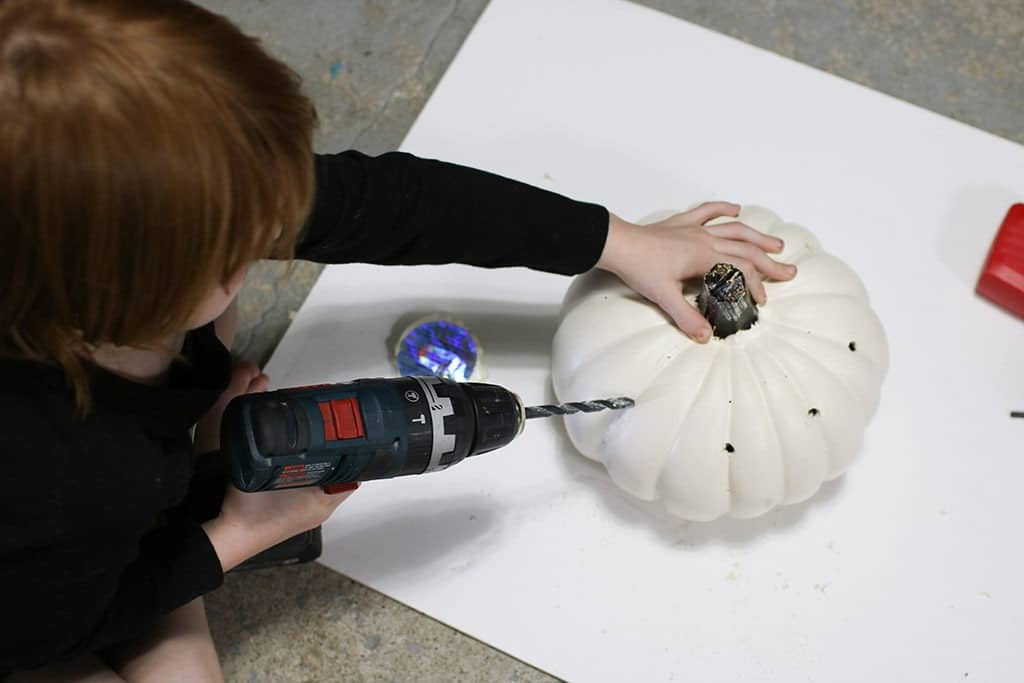
She drilled most of the holes herself. I was so impressed!
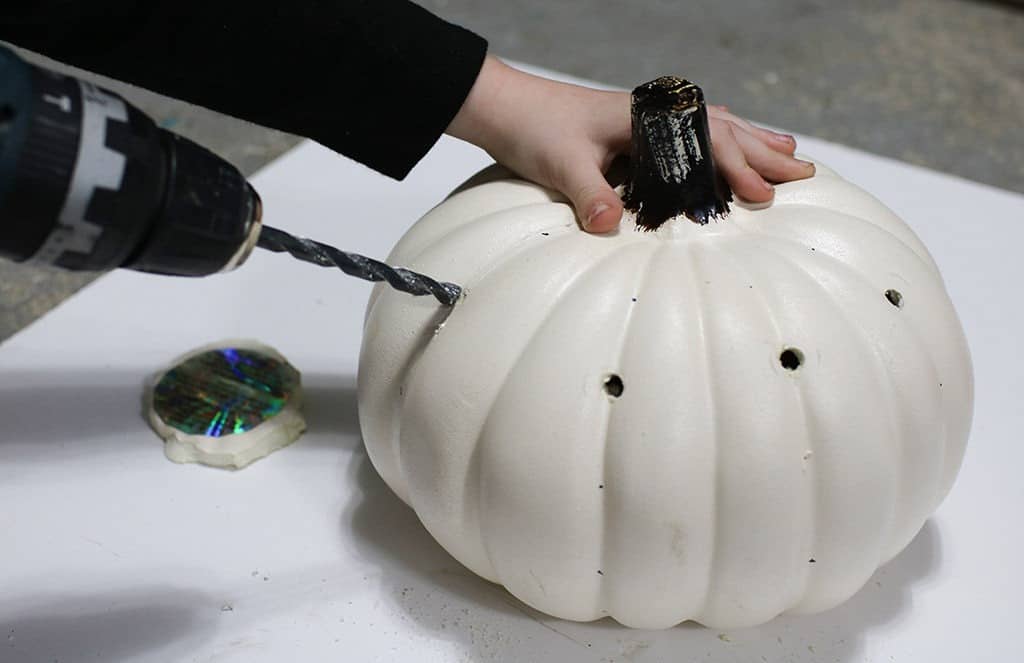
Once you make it all the way around your pumpkin, you’ll want to take your hand and pull out any extra pumpkin debris from the drilled holes. The holes don’t come out super perfectly, but you can’t tell when the pumpkins are lit up. Also this project gets messy, so you’ll want to do it on a drop cloth or in the garage

You’ll want to repeat the same steps for each pumpkin. I wanted a different look for all three of my DIY pumpkin lanterns, so I switched up my drill bits and the design.
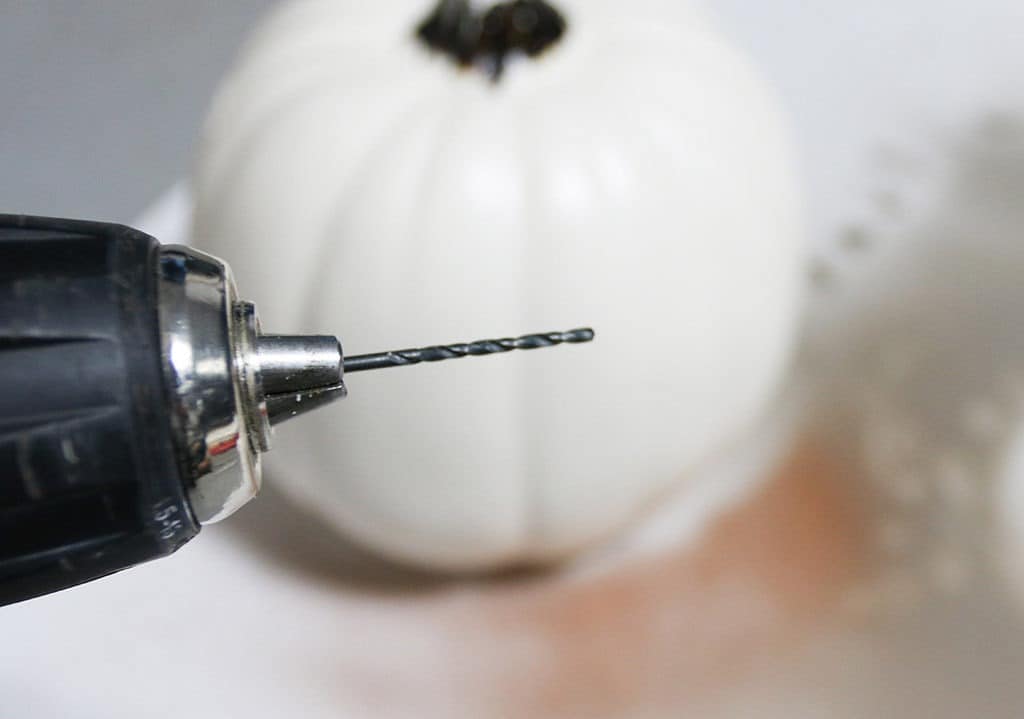
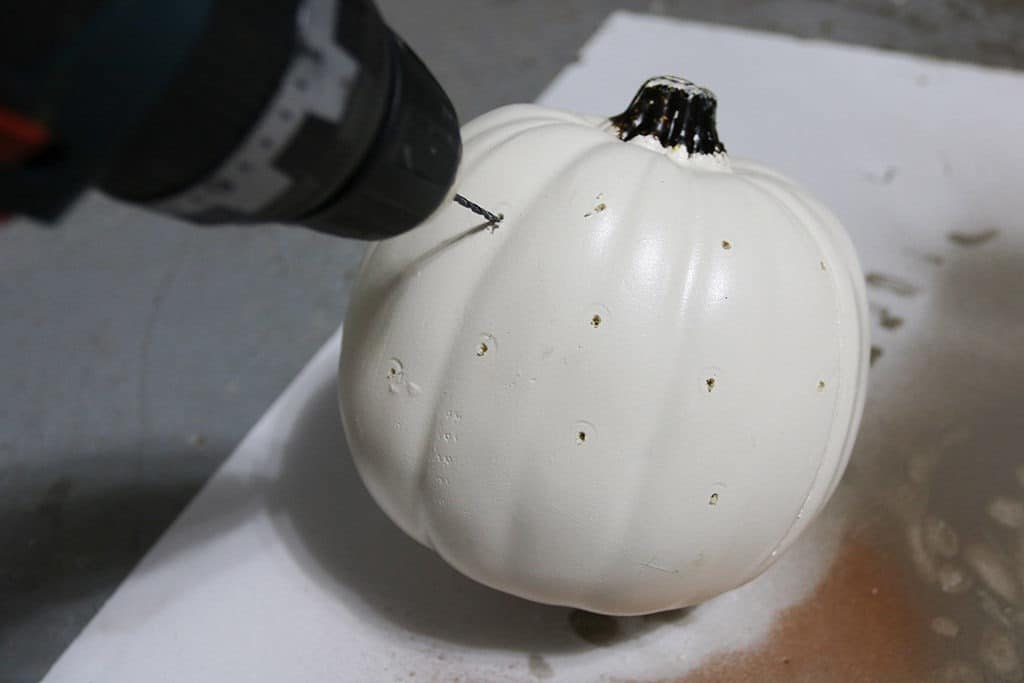
This tiny (5/64) drill bit is easier to use than the larger bits. It drills in super quickly and this pumpkin was definitely the quickest one to make.
I simply drilled holes all over the pumpkin to my liking. These smaller holes make almost a constellation or stars look. So pretty!

Now it’s time to spray paint your DIY lantern pumpkins.
Spraying after you drill ensures coverage inside the drill holes.
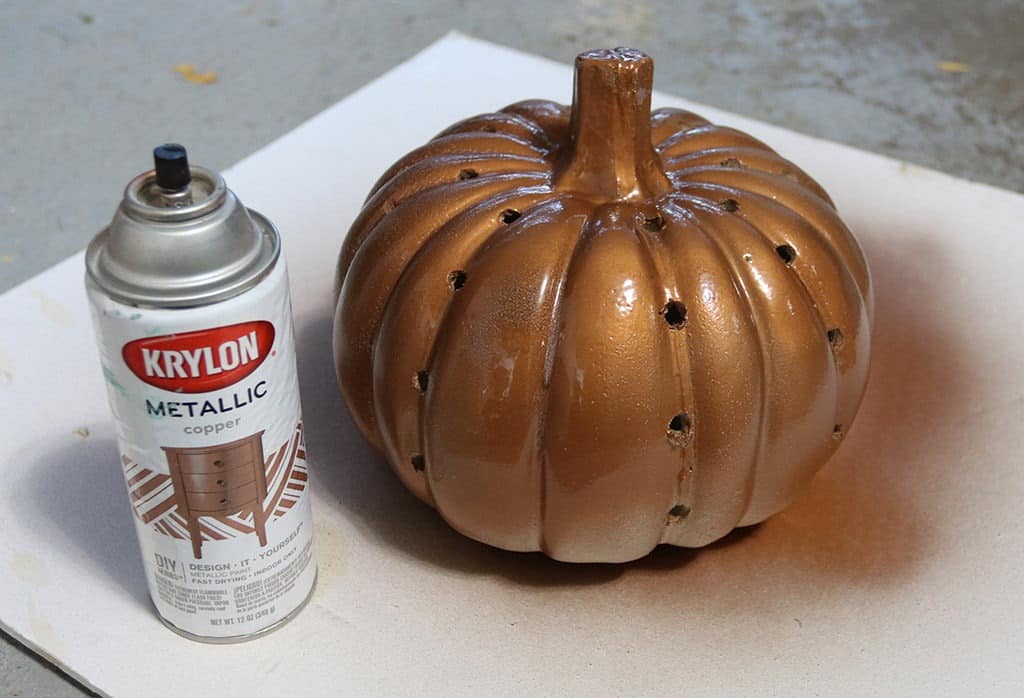
I love this copper color. And the small one went metallic gold. So pretty!
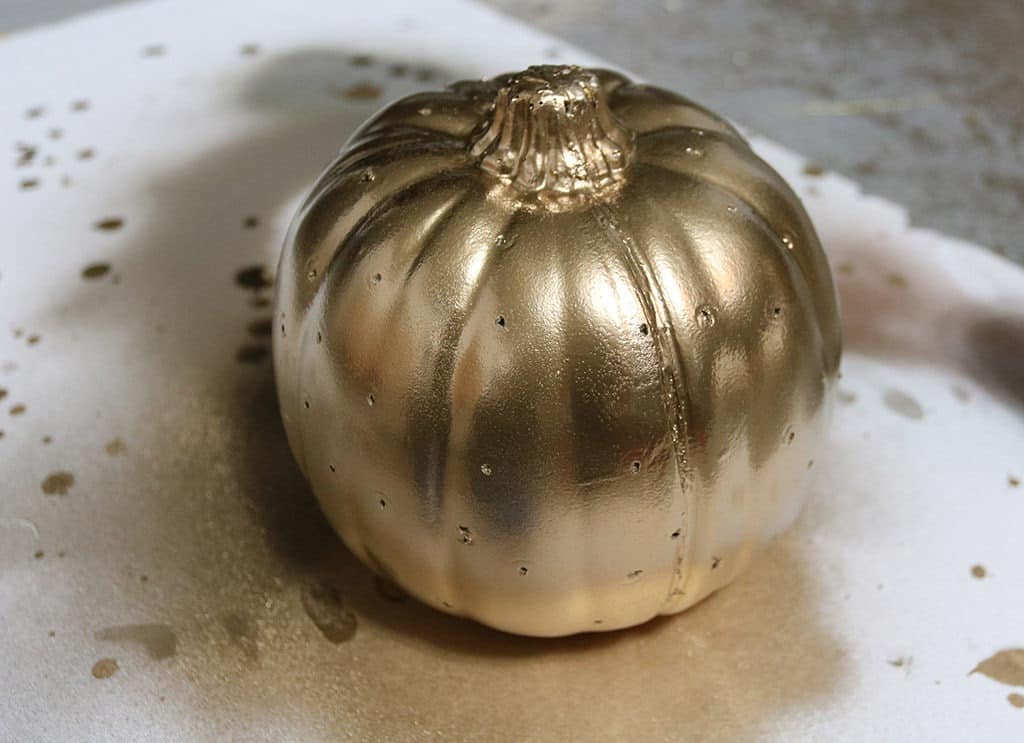
I did another pumpkin off camera and sprayed it a more muted gold color. I decided to keep a metallic theme, but you can really choose any color you like.
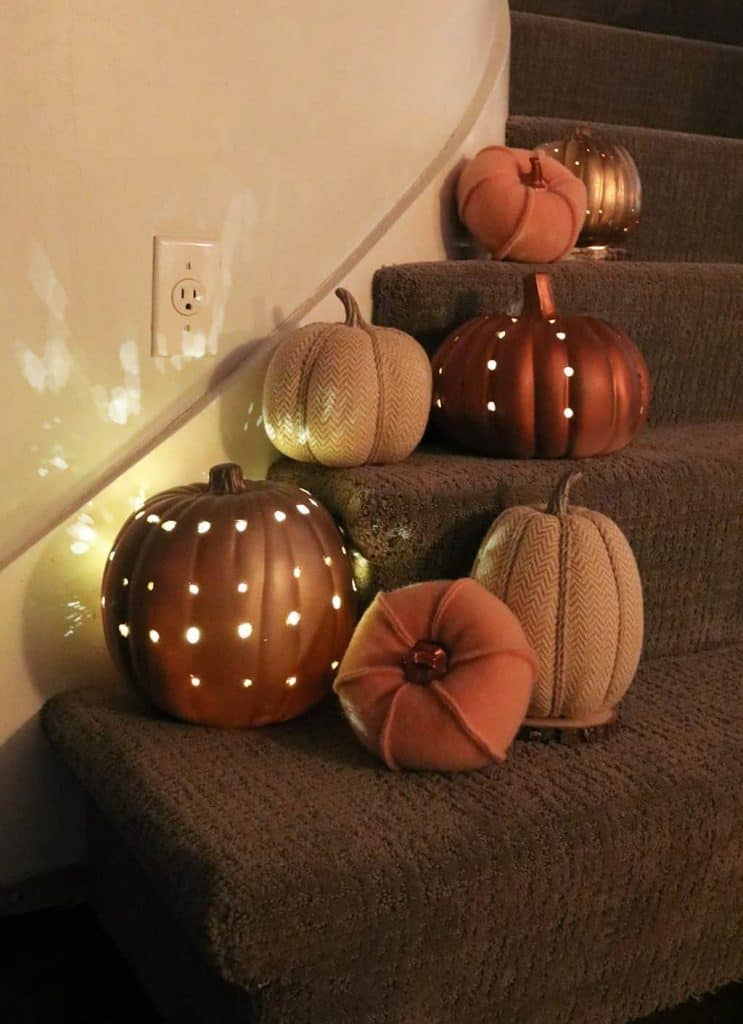
Once your pumpkins are dry it’s time to add your fairy lights and find a home for them. I explored adding them to our entry table. I just love how the lights glow on the walls!
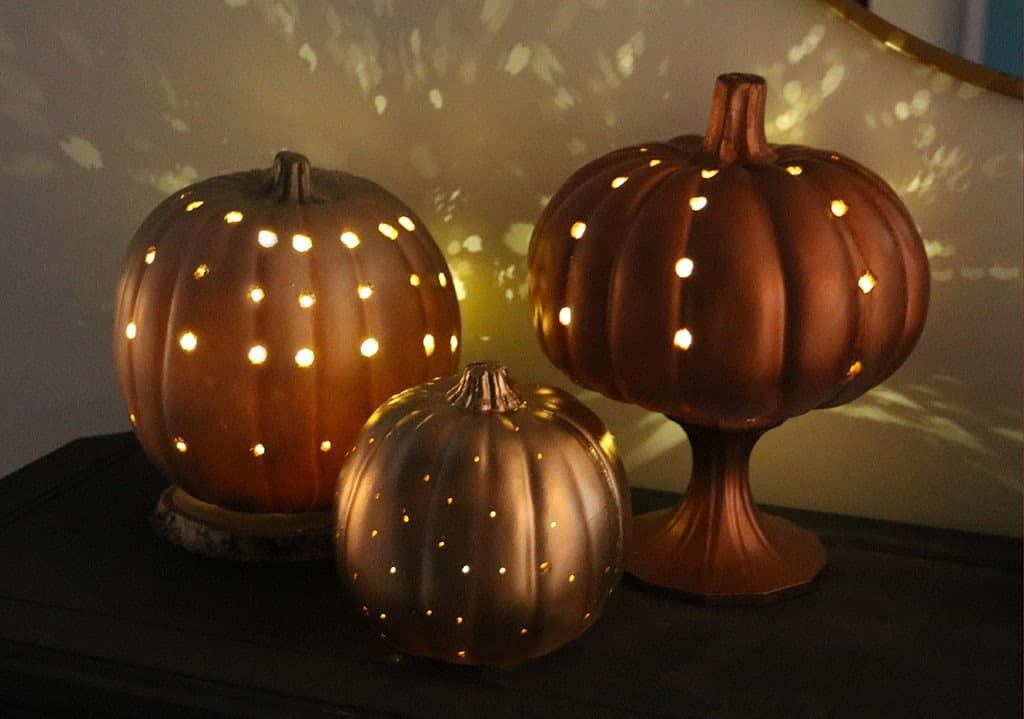
Here’s a top view.
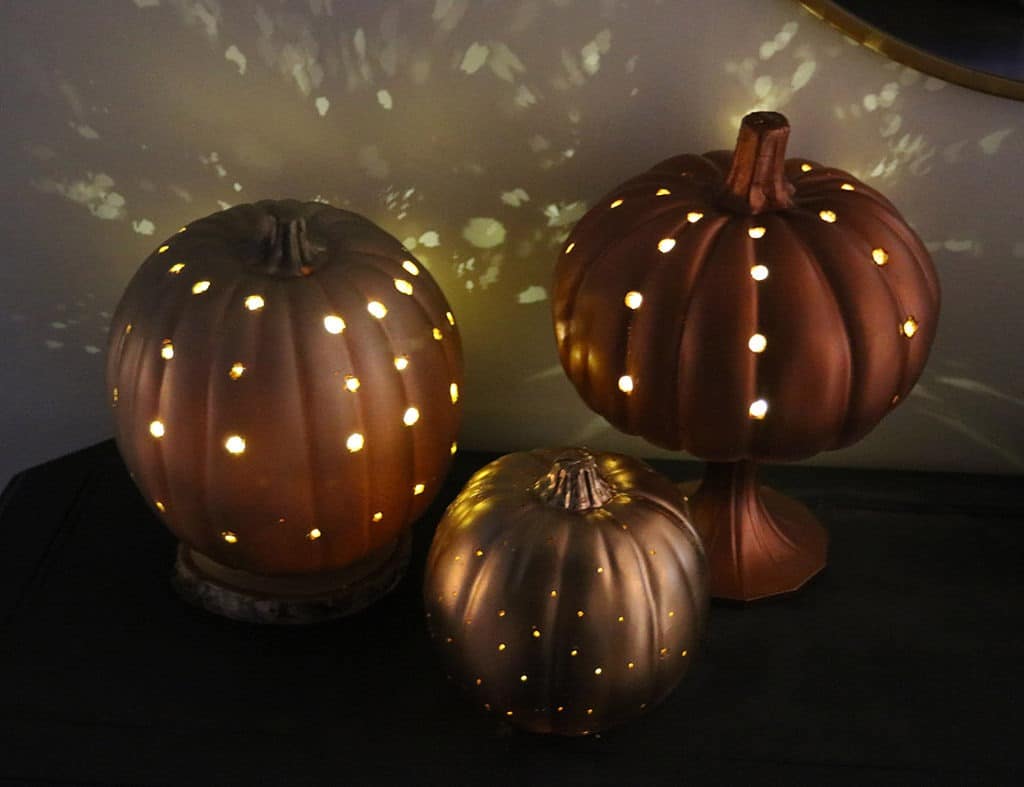
Ultimately they ended up on our stairs along a curved wall out of the walk way. I mixed them with a couple other fabric pumpkins I found around the house.
I love the glow they put off along the wall.
I love how these DIY luminary pumpkins turned out and they only took about an hour from start to finish. I highly recommend them to add some sparkle to your fall decor!
If you make some of your own I’d love it if you’d tag me in your Insta, Twitter, or Facebook photos, and I’m always so very thankful when you Pin my work as well.
xoxo
Audrey
Pin these DIY luminary lantern pumpkins for later

You might also like an easier DIY pumpkin project I did using only paint and push pins.