Want an easy way to pump up your pumpkins? You should definitely give DIY thumb tack pumpkins a try!
This method works great on both real or faux pumpkins, and I show both below.
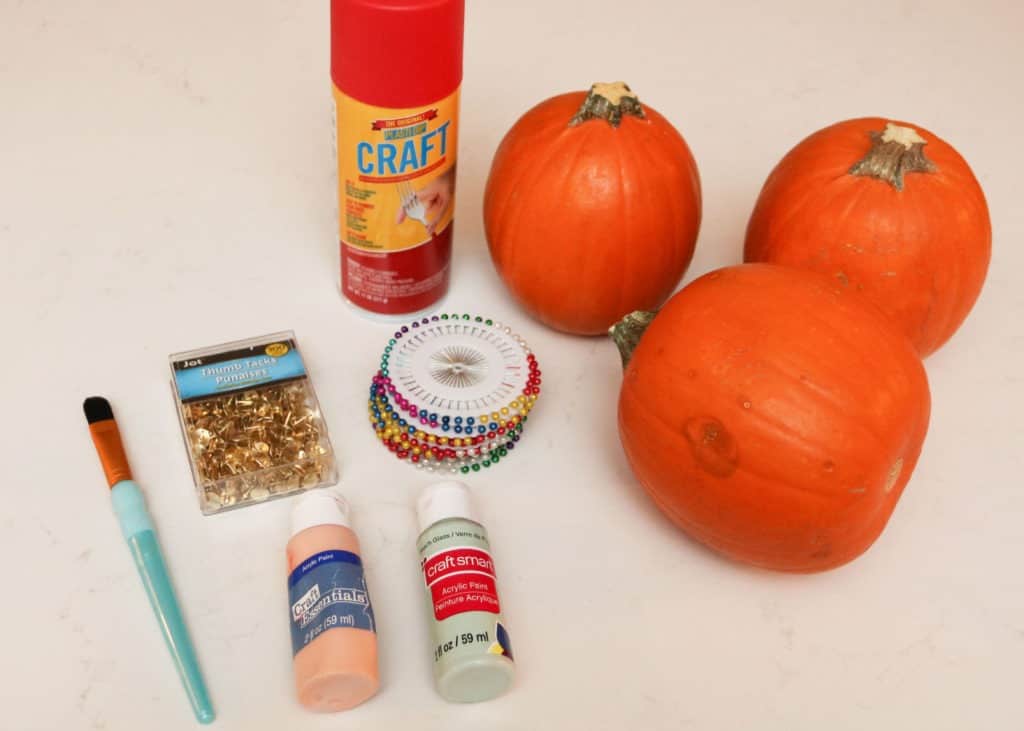
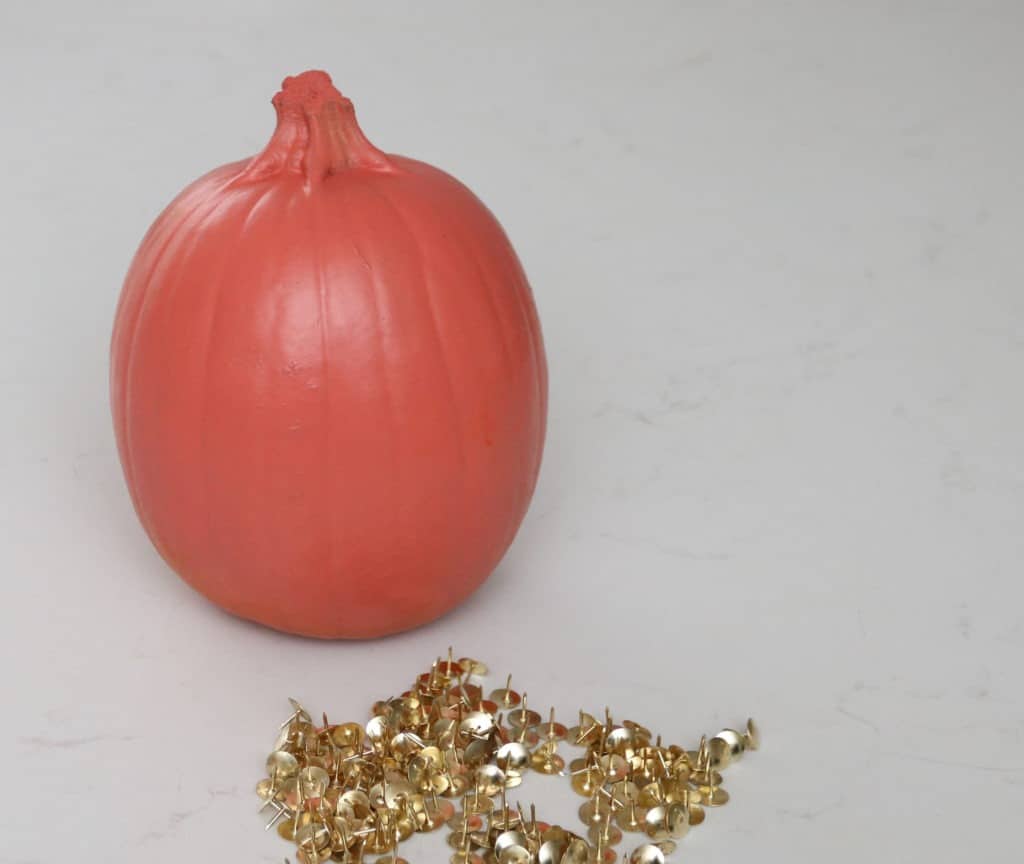
All you need are a few supplies to make these pretty DIY pumpkins:
- Real (or faux) pumpkins
- Acrylic paint and brush
- Spray paint
- Gold metal thumb tacks
- Straight pins with colored ends
- Flower thumb tacks
- Colorful round tacks (large)
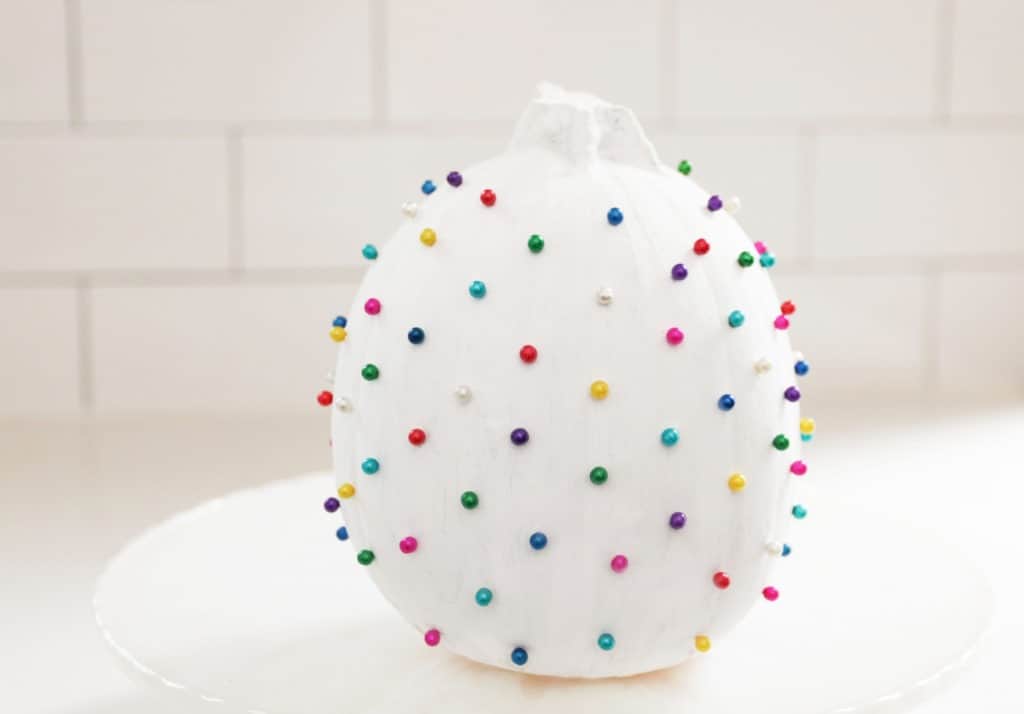
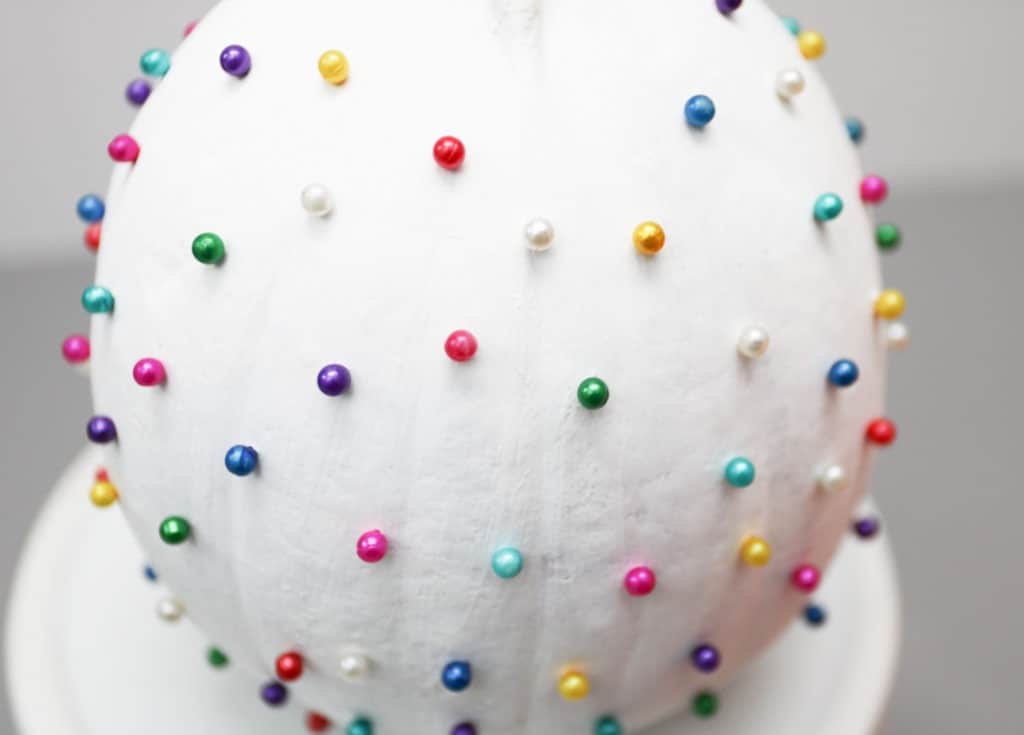
I did a few different styles for my pumpkins. First we’ll start with the straight pin pumpkins, which I call confetti pumpkins.
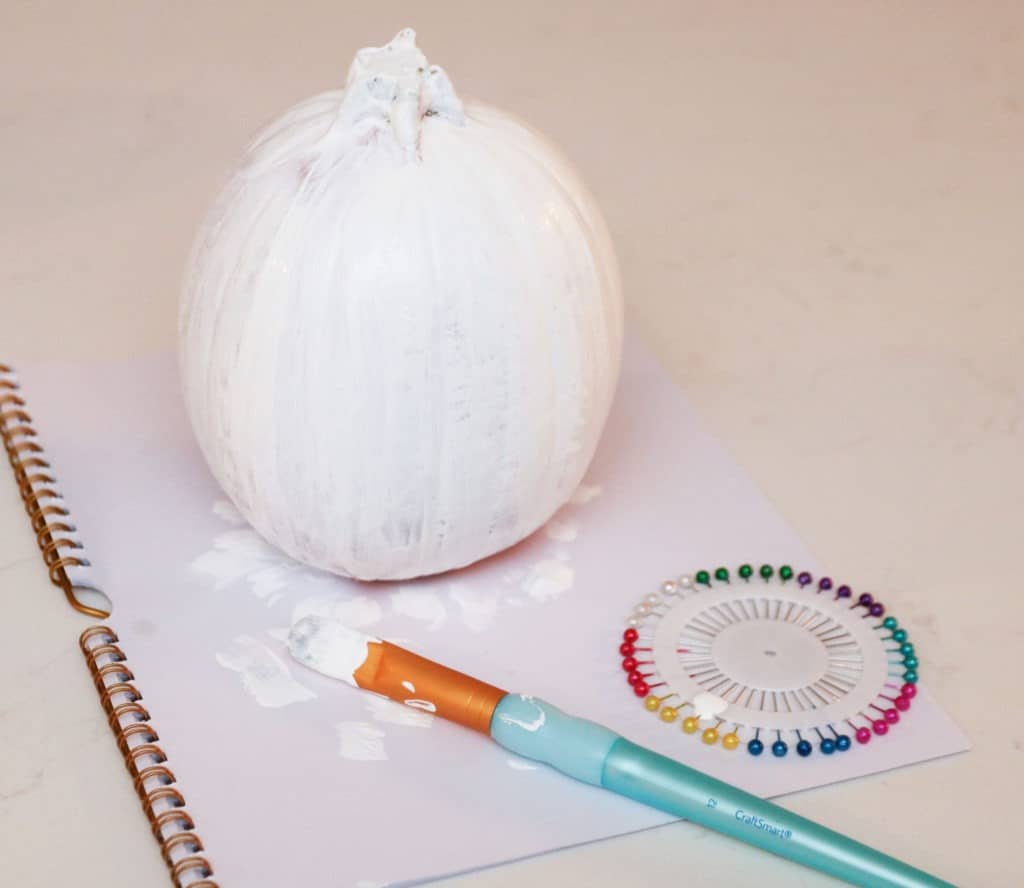
Take your acrylic paint (I chose white) and brush on a couple coats with your brush.
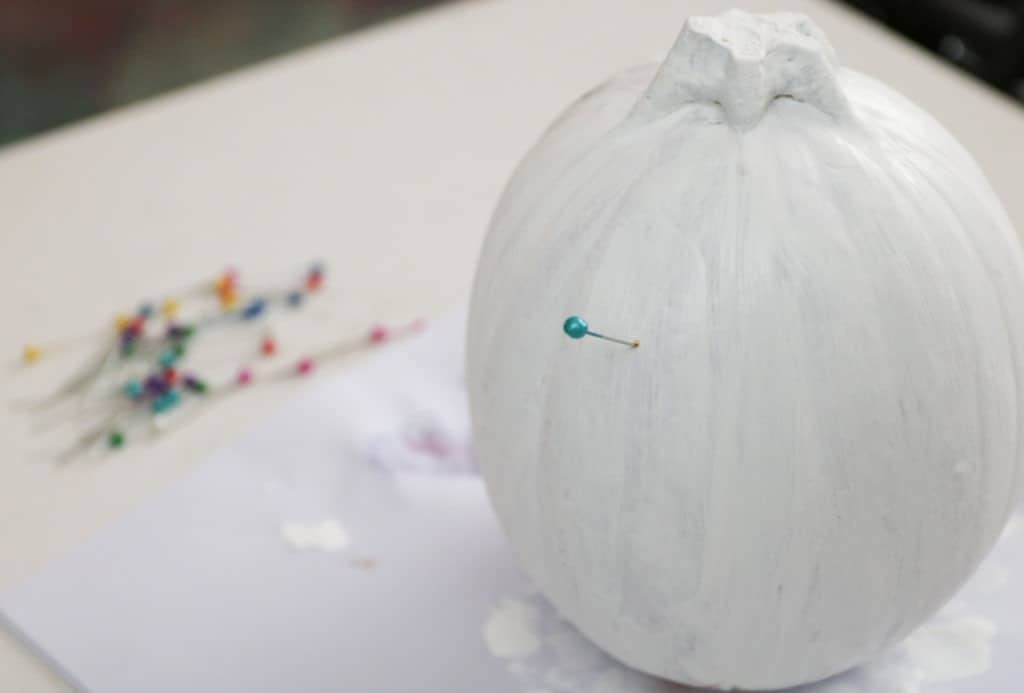
Once your paint is dry simply push your colored tip straight pins into the pumpkin.

Repeat this step until you’ve filled up the entire outside of the pumpkin. It’s so easy!
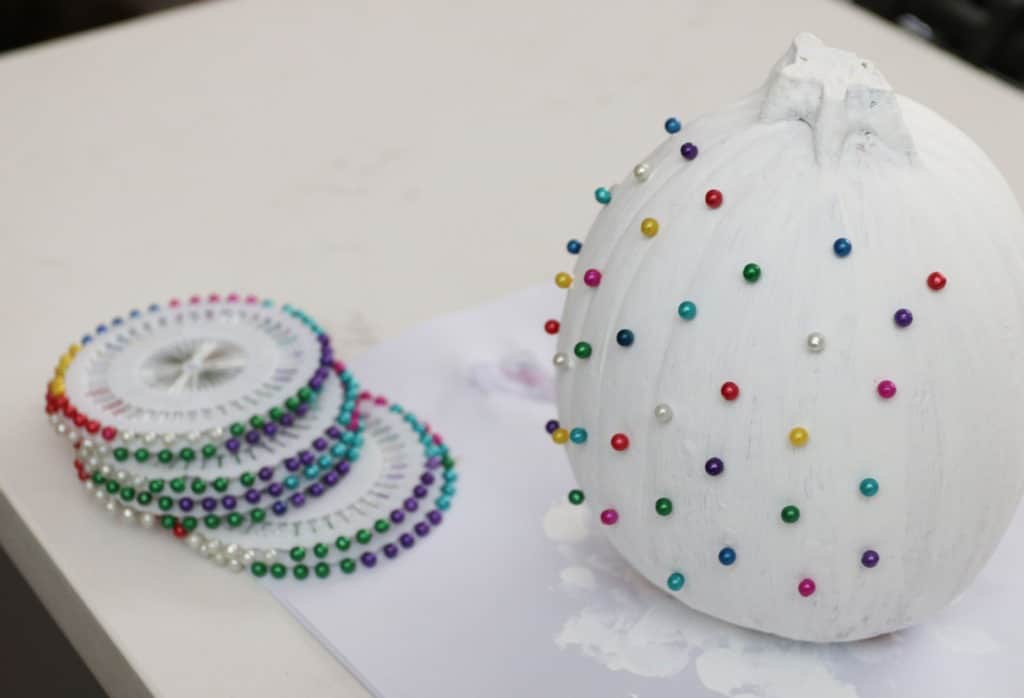
This DIY straight pin pumpkin feels very Kate Spade to me and would look awesome as a party centerpiece and would add a pop of color and fun!
It’s definitely my favorite.
Here’s a closer look.
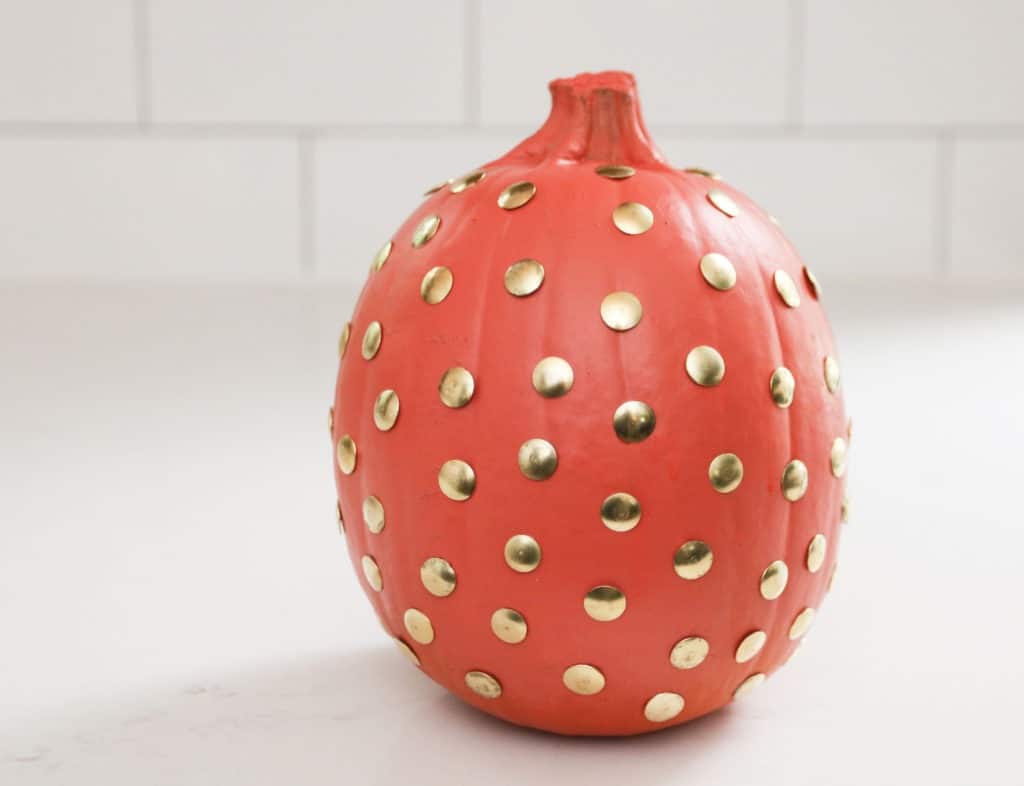
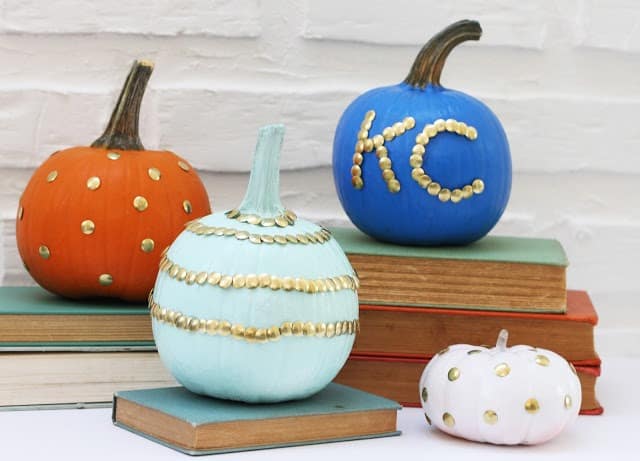
Ok, now it’s time for a simple polka dot pumpkin using brass thumb tacks, which I picked up at my local Dollar Tree, but you can also buy them affordably via Amazon (linked above).
I spray painted my pumpkin a coral color using my Krylon spray paint.
Once the spray paint was dry, I simply stuck the thumb tacks all over the pumpkin until I was happy with the balance. You really can’t mess it up!

You’ll want to make sure you firmly stick the thumb tacks into the pumpkin since they can stick out a bit otherwise.
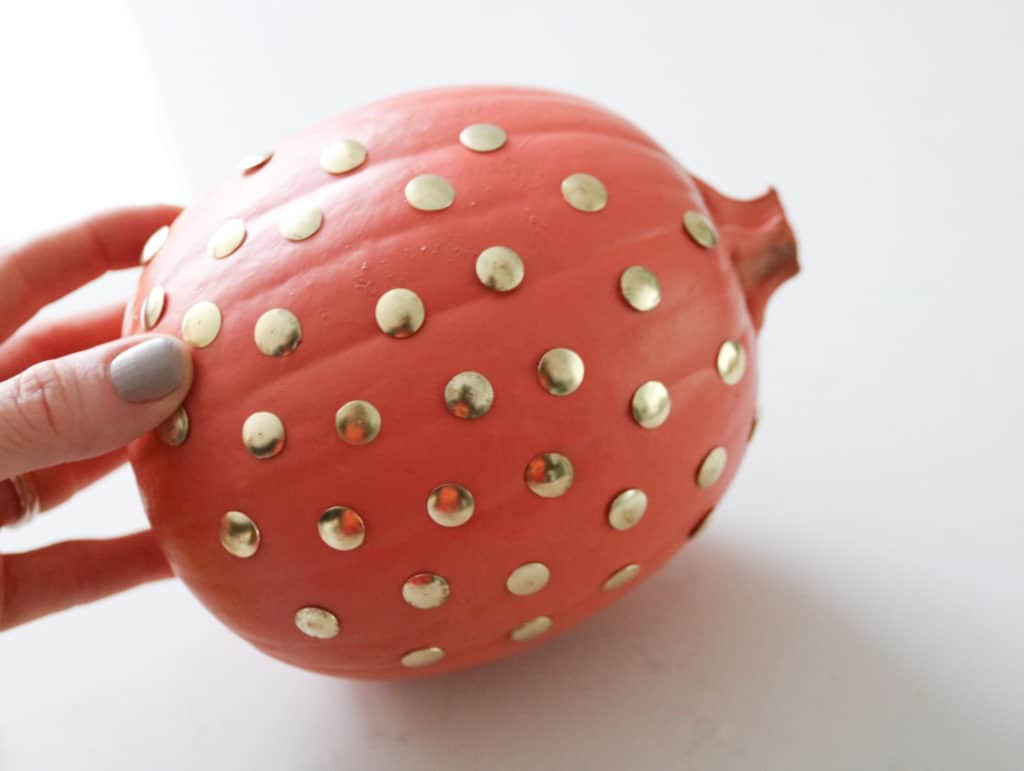
That’s it. Look how simple yet cute this DIY thumb tack polka dot pumpkin is.
You can choose to leave the pumpkin unpainted and you can also apply the tacks in a linear pattern. The options are endless!
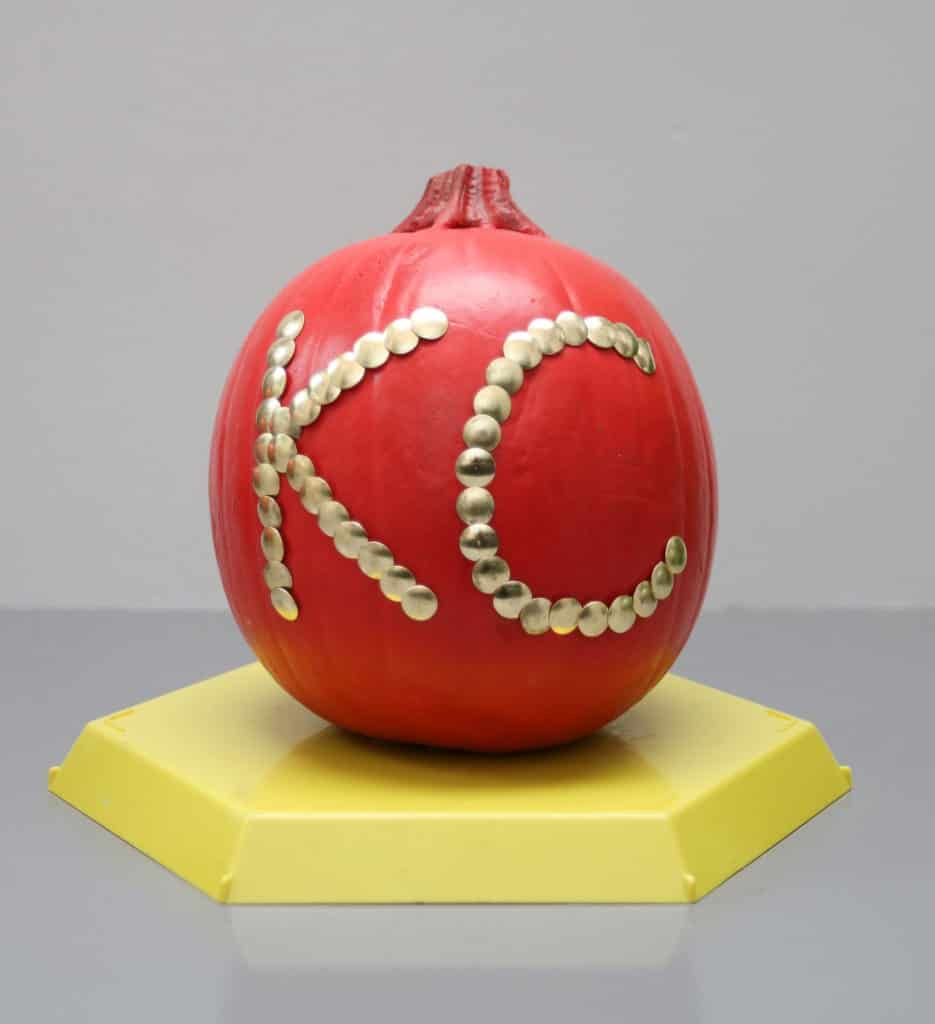
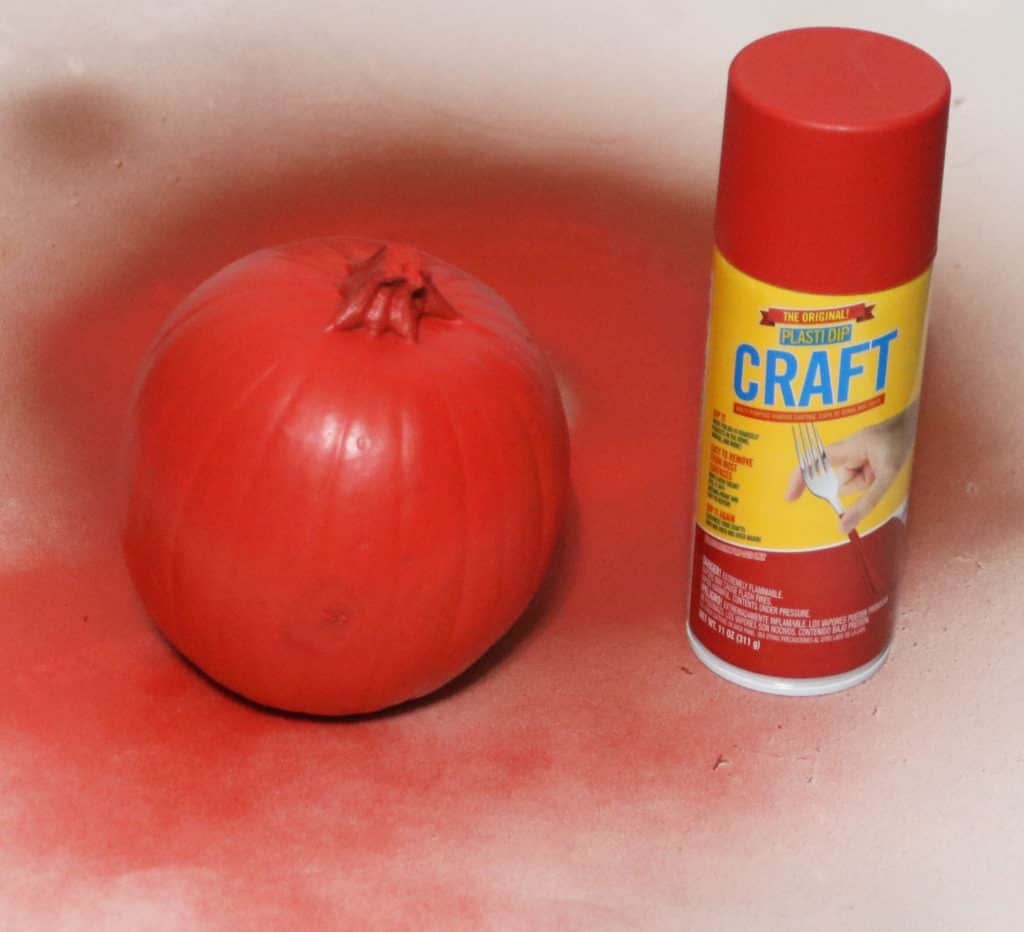
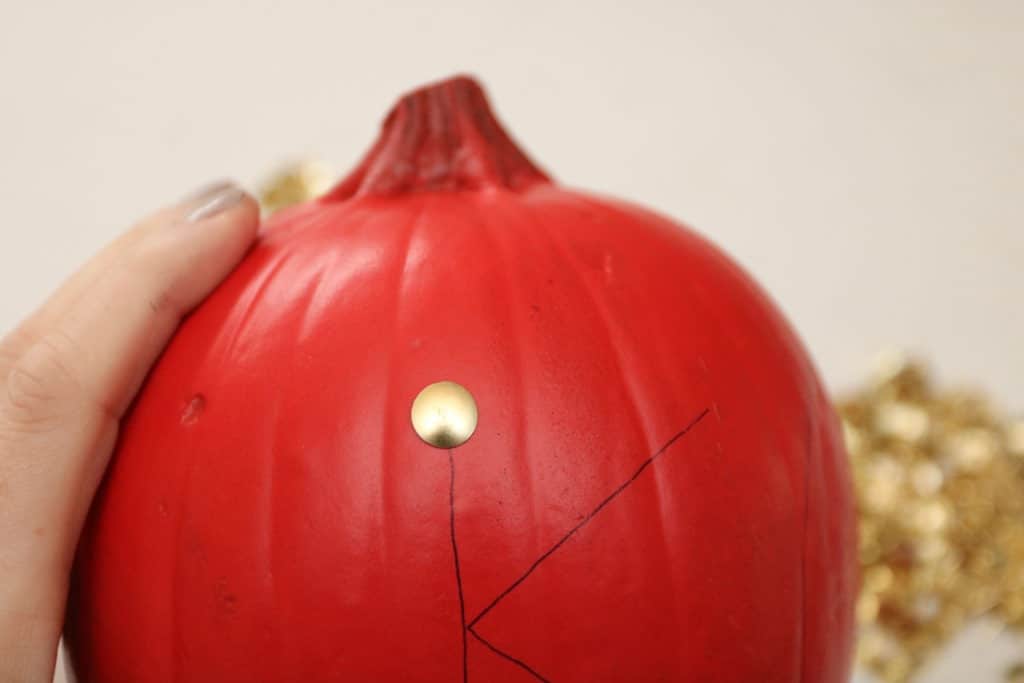
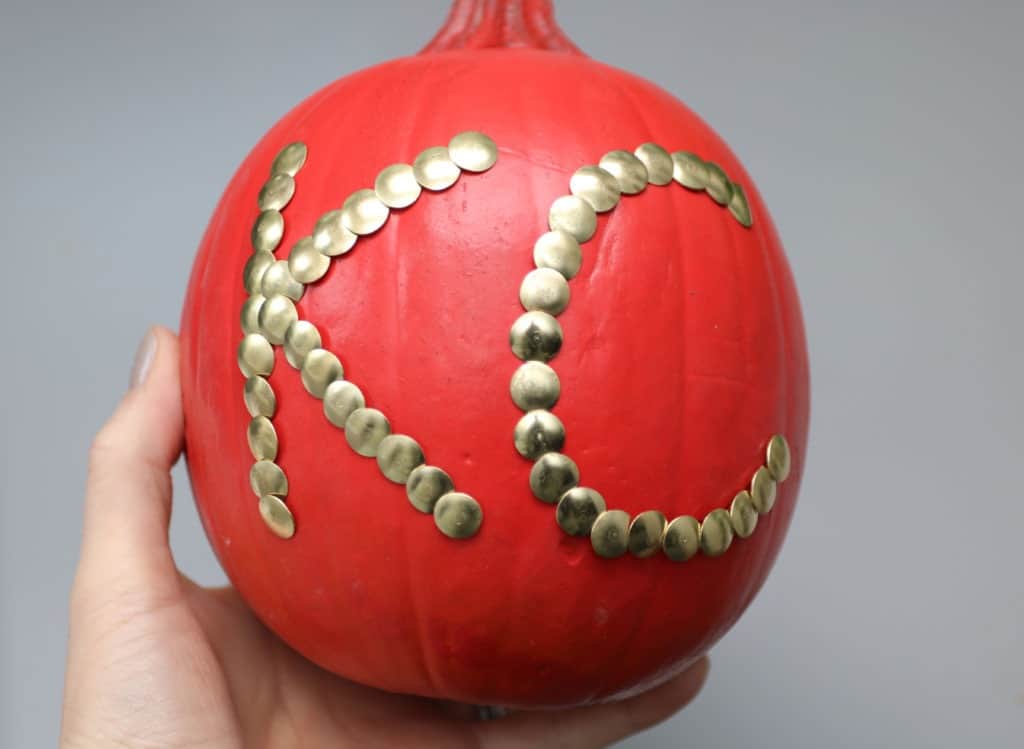
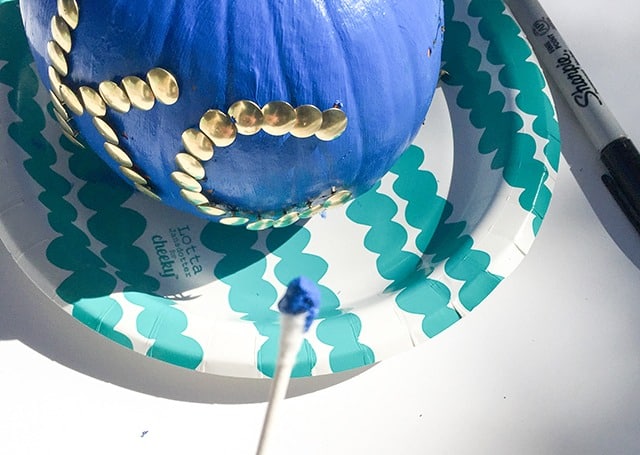
And I always like to do a more sophisticated sports themed pumpkin each year. This year I went for the Kansas City Chiefs colors.
All I did here was spray my pumpkin with PlastiDip craft spray. Once dry, it gives the pumpkin a plastic coated look and the color always turns out very saturated and smooth. I love this stuff and have it in quite a few other colors.
After the paint dried I took an ink pen and hand drew a “KC” onto one side of the pumpkin. I like to use an ink pen because if you mess up you can wipe the ink away (in most cases) and start over.

From there I added the gold thumb tacks down the letter, making sure they slightly overlapped.
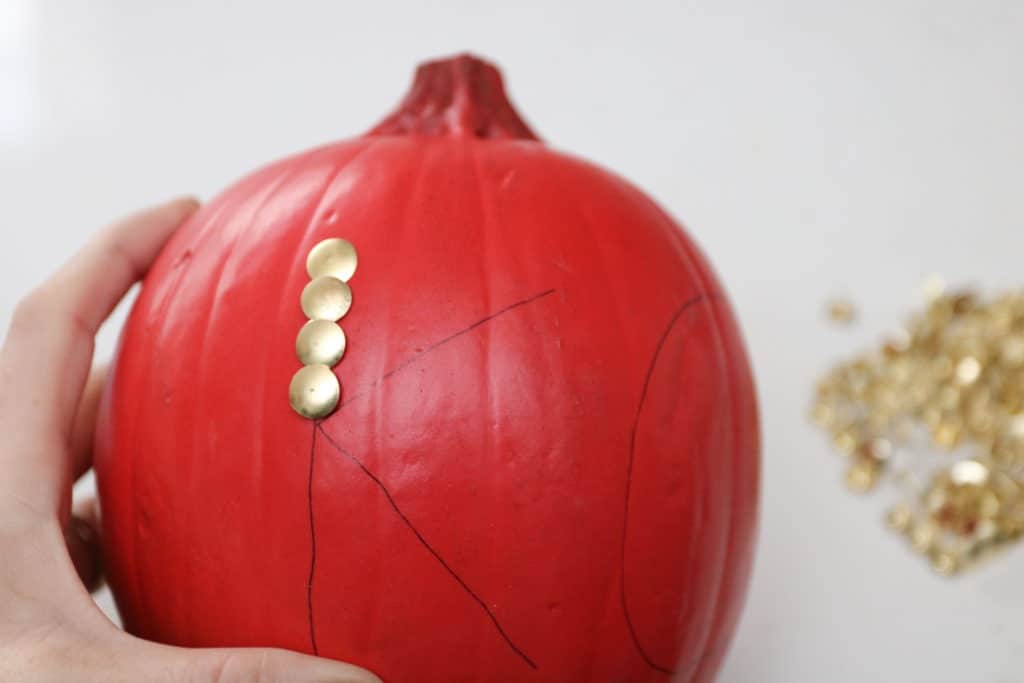
This part goes by pretty quickly.
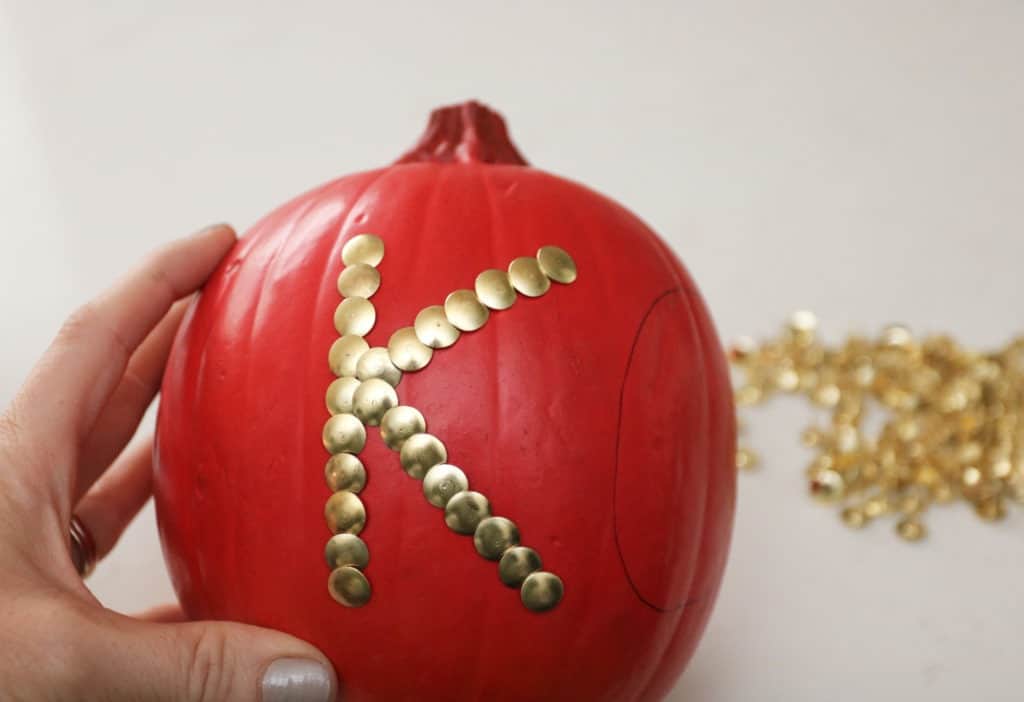
Once you cover the letters you’re all finished. I told you it was easy.
Look at this fun DIY thumb tack pumpkin — so fun!
A few years earlier I did a KC Royals pumpkin while they were in the world series.
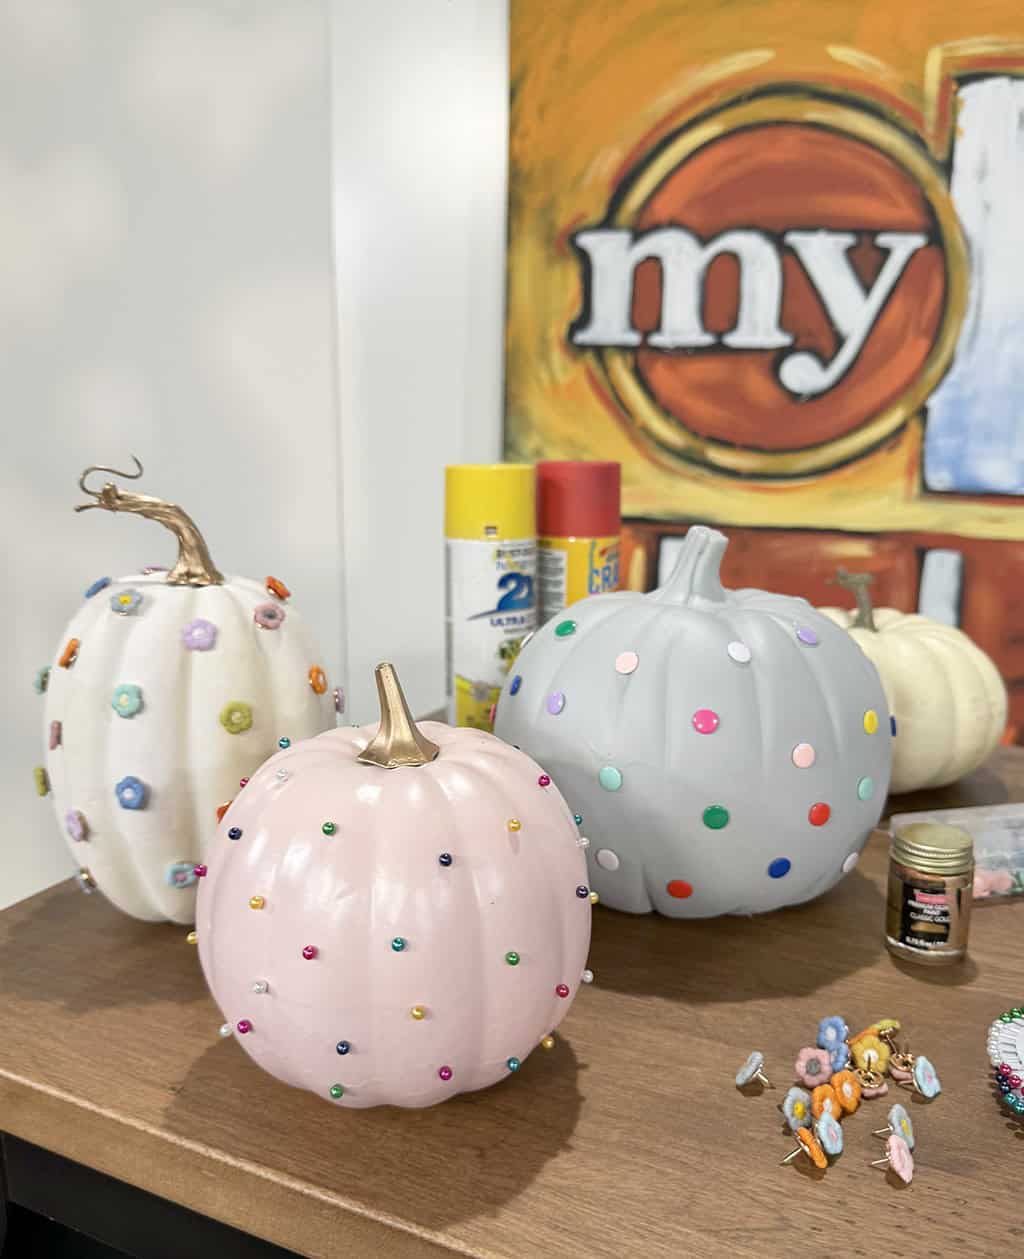
Here are some of the DIY push pin pumpkins I made a few years ago.
We’re headed to the pumpkin patch today to pick up a few more pumpkins. I just want to keep making more DIY thumb tack pumpkins!
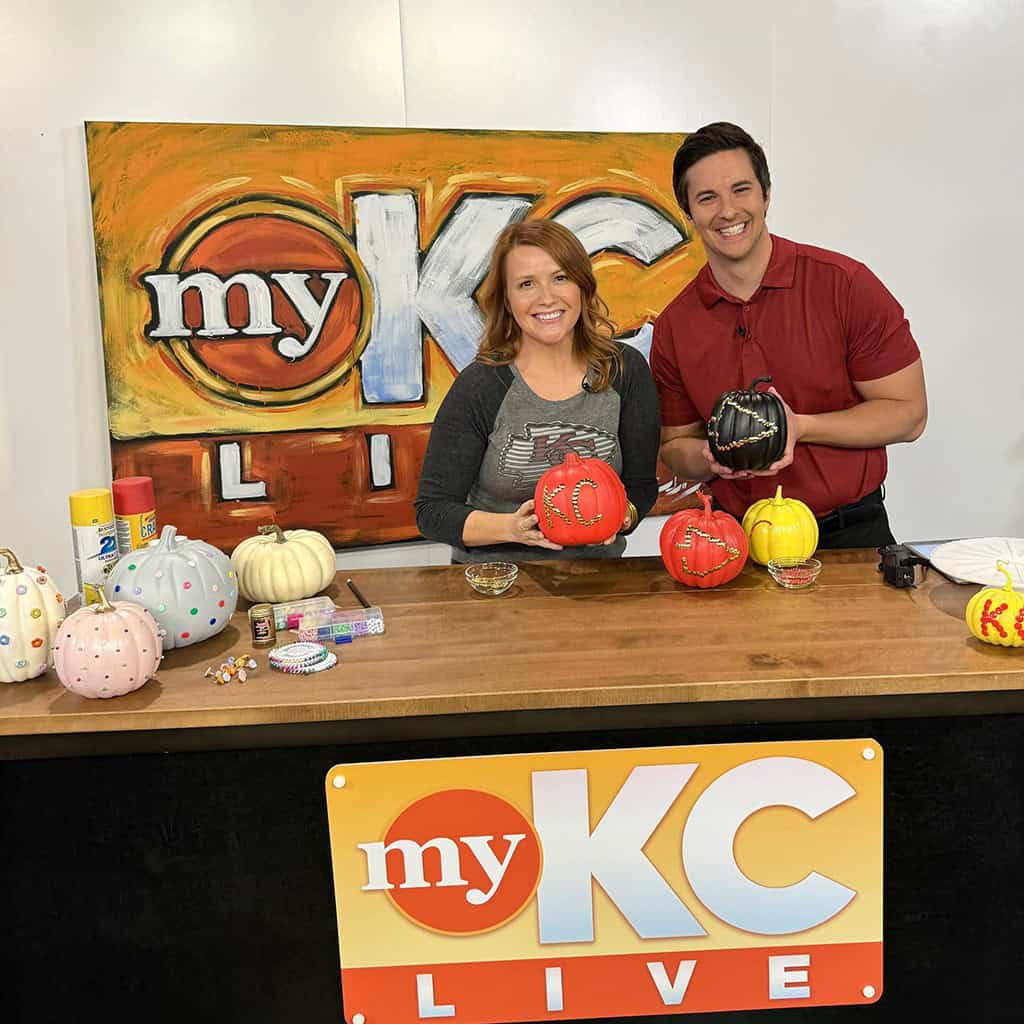
I recently did a live TV segment showing how to make these push pin pumpkins!
These pumpkins are so easy, and I highly recommend them. They’d made great hostess, neighbor, teacher gifts — everyone would love one of these!
If you make your own, I’d LOVE it if you’d tag me in your Insta, Twitter, or Facebook photos, and I’m always so very thankful when you Pin my work as well.
xoxo
Audrey
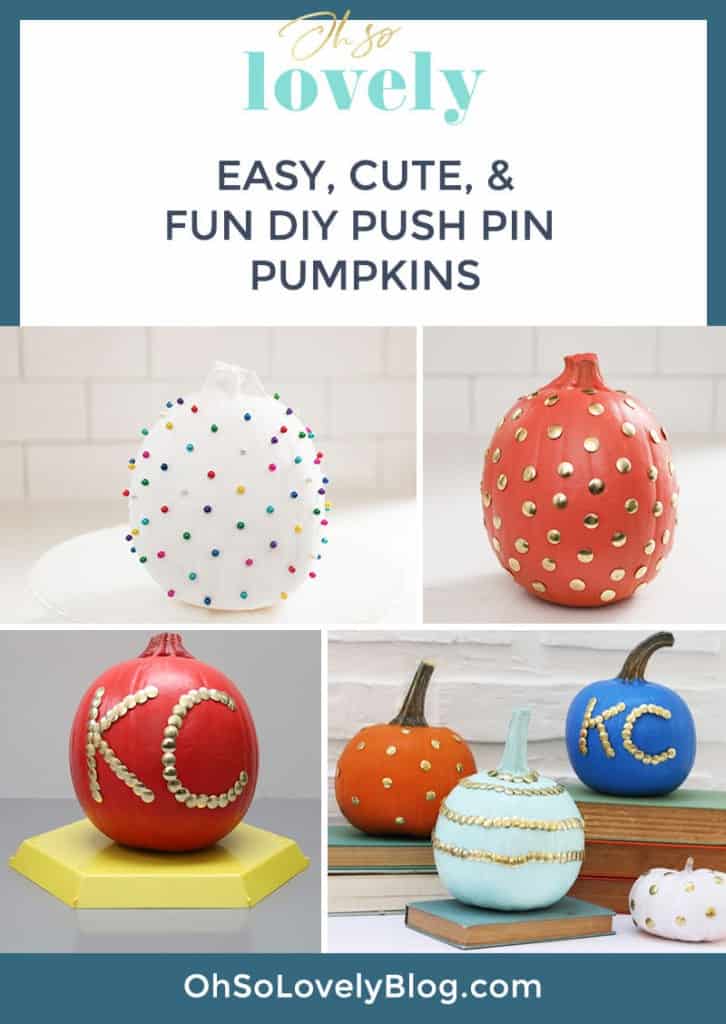
Pin these DIY thumb tack pumpkins for later!
1 thought on “HOW TO MAKE CUTE & EASY THUMB TACK PUMPKINS”
Comments are closed.