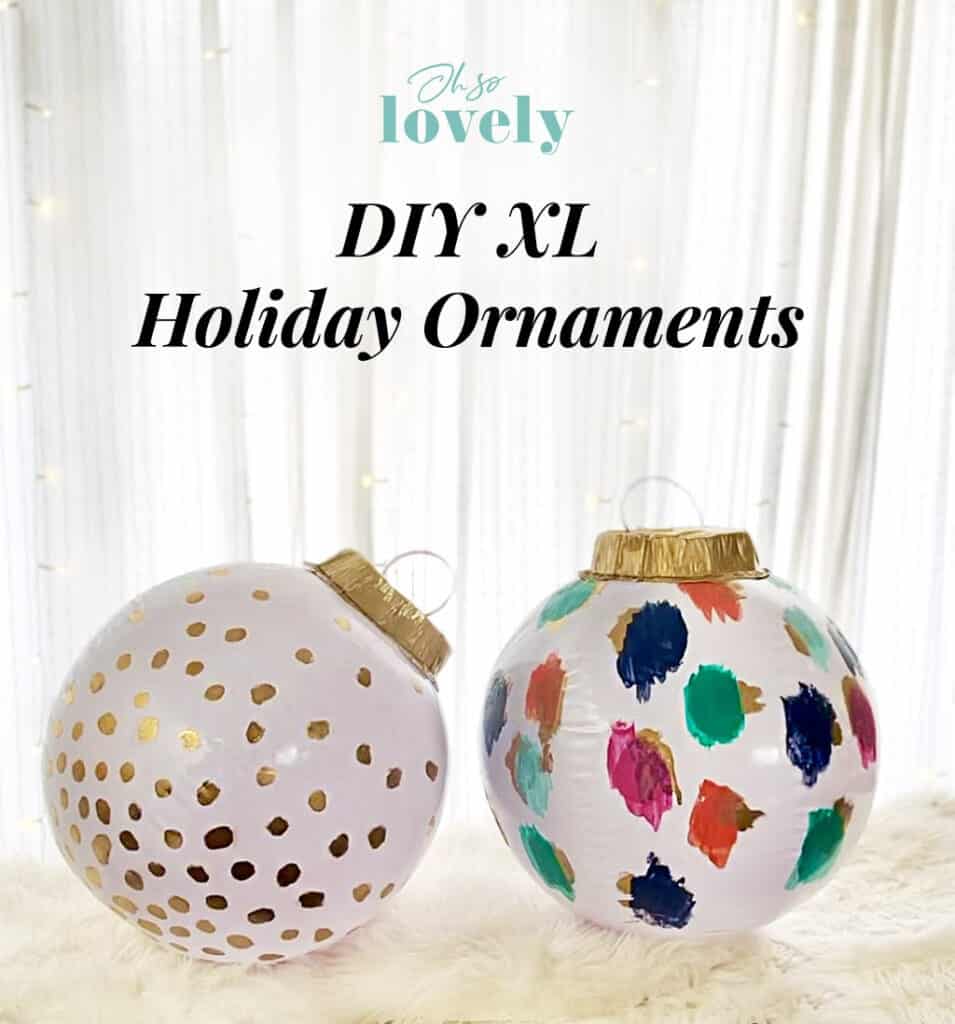
DIY XL holiday ornaments make the most fun holiday decor!
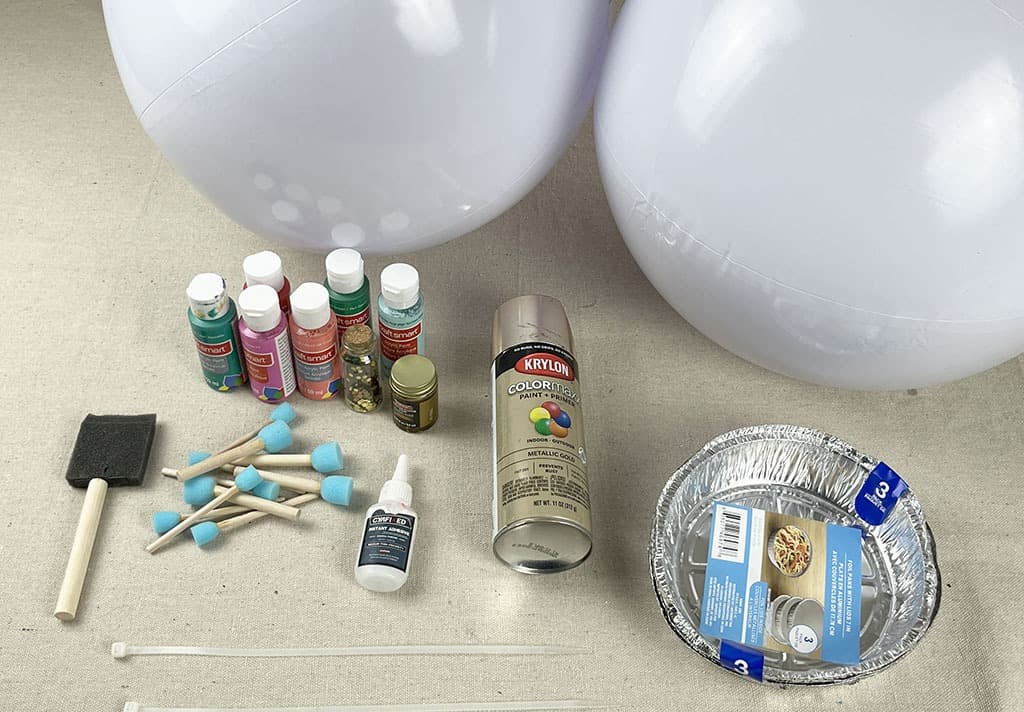
I always love decorating for the holidays, and this year I decided to try something new using two white beach balls and a few other supplies that I already had on hand:
Beach balls (you could also order solid colored or patterned balls)
Acrylic paint
Liquid leaf gold foil paint
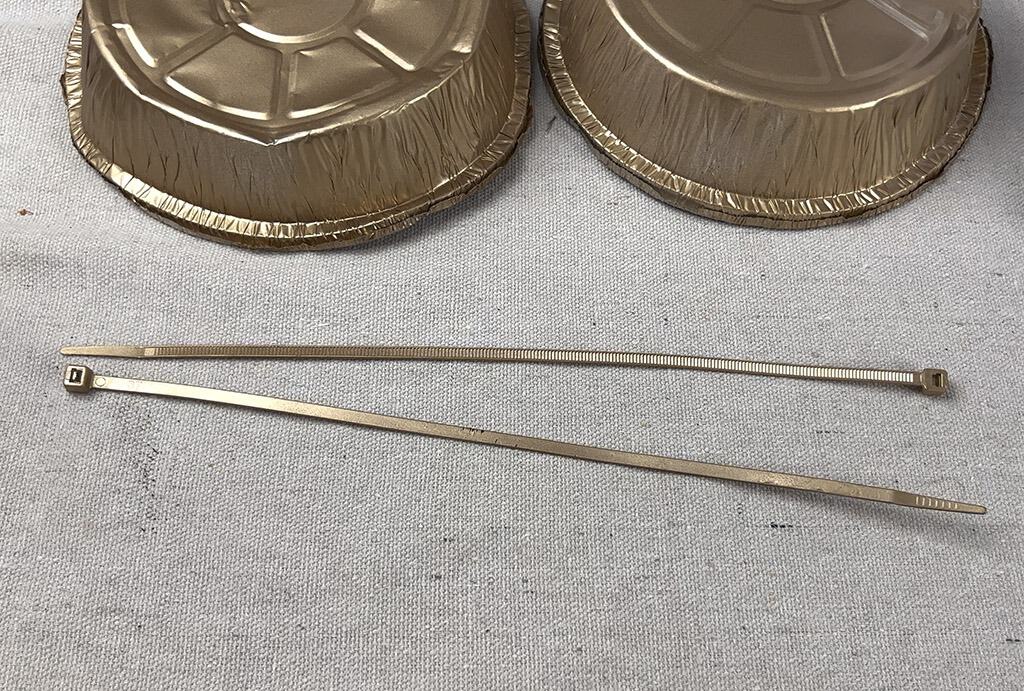
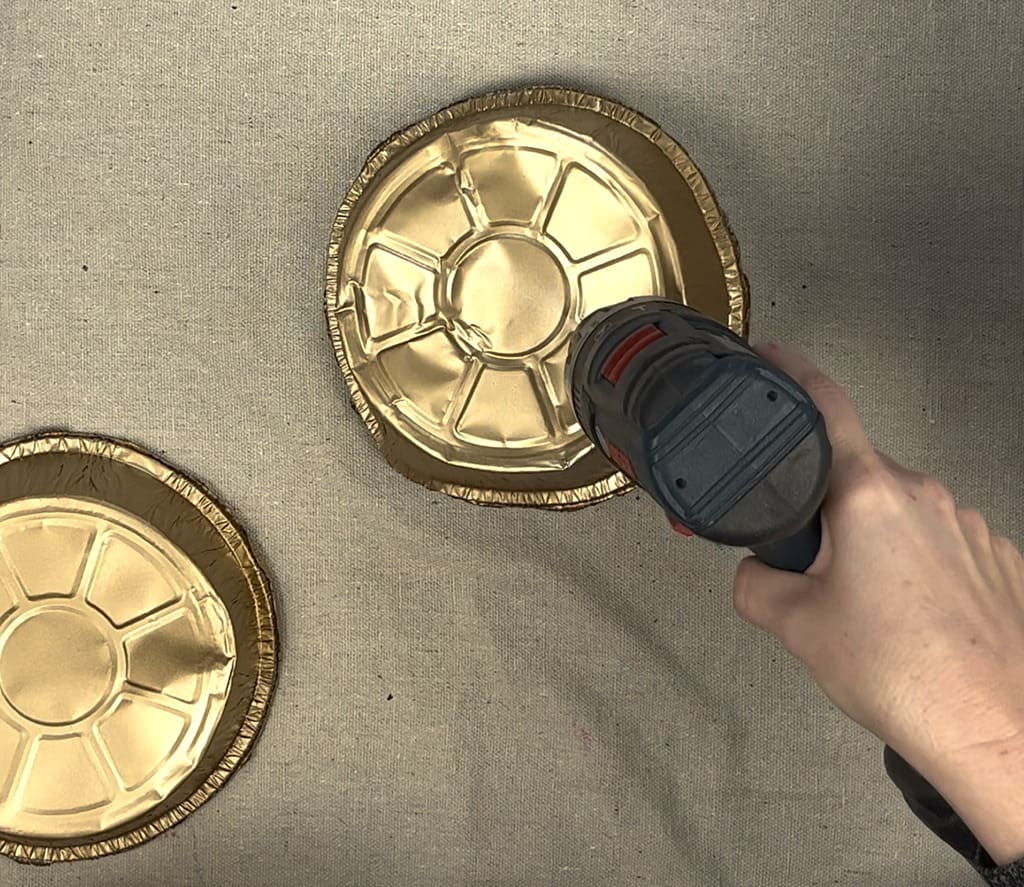
2 aluminum pie tins (from dollar tree)
2 zip ties or stiff silver or gold ribbon
Spray paint
Super glue
Foam brushes
Note: I originally tried these solid colored balls, but the red, gold, and green spray paint I used unfortunately never cured/dried, so I went to plan B. You’ll want to test a small area of your chosen ball to make sur eit takes paint ok before continuing your project.
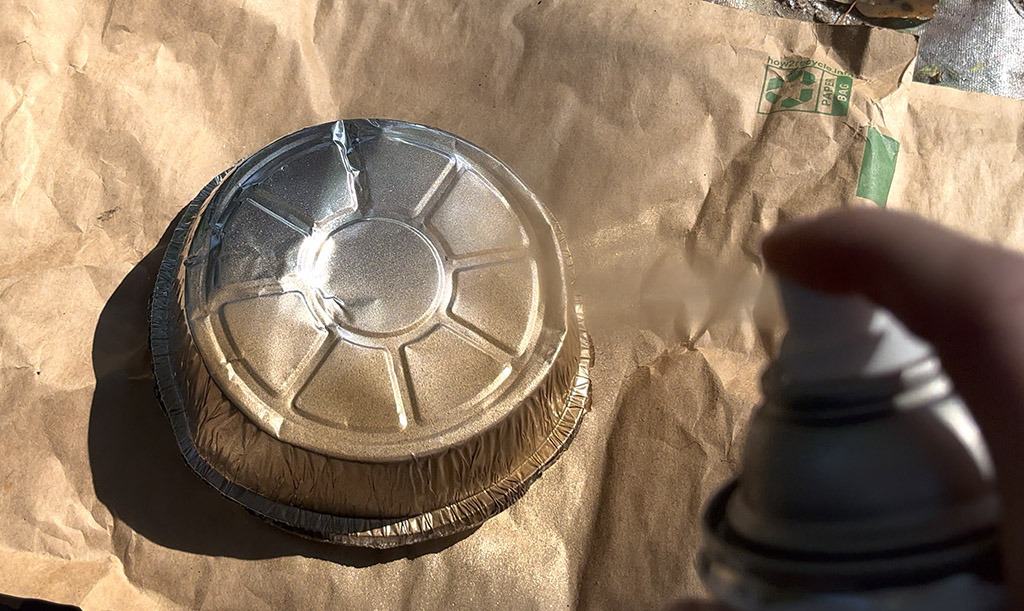
I took my 2 aluminum pie tins outside and spray painted them gold along with 2 zip ties.
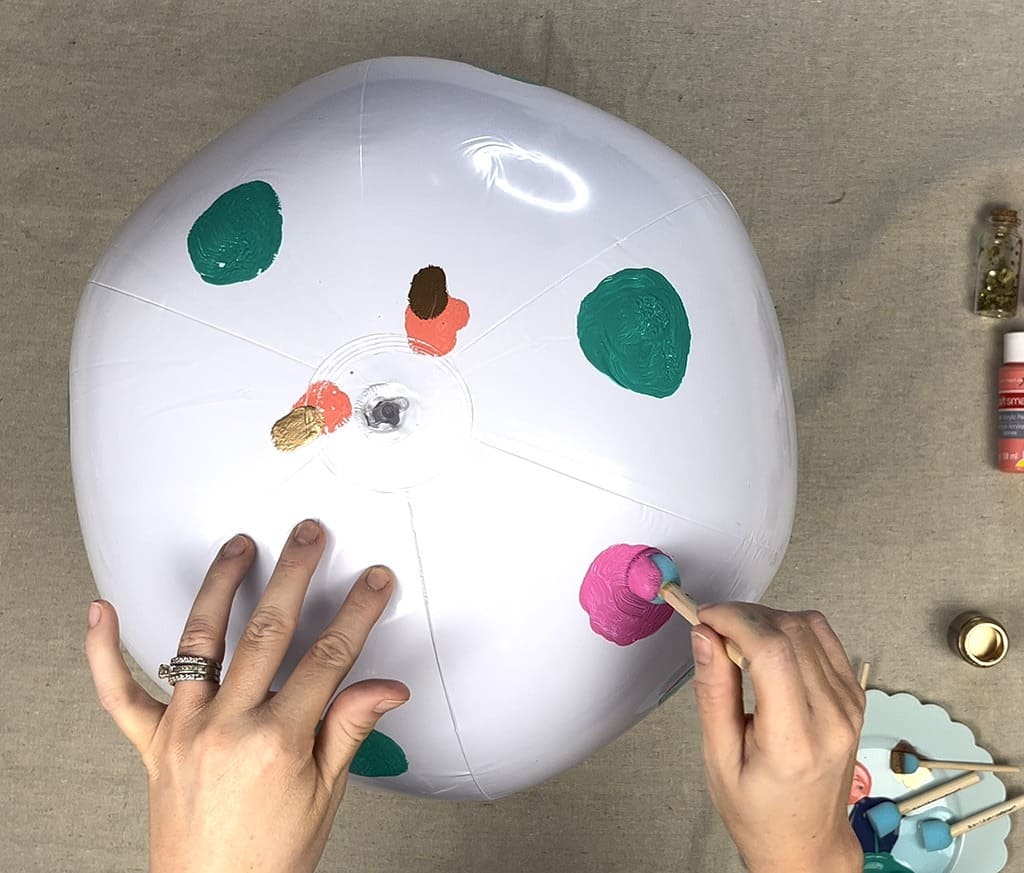
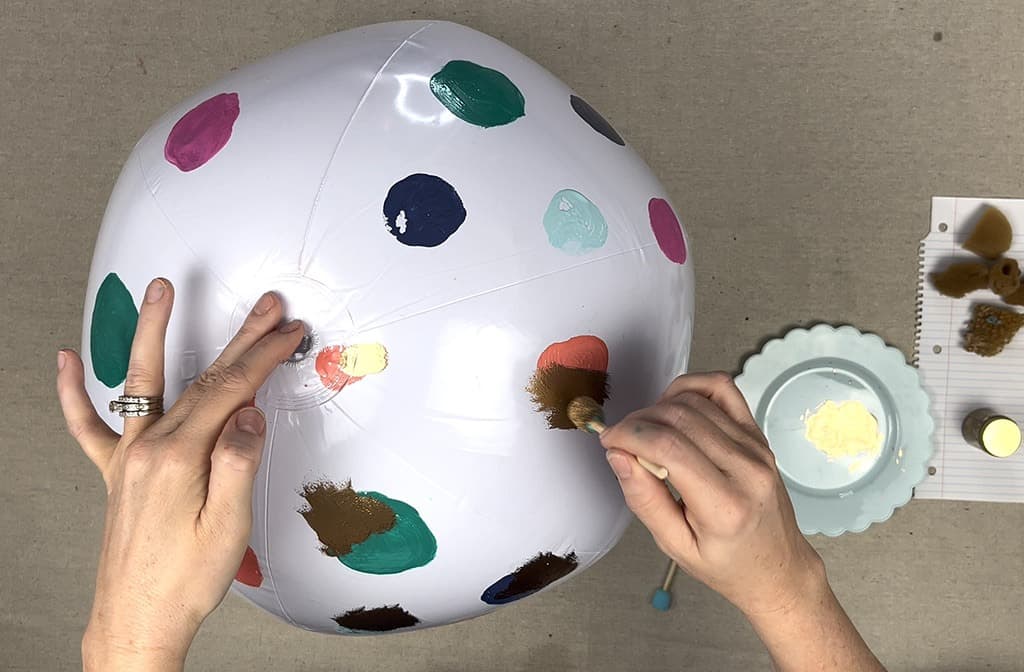
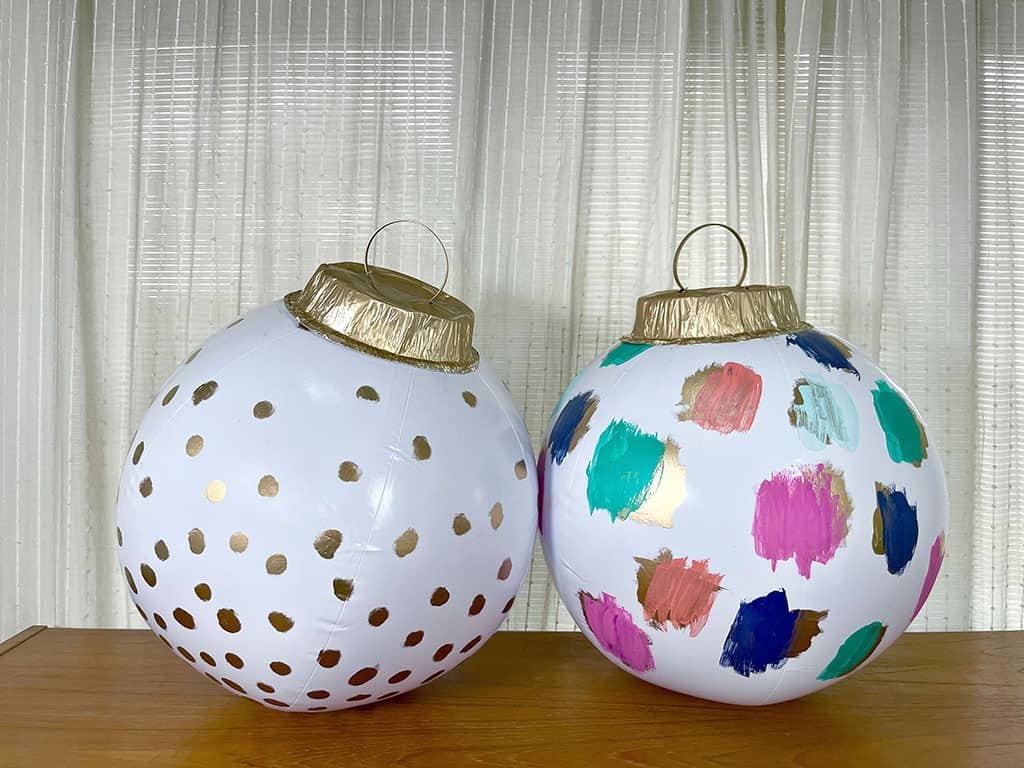
Then I got to work on my first beach ball ornament by dabbing on a layer of green acrylic paint.
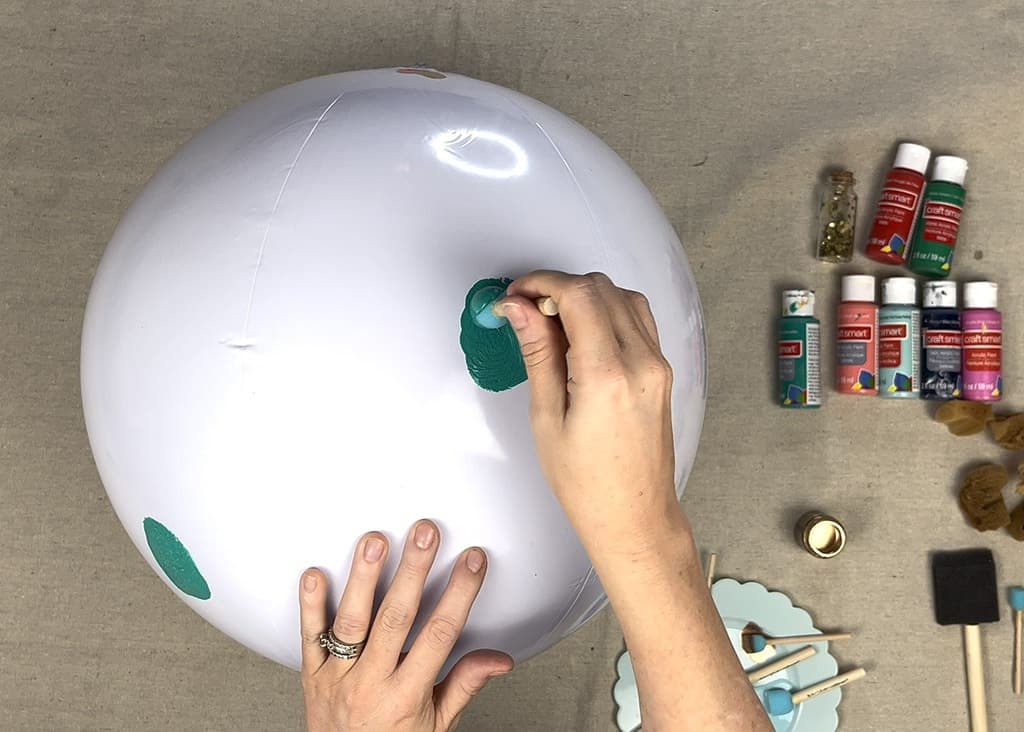
Next I moved onto pink, followed by coral, and navy.
Once the acrylic paint dried I brushed on my Liquid leaf gold foil paint for a fun pop!
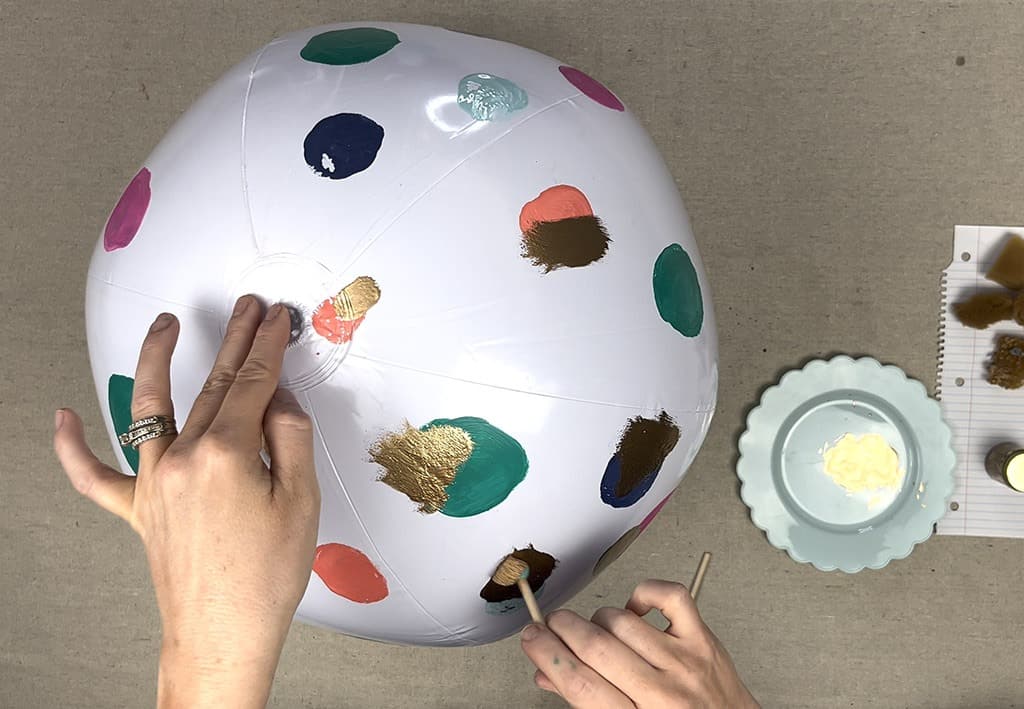
I got creative with loose brush strokes overlapping all of my colored shapes.
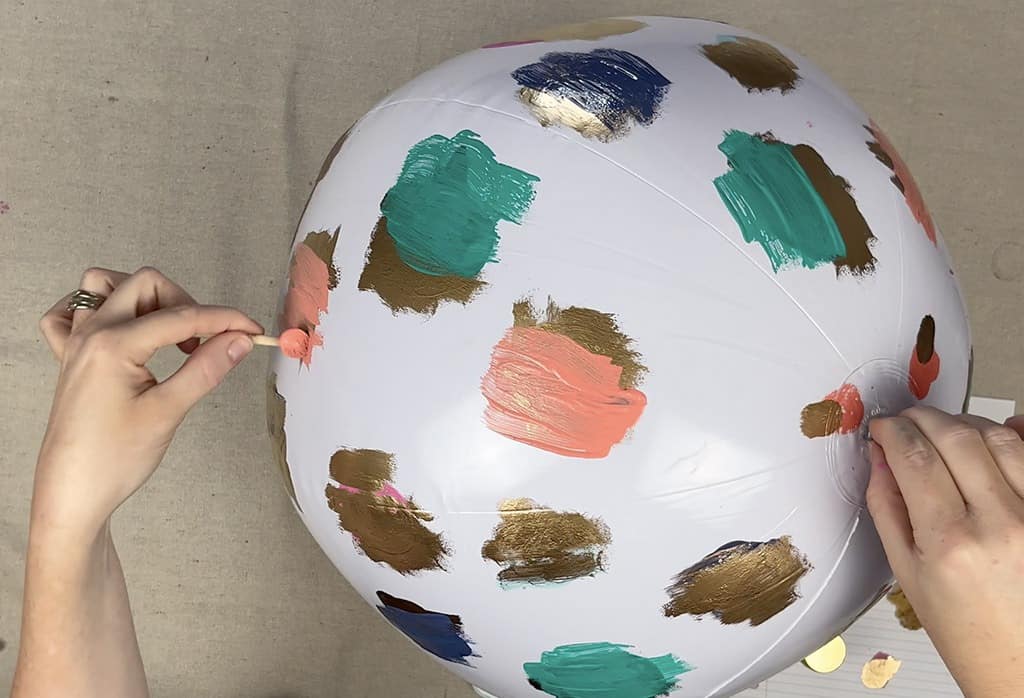
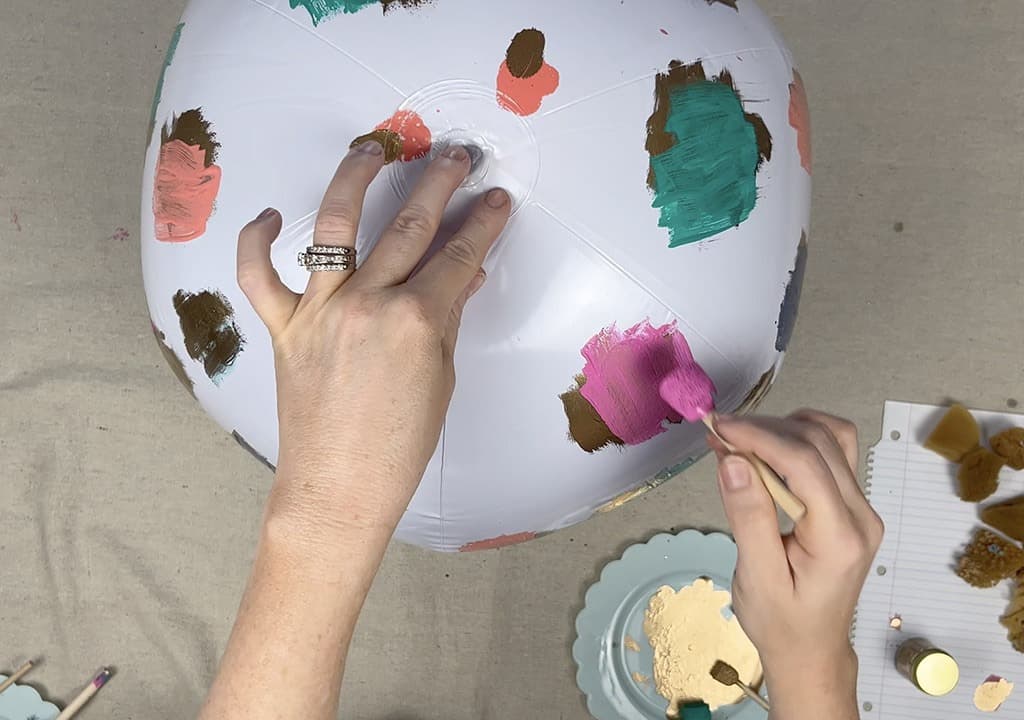
And once the first layer of metallic gold went down, I decided to add one more loose layer of color acrylic paint back over it for a more layered look. It was a trial and error design, and I really like how it turned out.
I set my first DIY XL holiday ornament aside to dry and got to work on my second.
For this one I used a round foam brush to dab on circles of gold foil paint.
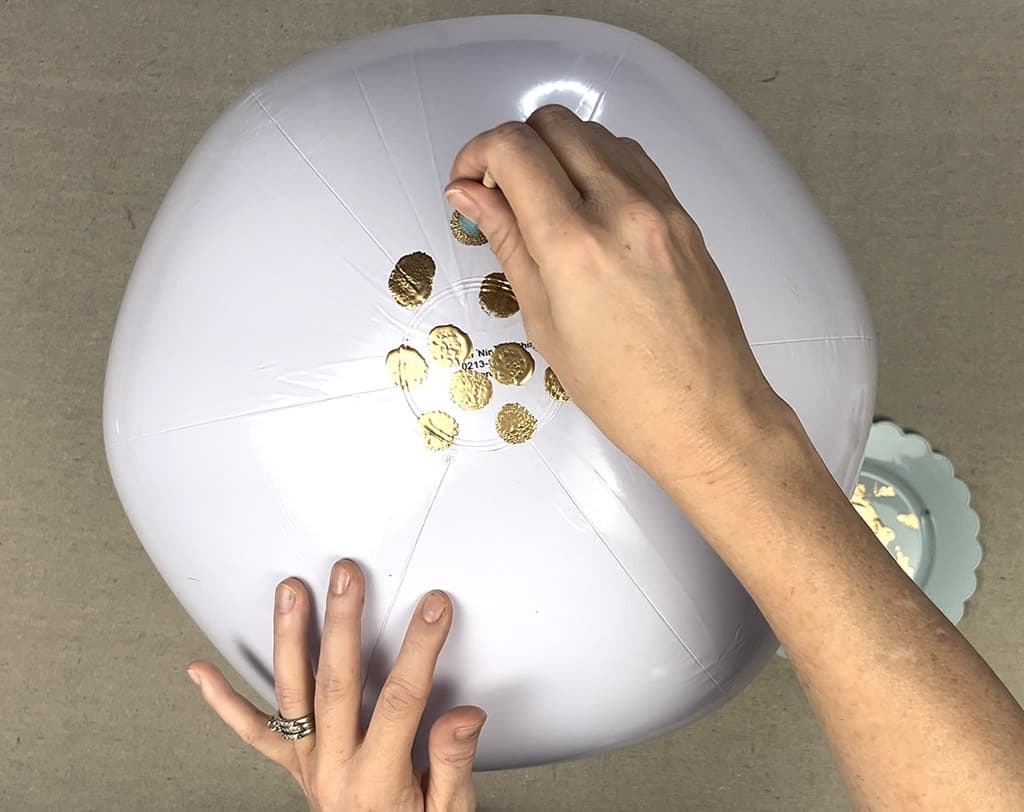
I started a little more heavy on the bottom and as I worked my way up tot he top of the ball I dabbed fewer circles on for a sort of ombre effect. Once I was happy with the second one, I set it aside to dry.

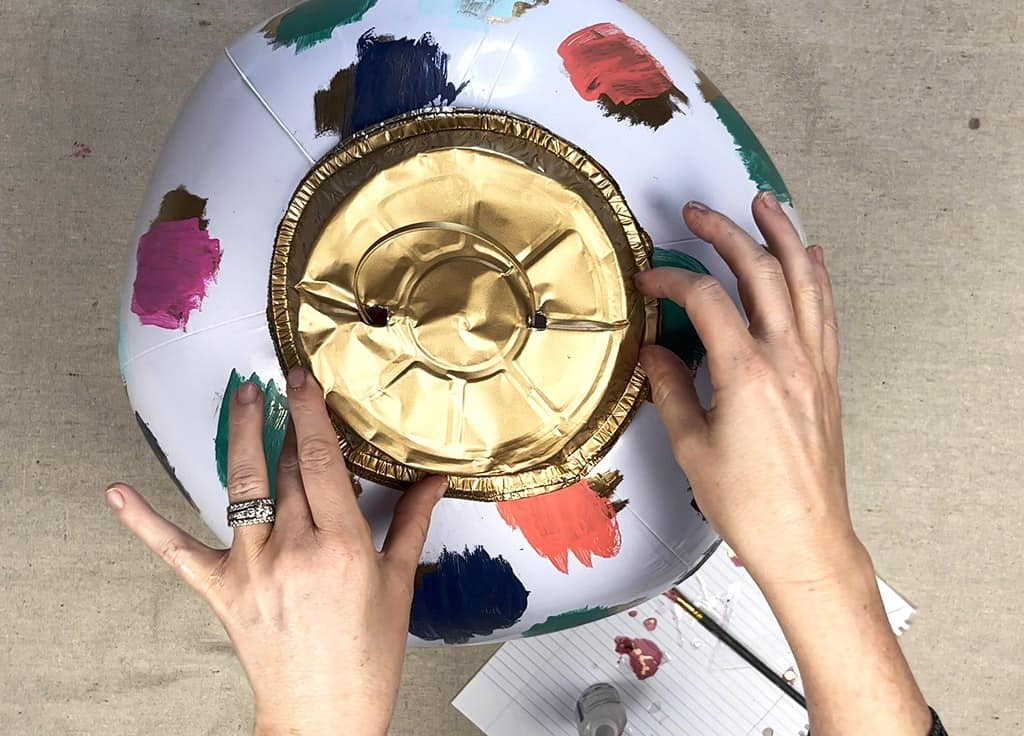
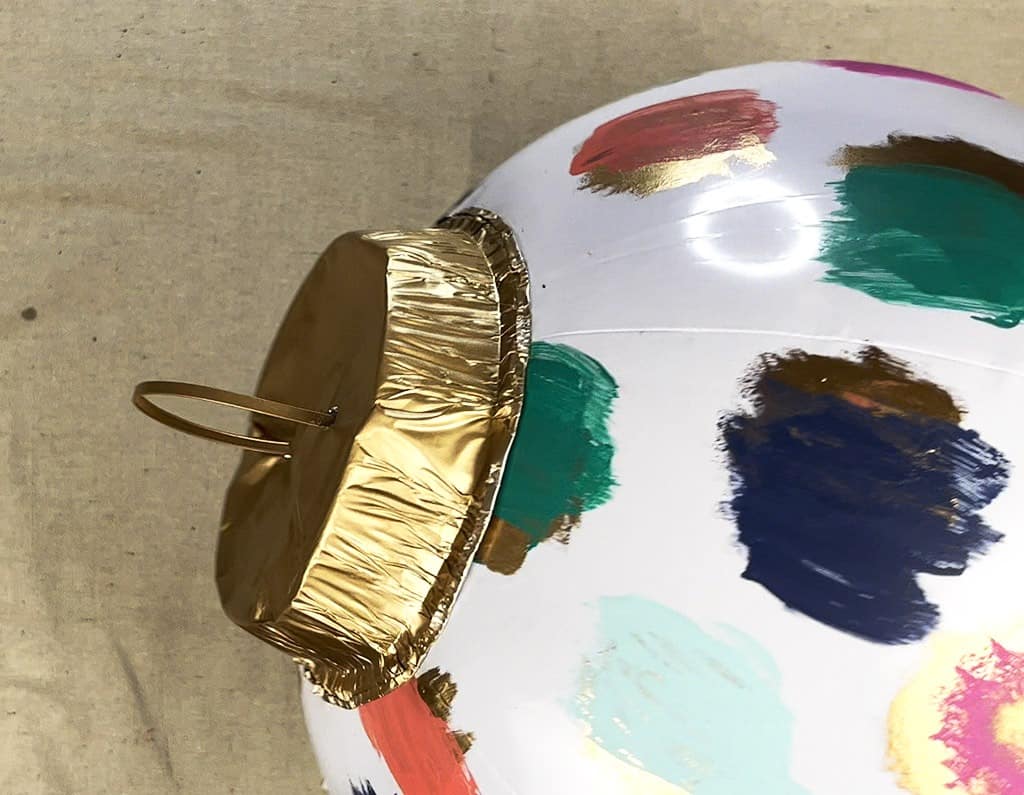
Using a drill and bit I drilled 2 holes in the base of the pie tin for the zip ties to go through. You could easily use a sharp object (pen, pencil, etc) if you don’t have a drill.
Next I looped a zip tie through the holes and locked into place in a circle shape.
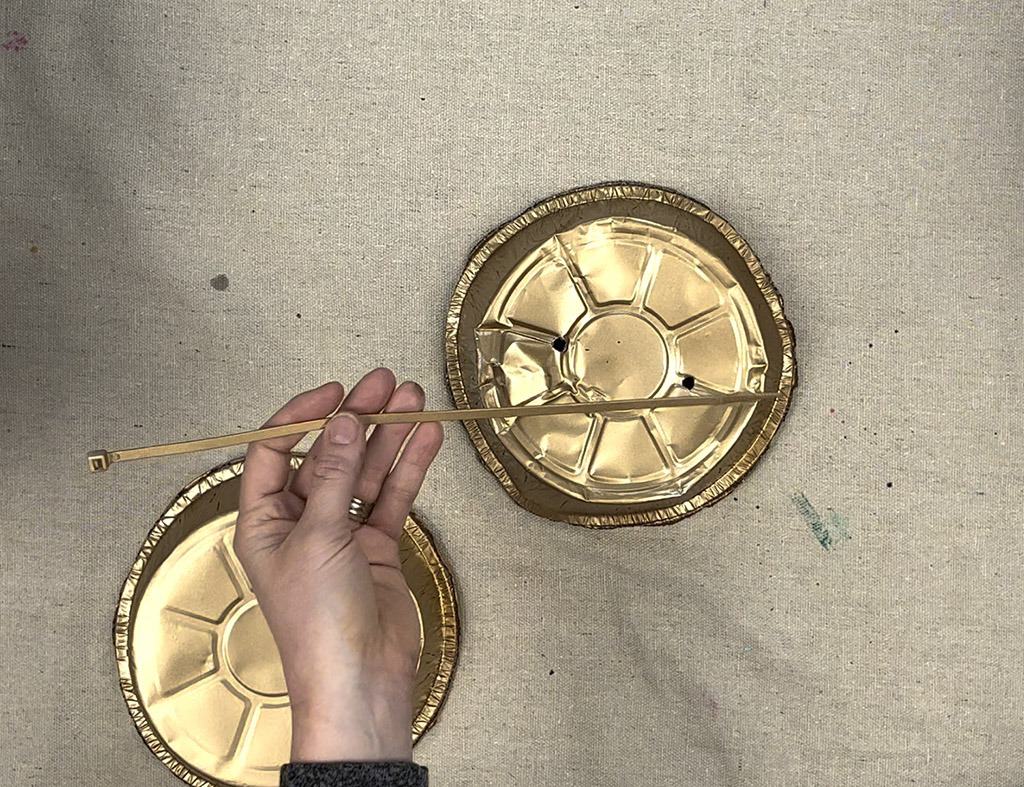
Edit: I made more of these later and found that stiff silver or gold ribbon works very well instead of zip ties and only requires one hole to be drilled.
Finally I used my super glue and a paint brush to brush the glue on the pie tin where it would attach to the top of the ball.
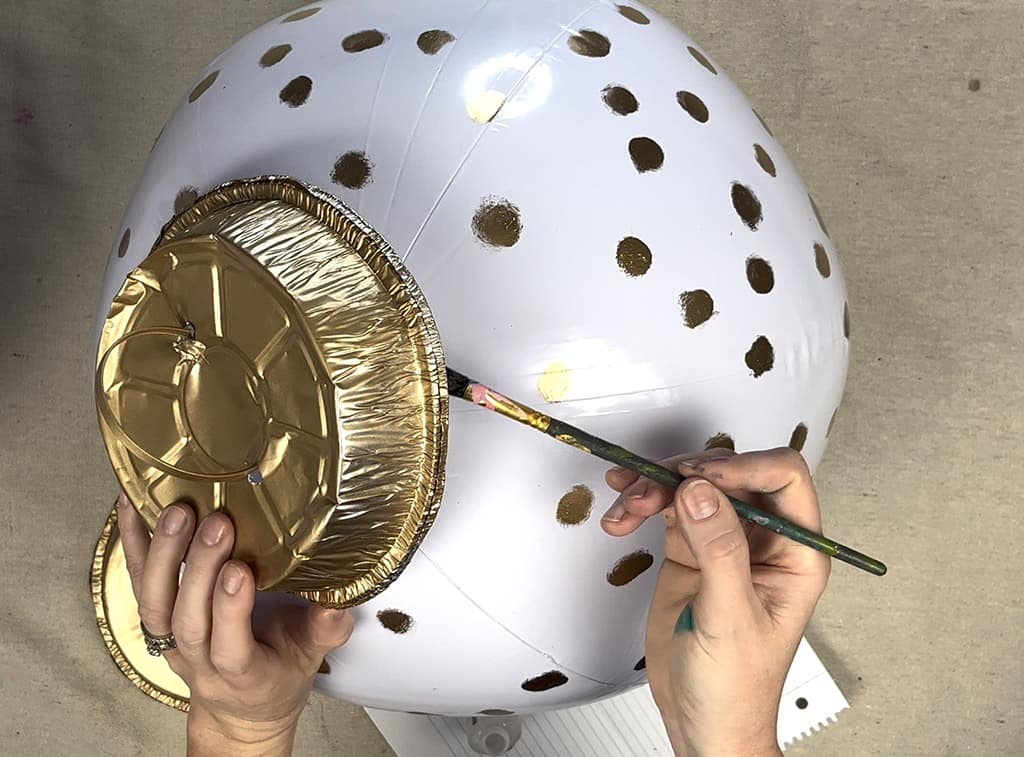
Then I held each section don for about 20-30 seconds until it set.
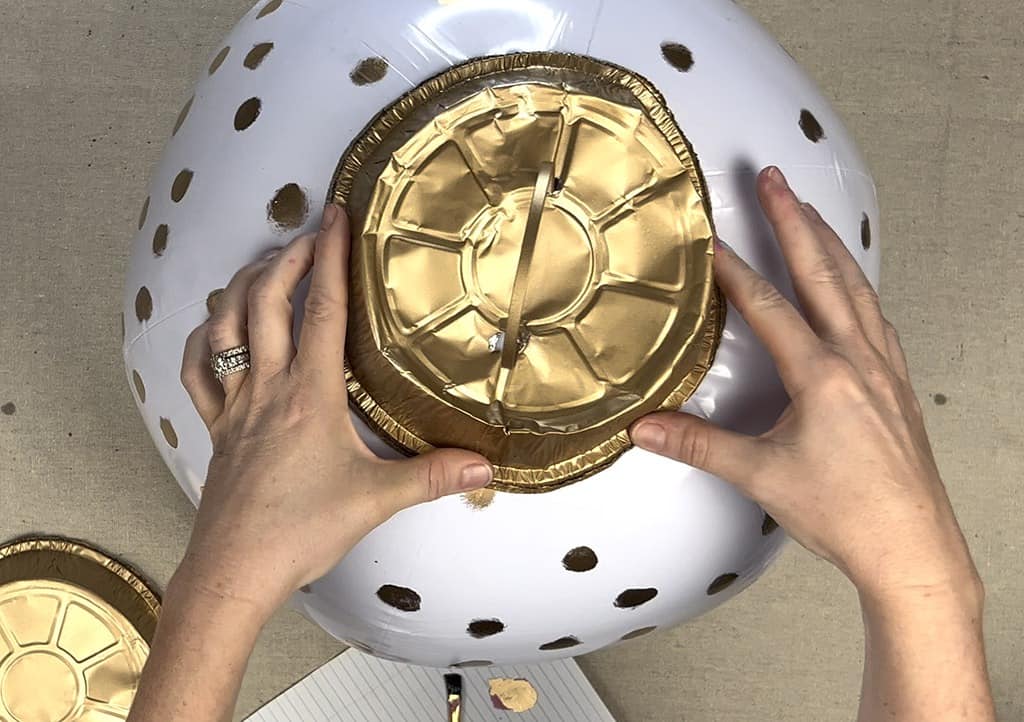
I followed the exact same steps on my other XL holiday ornament.
I absolutely love how these two DIY XL holiday ornaments turned out. They’re displayed on a shelf in my daughter’s room, but they’d look great hanging as well.

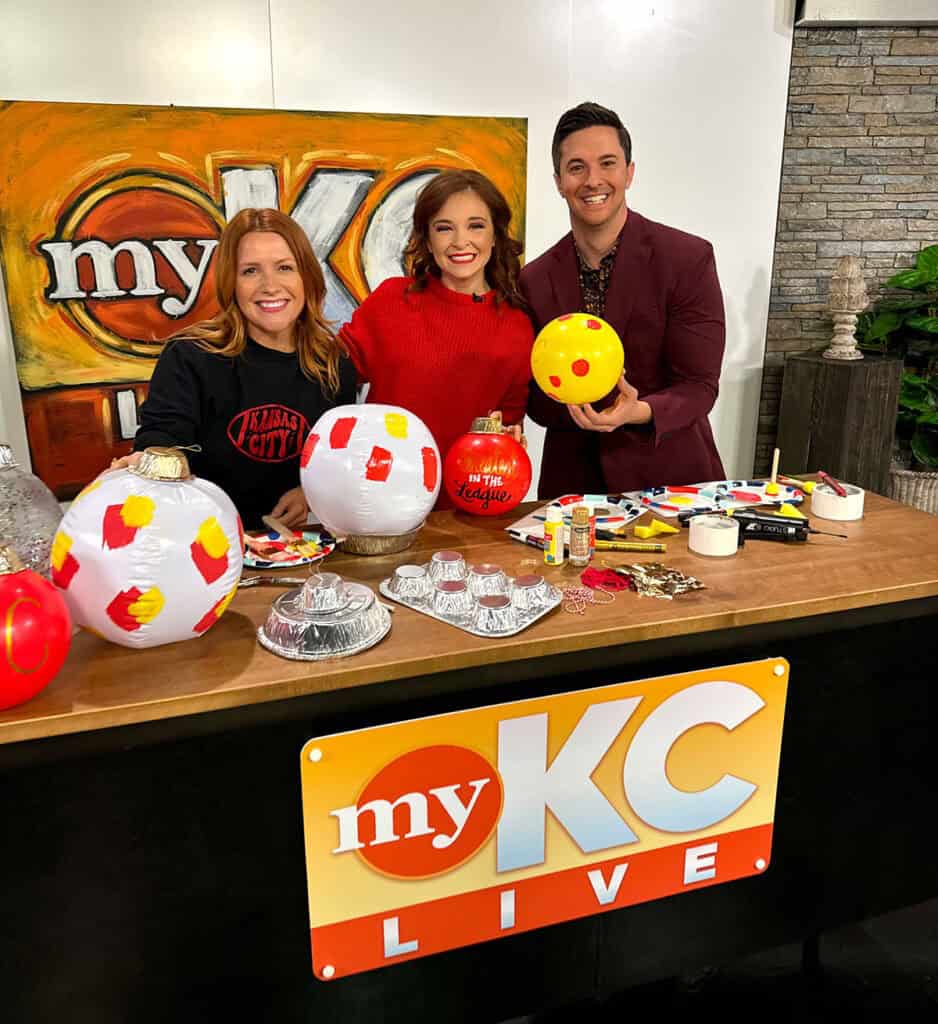
I recently made a smaller version of these (using ribbon for the toppers) in a live TV segment in the Red Friday Chiefs colors.
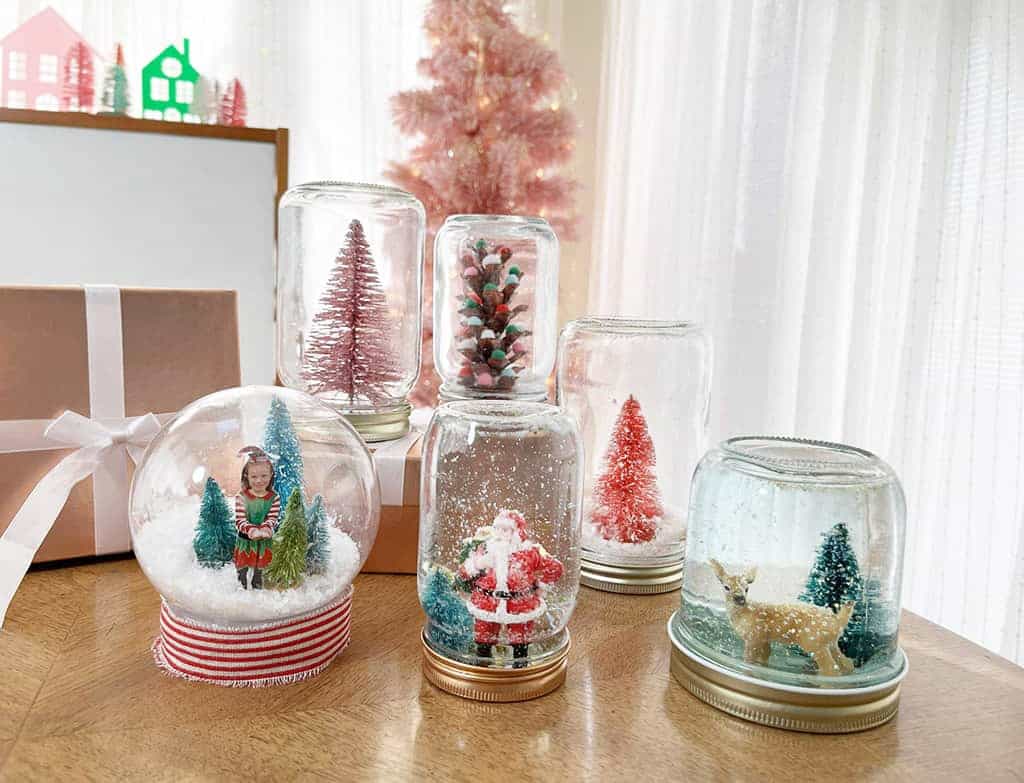
You might also like these holiday DIY snow globes!