DIY cameo art – Such a cute way to display a loved one with only a few supplies! Great for gallery walls or kid rooms too.
Last weekend I rummaged through our junky basement and found a handful of items sitting in boxes that were in dire need of being diy upcycled into something else.
In my search I found an old ikea mirror, an antique hook, a 4×6 white photo frame from our DIY vintage wedding and one my grandma’s small, old embroidery hoops.
I have been itching to do a small cameo project (of our baby Vivienne’s profile) using an embroidery hoop as the frame, so I started there.
I found a small blank wall next to our front door that needed a little personality. I am a sucker for a good wall grouping so it was obvious that a grouping was what I was going to create.
First, I painted the old ikea mirror a bright white (using paint from our post mod nursery DIY floating shelf project).
Next I got to work on the DIY cameo art.
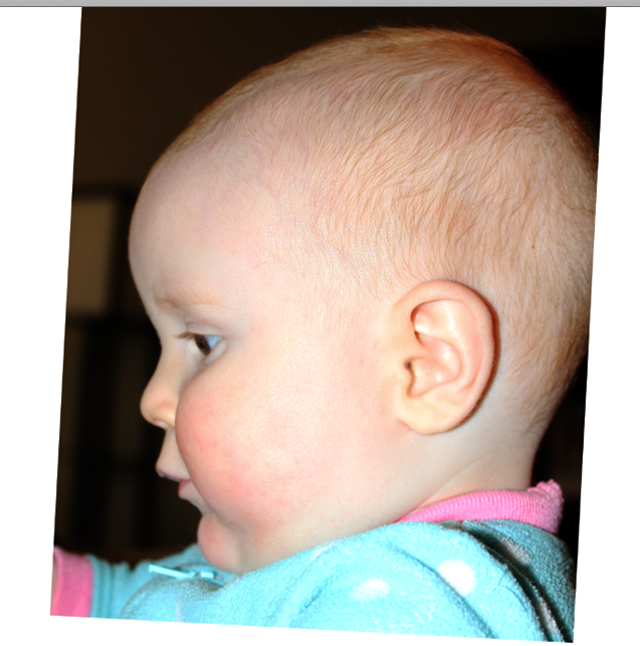
As I was playing with Vivienne that afternoon, I took out my cell phone and snapped a few profile photos of her (the quality didn’t really matter, I just needed to get the details of her profile to trace). She was pursing her lips in this picture, but I thought it was cute so I went with it.
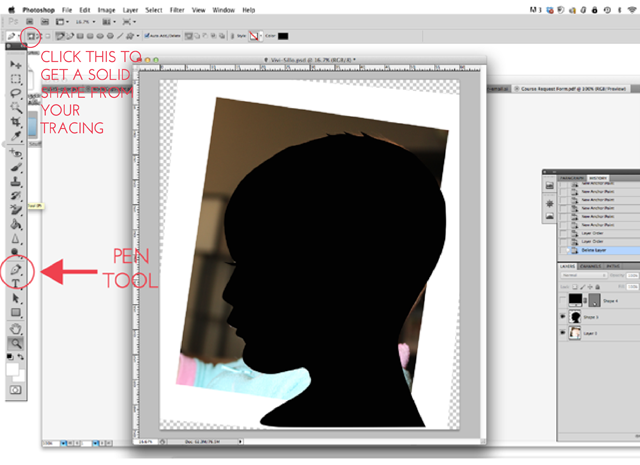
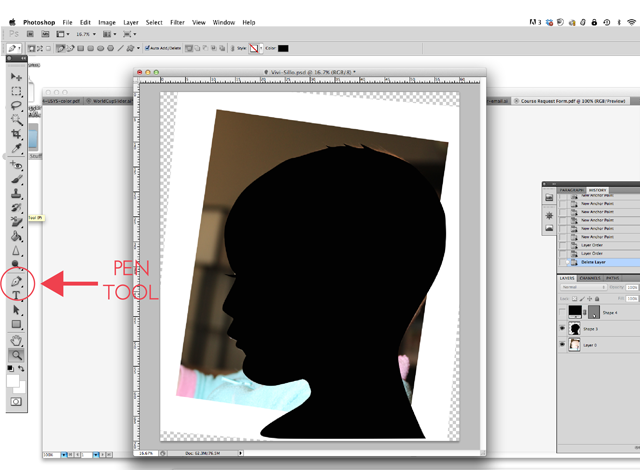
Later that night I opened the image in Photoshop and rotated the image a bit to get my desired angle (you can also use Illustrator, which is my absolute favorite design program, but I figure Photoshop is more widely used in the blogging world).
Next I added a new layer (using the layers panel), clicked on my pen tool and used it to outline the shape of Vivienne’s profile.
In the photo you will see that I didn’t get all of the back of her head in the shot. That’s ok since I just drew over the image. If this happens to you, you will just need to use your best guess for the missing area. You will also want to draw out the neck area on your own like I did to get the “bust” or “cameo” look.
Learn more about the photoshop pen tool here.
I’m sure since this article was written a decade ago there are many more tools on the market to help ith a project like this (Canva, etc).
I turned off the photo layer, which left only the drawn profile/cameo layer.
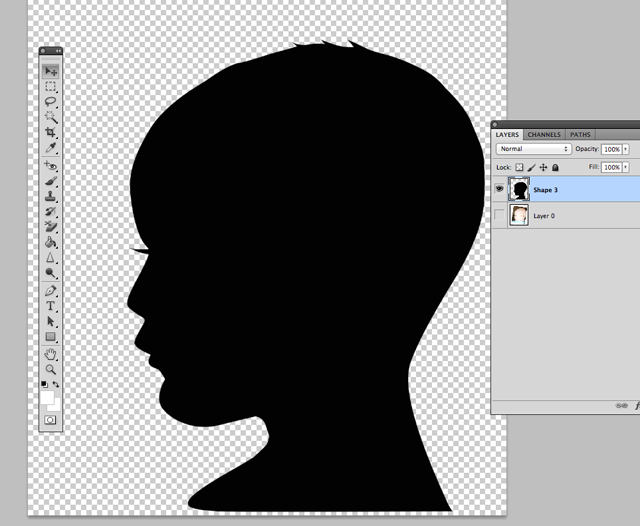
I saved the image as a .psd file (which leaves the background transparent – .png files do the same thing as long as you click “transparent” when saving it).
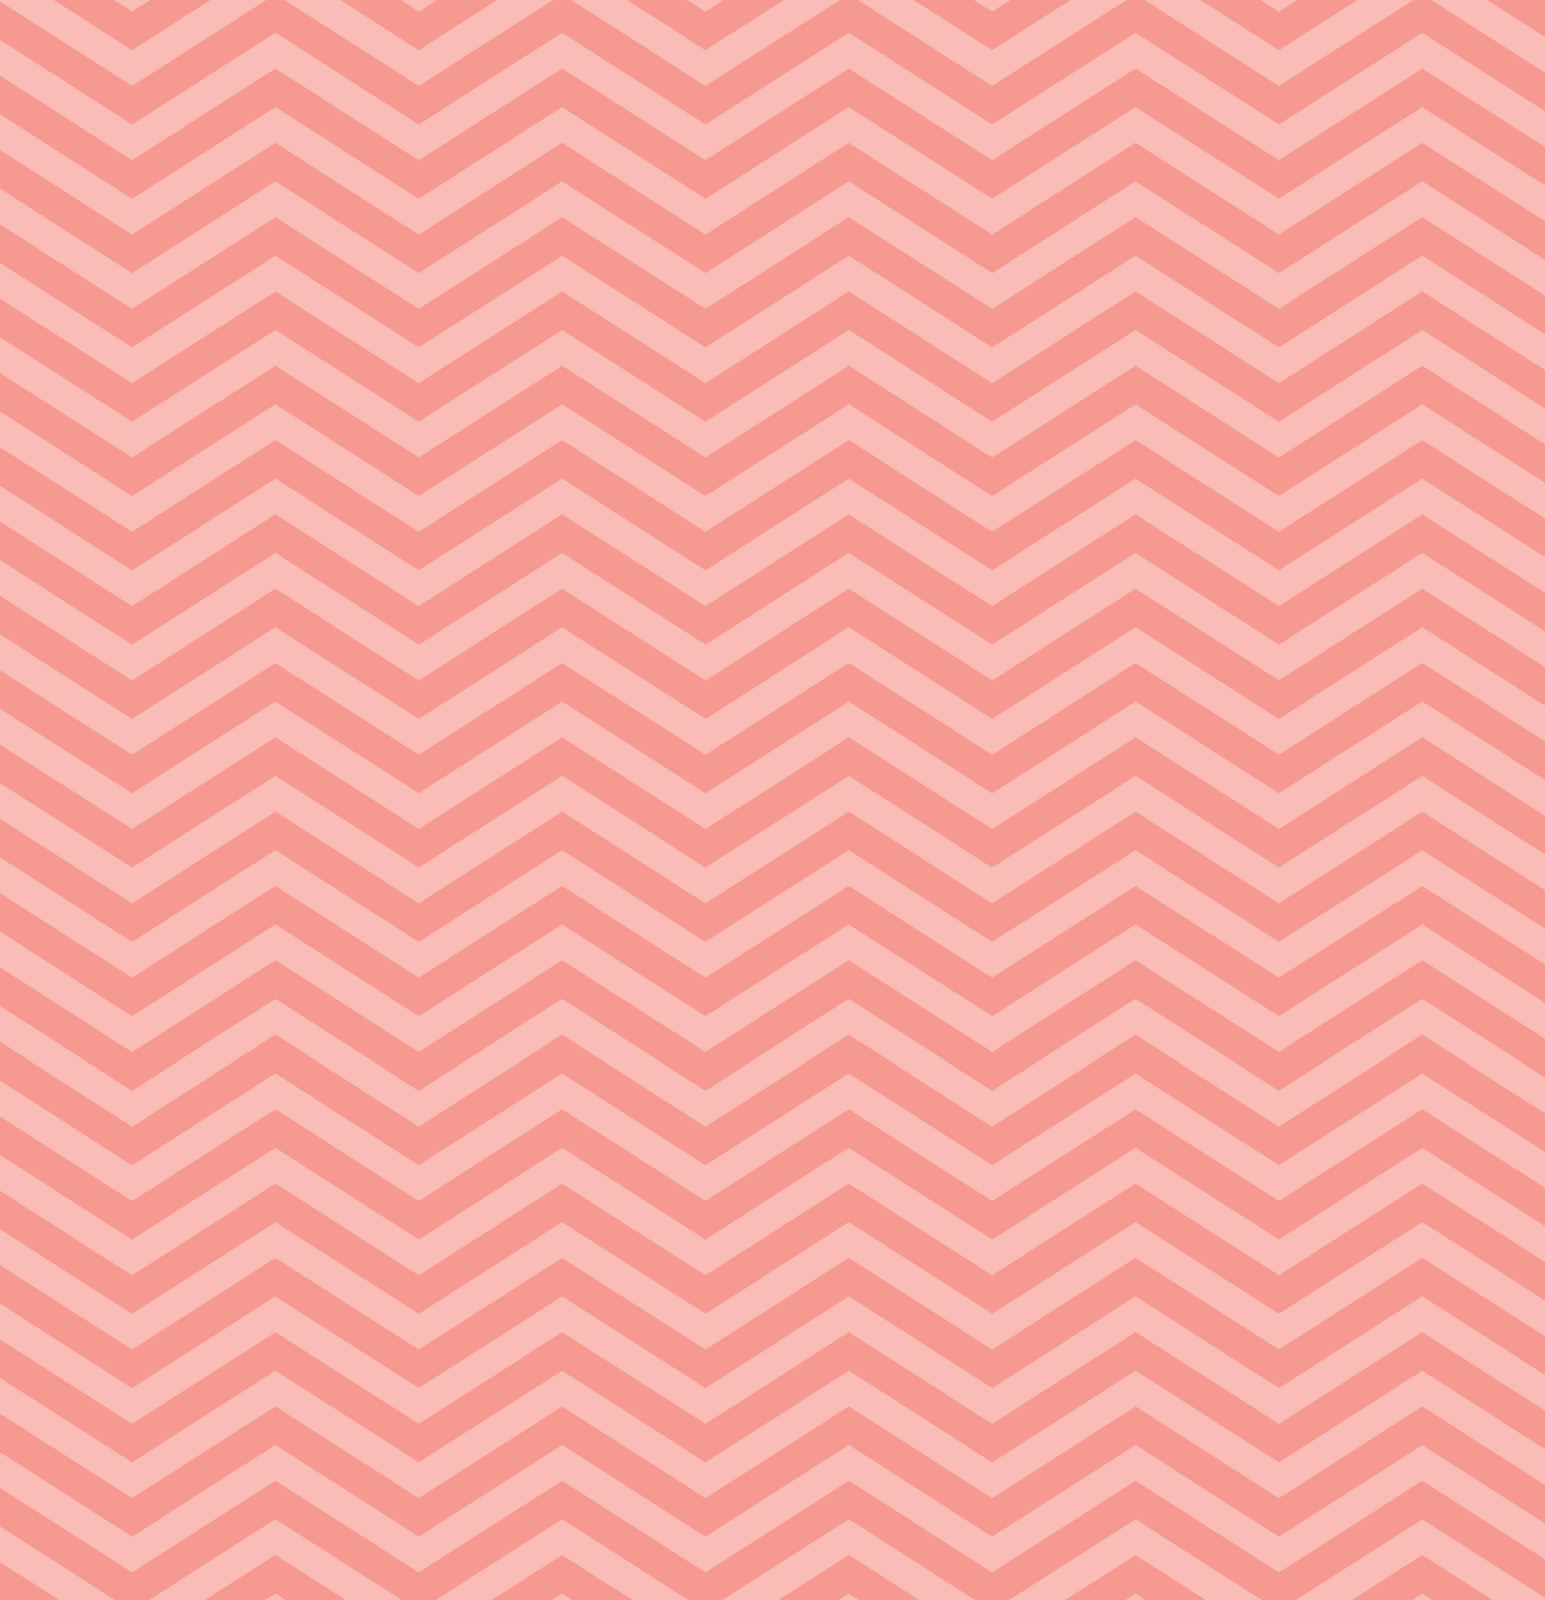
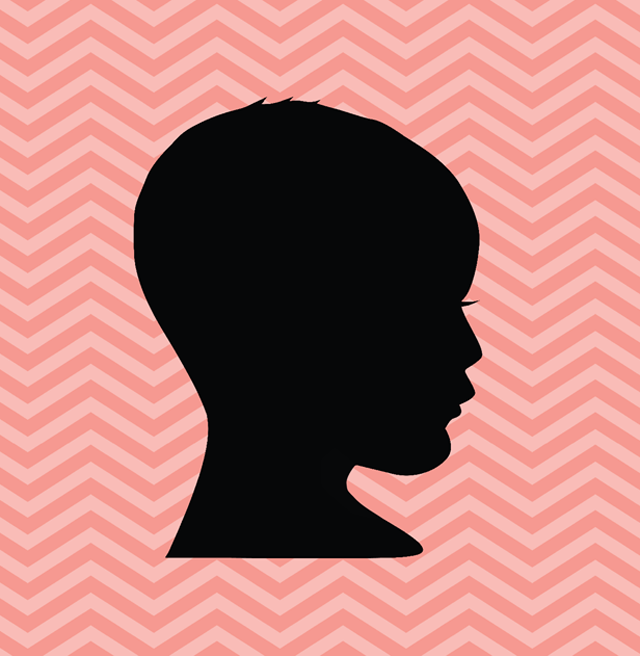
I went through my folder of digital patterns and chose a background pattern that I wanted the cameo to go over. I was digging this coral chevron one. If you like this one as well, feel free to open and save the high resolution image below and use yourself. You can also peruse my free pattern printables here and here for more options.
I created a new photoshop file sized to 6″ x 6″ to best fit my embroidery hoop (which left an extra 1″ of background all around for easier cutting).
Then I imported the cameo and the chevron background art into the file as 2 separate layers and made sure it was behind the cameo layer.
I wanted my cameo to face the other direction so I clicked on the cameo layer and went to “Edit” > “Transform” > “Flip Horizontal” which flipped the image for me. I flattened the image and printed it on heavy white paper.
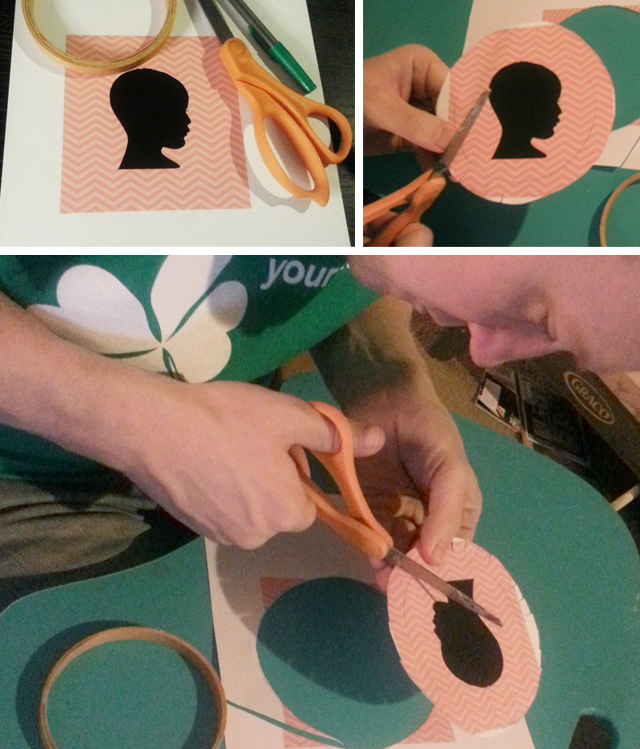
Finally I took my smaller circle from the hoop, placed it over the printed cameo and traced the circle with a pencil. I was planning on just cutting out the circle and gluing it to the hoop, but my husband Ted had a better idea, so I let him take it from here. I love it when he gets involved in my blog projects. 🙂
He cut out the circle, but made sure to leave about a half inch area outside of the circle tracing rather than cutting it on the cutline like I was going to do.
He then cut slits or “teeth” around the extra area outside of the circle until he made it all the way around. He then loosened the hoop using the screw at the top and began slightly bending/folding and inserting some of the “teeth” into the hoop (working his way around until all of the teeth were folded and inserted into the hoop). This creates more of a flush look rather than an obviously placed on circle like I was going to do.
I chose to use paper for this project, but you can definitely use actual fabric if you prefer. If you want to go the fabric route simply cut the fabric to size and secure it in the hoop (see instructions here if needed). Skip adding the pattern part and just print your cameo on heavy paper (sized to fit your hoop area) and simply cut it out with scissors and glue it to the fabric.
If you prefer to make your DIY cameo art a different way, go for it. I am sure it will turn out great.
(excuse the 3 cell phone images below – I was feeling lazy for a second)
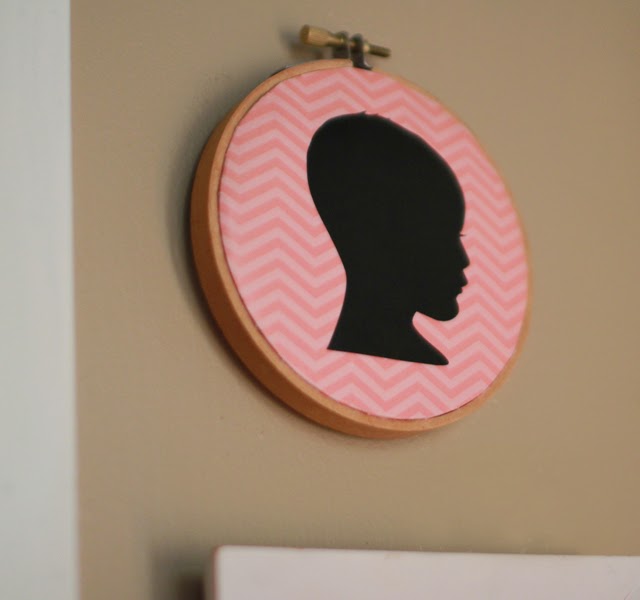
I love how my DIY cameo art turned out!
Edit: 10 years later it is still hanging in my daughter’s room.
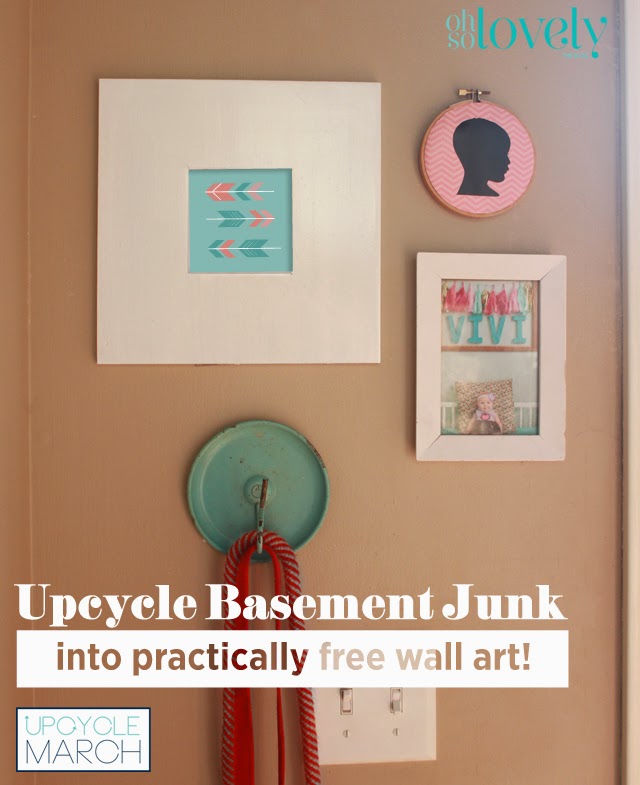
 To finish out the grouping, I placed prints into the 4×6 frame and newly painted Ikea frame. I hung the larger painted frame first, then the cameo, followed by the 4×6 frame and finally the hook. And here is the grouping in it’s finished form.
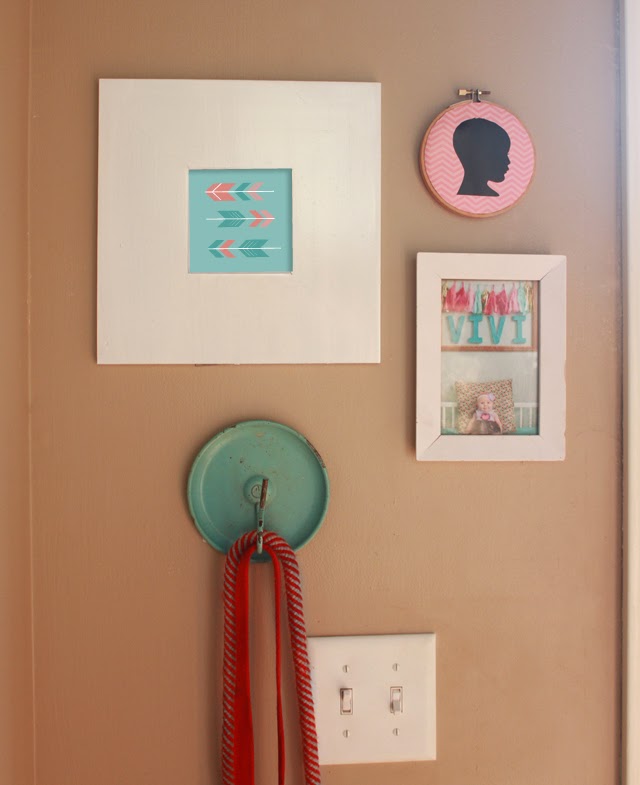
If you like the arrow print I used you can open and save it and another print from the image below and use it as you wish.

Hopefully this post inspired you to go hunting for unused treasures in your home and make some good use of them.
Help spread the word…Pin this image!
Love the cameo! And how handy to have such a creative hubby! I think I have a little embroidery hoop somewhere. If I can find it, I'm definitely going to do this project, except with a silhouette of my dog! 🙂
Love it Red Leaf Style! I eventually want to do cameos of our 2 dogs too. 🙂