{also featured on kcmag.com}
Recently we hosted my mother-in-law, Annie’s, birthday party at our house. I wanted to add some personalization and a few punches of color to the party…I quickly decided that it was the perfect occasion to pull out a couple of my quick DIY tricks.
Are you throwing a birthday party, shower or even a wedding soon? I have a couple of fun, easy ideas to add some personality to your party. And the best part is they cost under $10 and take less than an hour. Here is your step-by-step guide to making your own custom cupcake stand and party banner.
Make your own custom cupcake stand (for under $10)
Cupcake stands are pretty popular and can display anything from desserts to appetizers at any kind of event. Why spend a lot of money buying a generic pre-made stand when you can create your own affordable custom DIY stand?
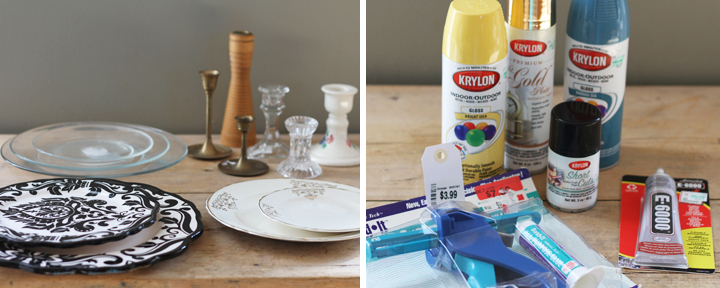
I went to Savers Thrift Store in Olathe and scoured the shelves for some interesting cupcake stand parts. Here is what I found:
+ Various candlesticks
+ Coordinating plates in various sizes
+ Epoxy (yes I actually found an unopened tube at the thrift store)
You will also need spray paint in whatever color you choose. (Please keep in mind that most spray paints are not food safe. I did not spray paint the plates, just the candlesticks).
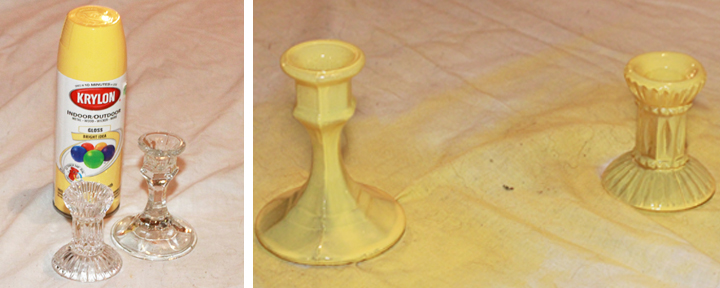
1. First I ran the candle sticks and plates through the dishwasher.
2. After the parts were sanitized I spray painted 2 coordinating candle sticks in a cheery yellow color. You will want to do 2 even coats.
3. Once the spray paint dried, I began the epoxy/plate process. You will want to follow the directions for the epoxy that you choose to use.
4. I coated the candle stick top with the epoxy and after letting it stand 2 minutes, I attached the candle stick to the plate. You will want to wait 1-2 minutes for each epoxy application to set.
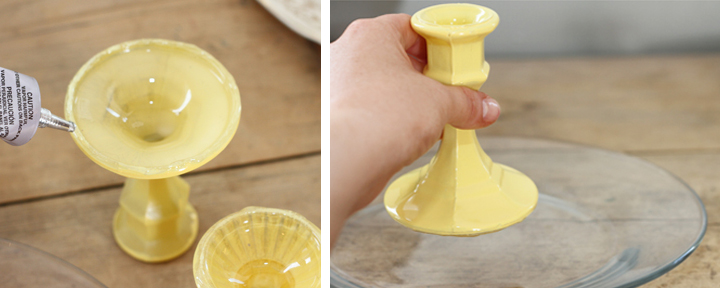
5. Continue to epoxy each tier until you have the desired amount of tiers. Use the largest plate on the bottom of the stand and the smallest one on top.
6. Voilà, you have your very own cupcake stand!
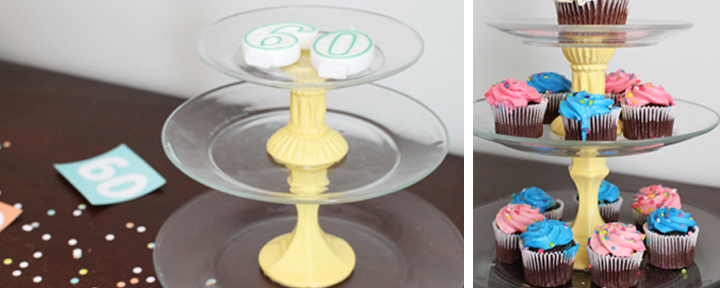
Here are some other stands that I have made using this process. I have made 1, 2 and 3 tired stands, but the possibilities are endless.

I can't wait to try it either. My only suggestion would be to wipe the paint off the surface you are gluing or the paint might stick to the epoxy but come off the plate. (Ask me how I know :/ Here's a hint: It involved a very large, very public piece of artwork I did for my church.)
thanks katie…they are super easy 🙂
I love the stands! They are beautiful and can't wait to try making one myself 🙂