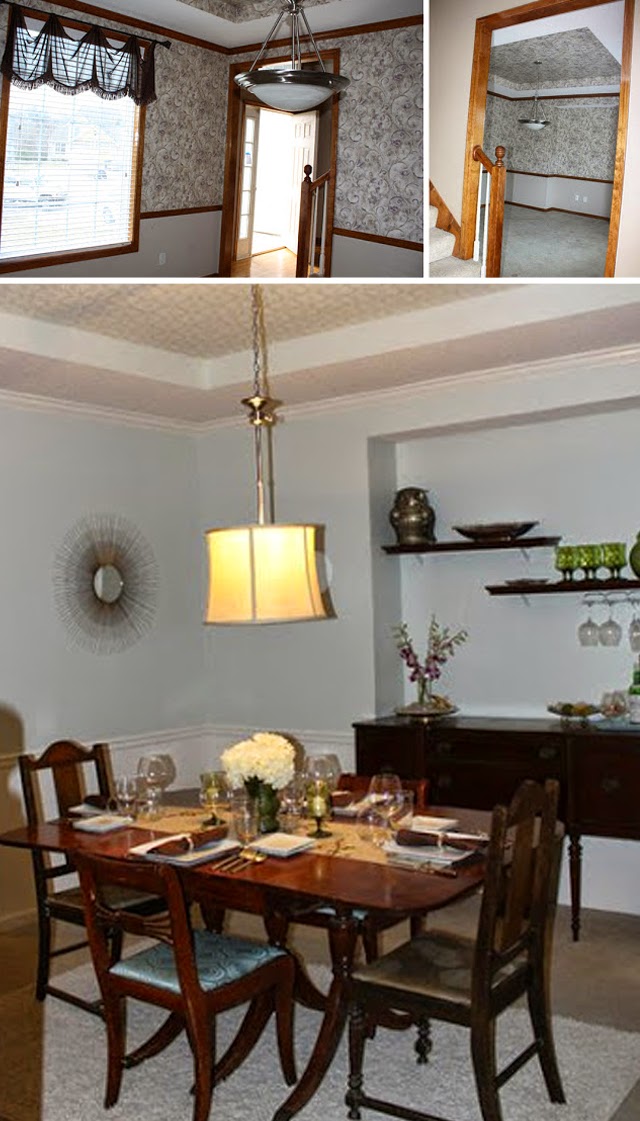
As you might already know, over the last week I’ve been working on turning our rarely used formal dining room into my new home office and lounge (you can click here to see the before and after photos of the 2013 $150 dining room update). It came a looong way from the ugly swirl wallpaper. 🙂
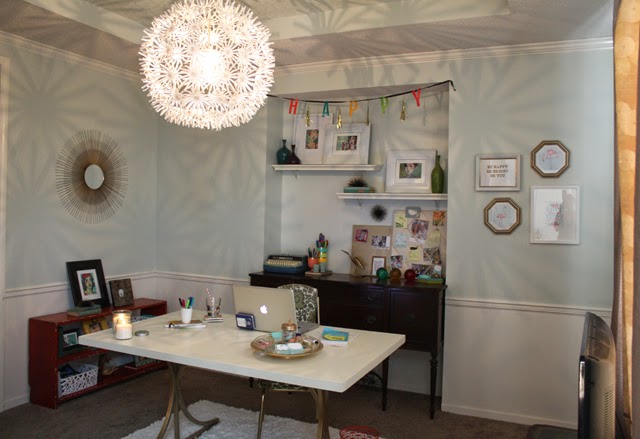
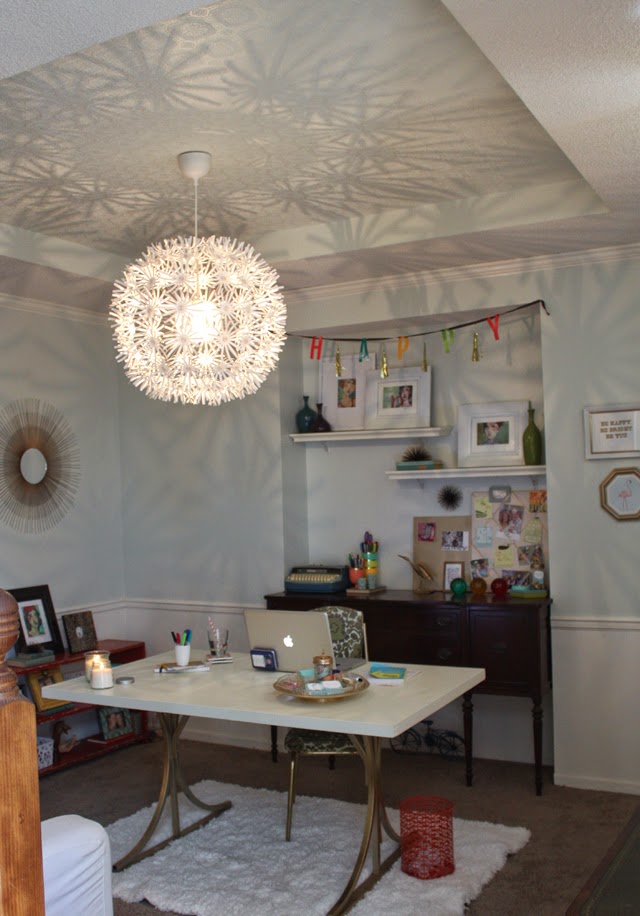
Well, we put the finishing touch on the office this weekend by hanging the new pendant light. Yay!
Now onto the photos…
Here’s the before shot of our updated dining room:
I really liked this updated space, but am so happy that it’s actually being used now. I’m also very happy that a lot of the dining room decor worked in the office (wall shelves, buffet, sunburst, curtains, other mirror).
BONUS: I didn’t have to paint…yay!
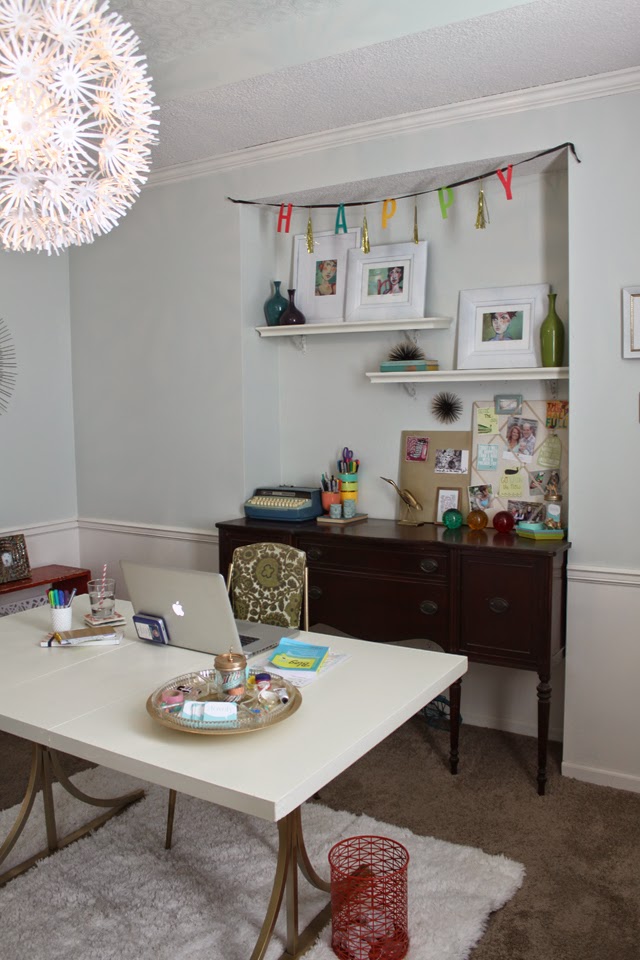
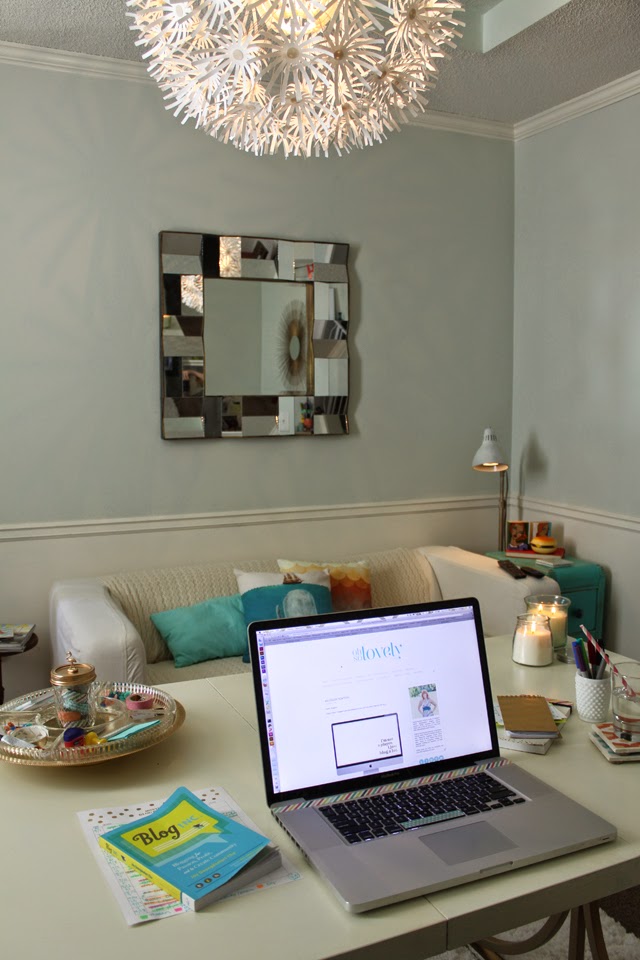
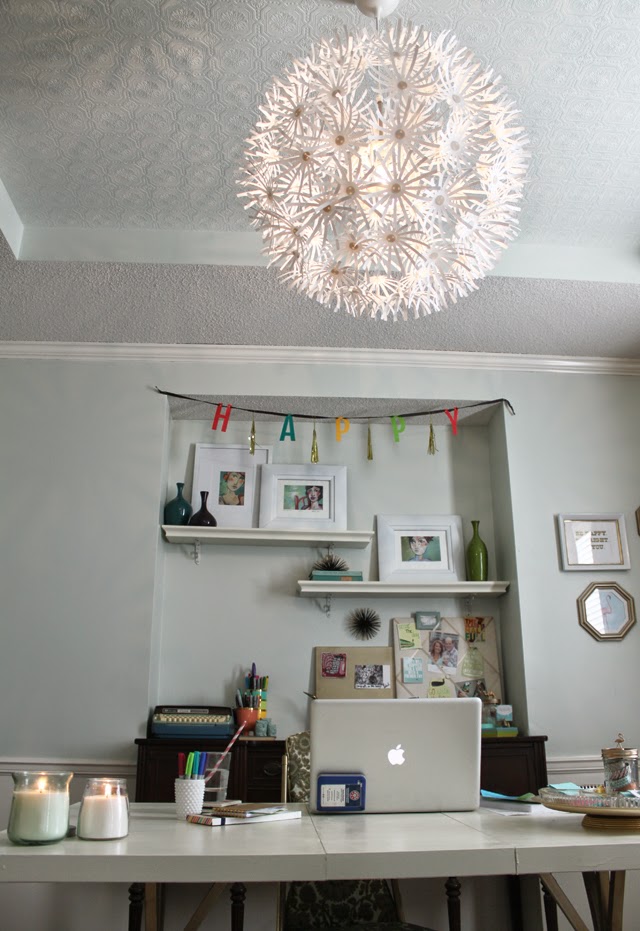
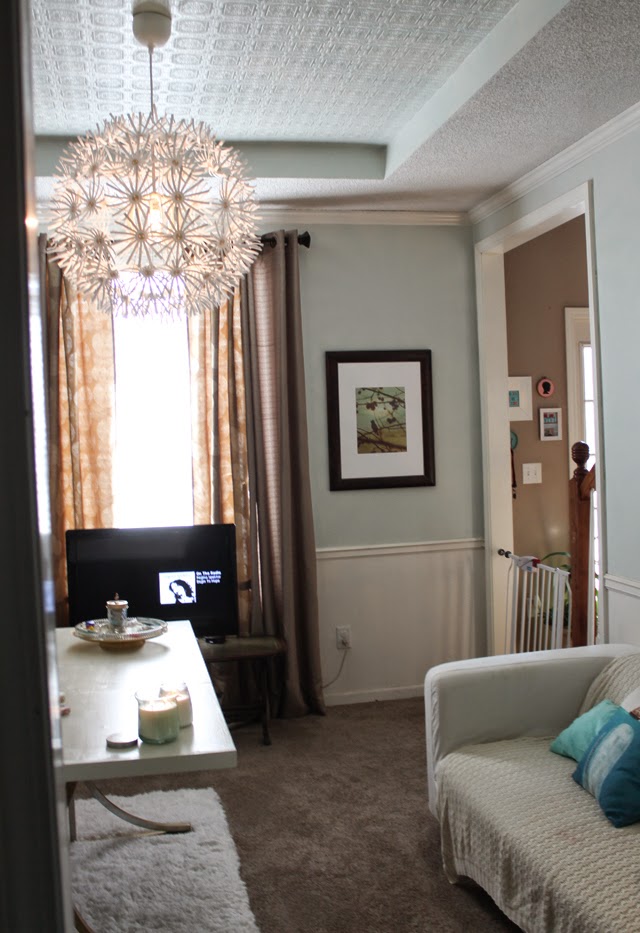
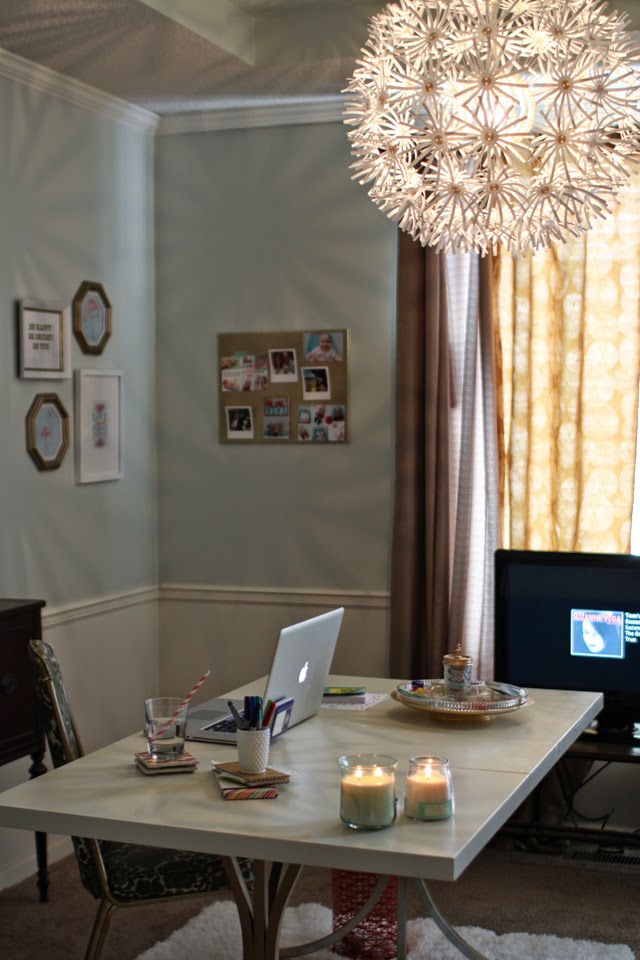
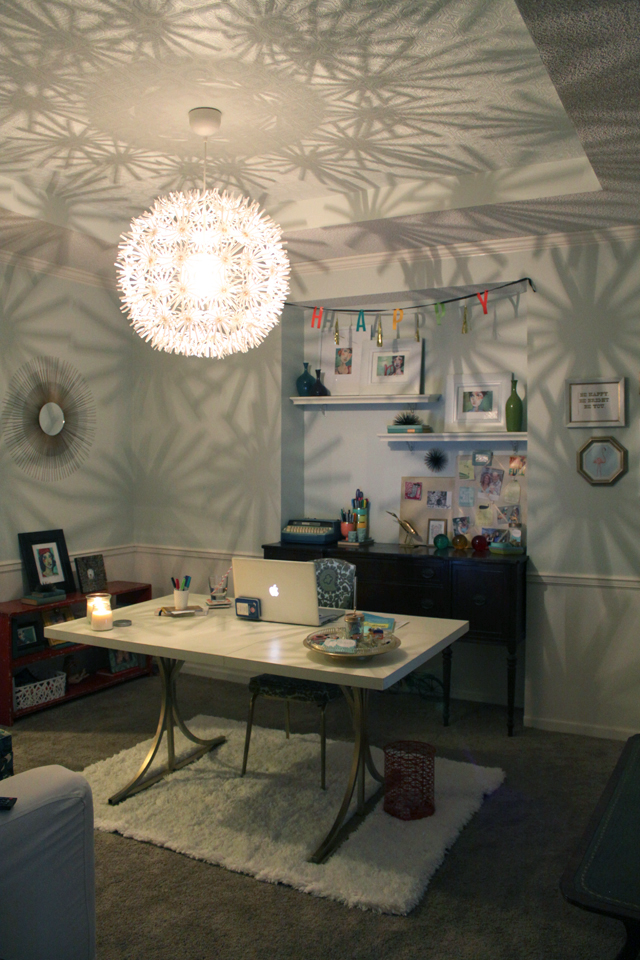
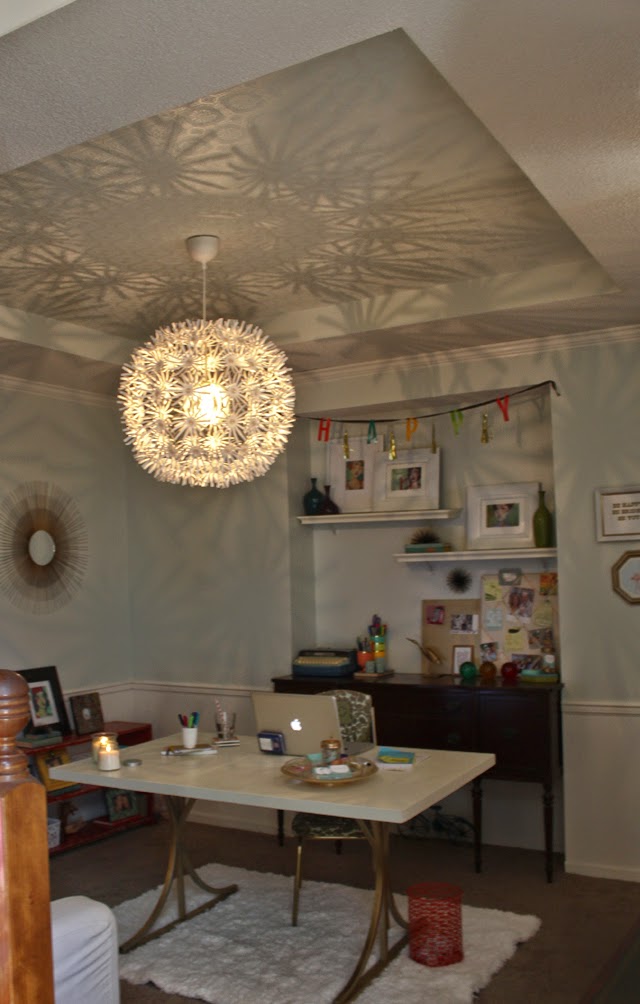
Here are the after shots of the converted office (please ignore the beautiful baby gates):
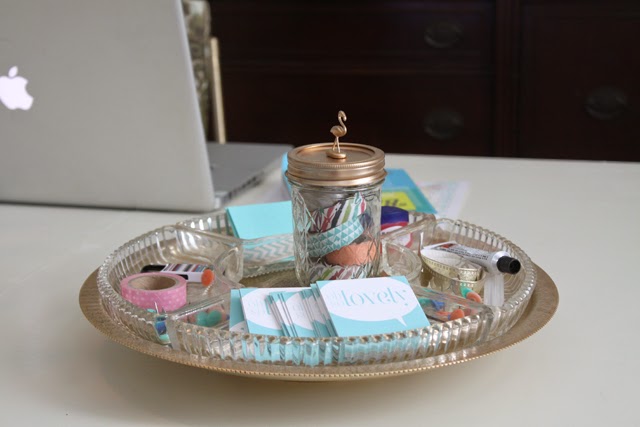
I turned a crystal lazy susan handed down from my great grandma into a unique office organizer.
And when it starts getting dark outside, the light casts super cool shadows all over the room. I love it!
Bonus: Vivi loves the light 🙂
Here’s a breakdown of what I bought and did to the room:
I only bought a few items, and I mostly used furniture and decor from other rooms in the house, which is why the room update cost only $100. I LOVE repurposing!
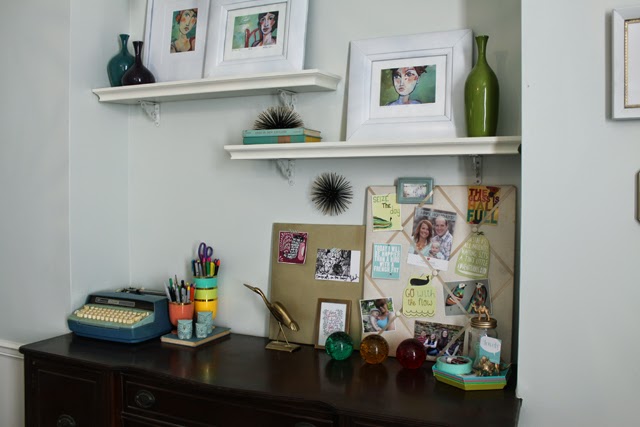
+ 2 octagonal photo frames from a local thrift store ($4)
Total = $101
Details:
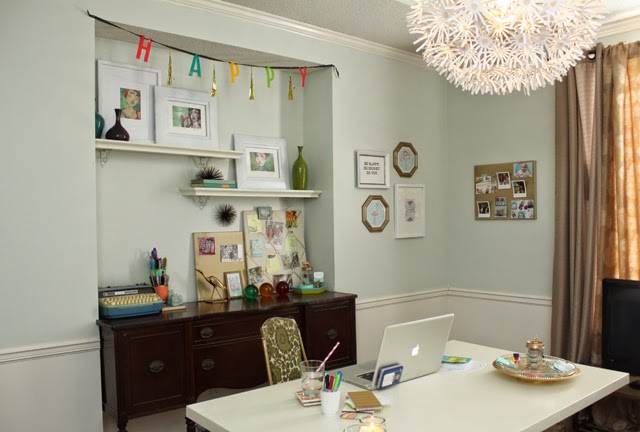
I knew the pendant light would be just perfect in the room. It was super cheap and I love the funky shadows it casts in the space at night. In my opinion it makes the room.
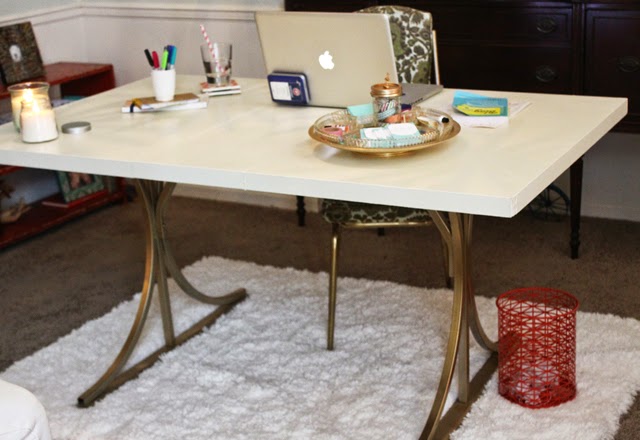
I saw the desk and fell in love immediately. The top was made of a very heavy wood laminant. I knew if I followed the exact (no sanding) method that we used for painting our kitchen cabinets, I could paint the top white, no problem.
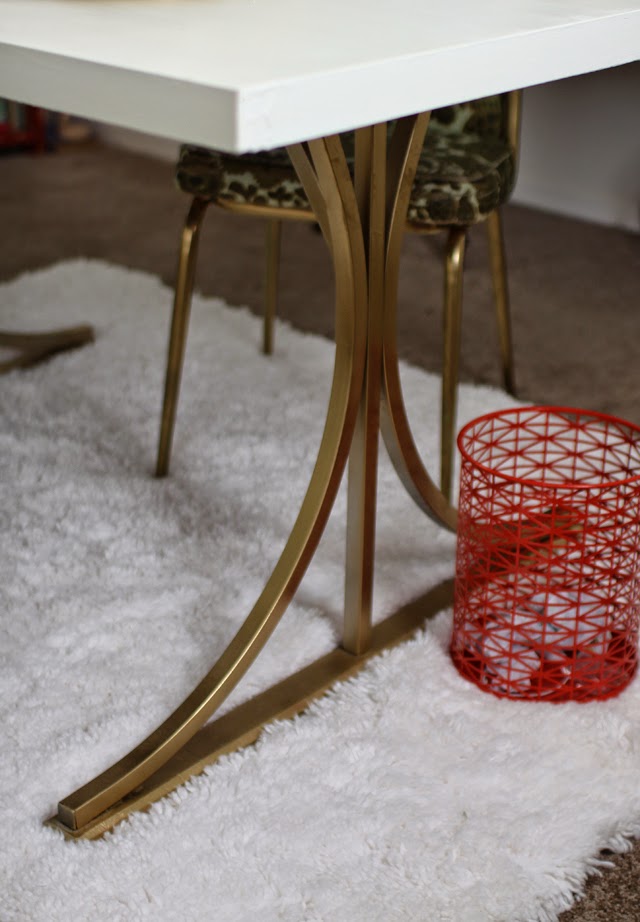
The metal legs were chrome to start, but I removed them and spray painted them a metallic gold. I LOVE the combo of white and gold…it gets me every time. 🙂
I liked the retro feel of the chair, but wanted to spray paint the legs and sides the same gold from the desk.
The frames were filled with ugly swan art from 1985. I pulled the old art, mat and glass from the frame and gave it a quick coat of brushed gold spray paint. I flipped the mat to the white side and filled them with some free printables from my blog.
NOTE: I’ll be showing the process of updating the desk, chair and frames in another blog post very soon, so stay tuned!
What I repurposed:
I repurposed mostly everything in the office from other parts of the house, but here is a list of the main items (I guess I just have too much stuff in our house, geez).
+ Ikea couch (10 years old, from master bedroom)
+ Red shelf from the master closet (my husband’s childhood shelf)
+ White rug
+ Pillows and blanket
+ Wood buffet table behind the desk (family heirloom)
+ Shelves above buffet
+ TV (from master bedroom)
+ TV stand (antique from Ted’s aunt)
+ All art prints and decor (all of the female art is all done by my fave artist – Bekah Ash. She comes to the Plaza Art Fair each year, KC friends – sooo good.)
Next on our DIY to do list:
We’re building a custom banquette seating area in our kitchen to make up for the loss of dining space.
5 thoughts on “DIY // HOME OFFICE UPDATE”
I love it!! I'm also contemplating turning my dining room into an office when I move so this is great inspiration.
I recognized the shelf immediately. The desk could retail for over $1000 with the redo. You did a great job, and I love the balance of sleek and rustic. And Viv. And you. And T.
thank you, rebecca!!! i'm glad ted let me use that shelf in here – i love it. xoxox 🙂
Love the update! It's also encouraging to see what can be done on a budget, great job. I love the little table beside the desk–turquoise is such a fun color for table/bureau makeovers. Did you paint this or was it a fab find?
Thanks so much, Tara!! I love that little table too. I found it at an antique store 5 years ago and fell in love. it was turq. when i found it 🙂